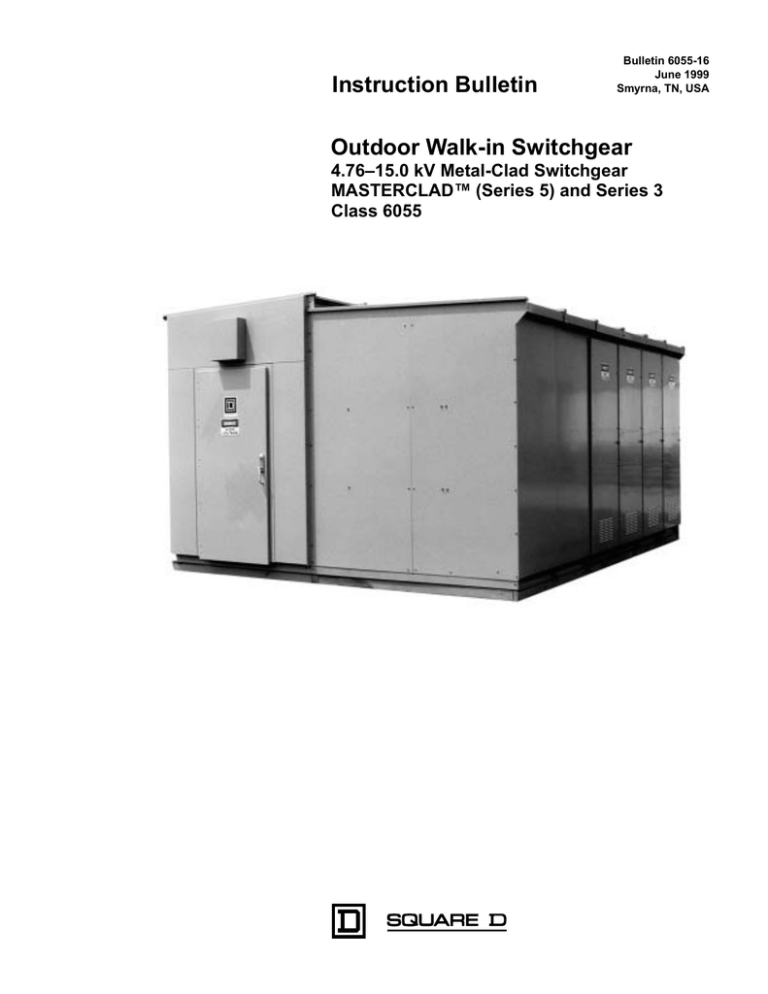
Instruction Bulletin
Bulletin 6055-16
June 1999
Smyrna, TN, USA
Outdoor Walk-in Switchgear
4.76–15.0 kV Metal-Clad Switchgear
MASTERCLAD™ (Series 5) and Series 3
Class 6055
Bulletin No. 6055-16
June 1999
CONTENTS
© 1992 Square D All Rights Reserved
Outdoor Walk-in Switchgear
Contents
SECTION 1—INTRODUCTION . . . . . . . . . . . . . . . . . . . . . . . . . . . . . . . . . 1
SECTION 2—SAFETY PRECAUTIONS . . . . . . . . . . . . . . . . . . . . . . . . . . 2
SECTION 3—RECEIVING, HANDLING, AND STORAGE . . . . . . . . . . . . . 3
General . . . . . . . . . . . . . . . . . . . . . . . . . . . . . . . . . . . . . . . . . . . . . . . . . 3
Receiving . . . . . . . . . . . . . . . . . . . . . . . . . . . . . . . . . . . . . . . . . . . . . . . . 3
Handling . . . . . . . . . . . . . . . . . . . . . . . . . . . . . . . . . . . . . . . . . . . . . . . . 3
Storage . . . . . . . . . . . . . . . . . . . . . . . . . . . . . . . . . . . . . . . . . . . . . . . . . 4
Foundation Requirements . . . . . . . . . . . . . . . . . . . . . . . . . . . . . . . . . . . 4
Typical Single Aisle Foundation . . . . . . . . . . . . . . . . . . . . . . . . . . . . . . 5
Typical Common Aisle Foundation . . . . . . . . . . . . . . . . . . . . . . . . . . . . 6
SECTION 4—INSTALLATION . . . . . . . . . . . . . . . . . . . . . . . . . . . . . . . . . . 7
Single Aisle . . . . . . . . . . . . . . . . . . . . . . . . . . . . . . . . . . . . . . . . . . . . . . 7
Common Aisle . . . . . . . . . . . . . . . . . . . . . . . . . . . . . . . . . . . . . . . . . . . 16
Common Aisle Assembly Sequence . . . . . . . . . . . . . . . . . . . . . . . . . . 17
SECTION 5—ELECTRICAL HOOK-UP . . . . . . . . . . . . . . . . . . . . . . . . . . 18
SECTION 6—INSPECTION AND MAINTENANCE . . . . . . . . . . . . . . . . . 19
SECTION 7—STANDARD COMPONENTS AND PARTS . . . . . . . . . . . . 20
SECTION 8—OUTLINES . . . . . . . . . . . . . . . . . . . . . . . . . . . . . . . . . . . . . 21
SECTION 9—INSTALLATION AND MAINTENANCE LOG . . . . . . . . . . . 22
iii
Outdoor Walk-in Switchgear
Figures and Tables
Bulletin No. 6055-16
June 1999
FIGURES
Figure 1:
Figure 2:
Figure 3:
Figure 4:
Figure 5:
Figure 6:
Figure 7:
Figure 8:
Figure 9:
Figure 10:
Figure 11:
Figure 12:
Figure 13:
Figure 14:
Figure 15:
Figure 16:
Figure 17:
Figure 18:
Figure 19:
Figure 20:
Figure 21:
Figure 22:
Figure 23:
Figure 24:
Figure 25:
Figure 26:
Figure 27:
Figure 28:
Figure 29:
Figure 30:
Figure 31:
Outdoor Walk-in Switchgear . . . . . . . . . . . . . . . . . . . . . . . . . 1
Lifting Method . . . . . . . . . . . . . . . . . . . . . . . . . . . . . . . . . . . . 3
Typical Single Aisle Foundation . . . . . . . . . . . . . . . . . . . . . . 5
Typical Common Aisle Foundation . . . . . . . . . . . . . . . . . . . . 6
Preparing to Unload Shipping Sections . . . . . . . . . . . . . . . . 7
Unloading a Section . . . . . . . . . . . . . . . . . . . . . . . . . . . . . . . 8
Removing Shipping Covers . . . . . . . . . . . . . . . . . . . . . . . . . 8
Placing First Section . . . . . . . . . . . . . . . . . . . . . . . . . . . . . . . 8
Unloading Second Section . . . . . . . . . . . . . . . . . . . . . . . . . . 8
Securing Switchgear Sections. . . . . . . . . . . . . . . . . . . . . . . . 9
Securing Equipment Space to Switchgear . . . . . . . . . . . . . . 9
Braced Front Aisle Section . . . . . . . . . . . . . . . . . . . . . . . . . 10
Aligning Aisle With Switchgear Section . . . . . . . . . . . . . . . 10
Attaching Aisle Roof Support Bracket to Switchgear . . . . . 11
Moving Sections With Braces in Place . . . . . . . . . . . . . . . . 11
Placing Second Aisle Section . . . . . . . . . . . . . . . . . . . . . . . 12
Switchgear With All Sections in Place . . . . . . . . . . . . . . . . 12
Attaching Second Aisle Section to First Aisle Section . . . . 13
Aisle and Switchgear Base Connection . . . . . . . . . . . . . . . 13
Roof Cap Mountings . . . . . . . . . . . . . . . . . . . . . . . . . . . . . . 14
Checking Enclosure for Openings in Seal . . . . . . . . . . . . . 14
Removing Large Lifting Lugs . . . . . . . . . . . . . . . . . . . . . . . 15
Removing Small Lifting Lugs . . . . . . . . . . . . . . . . . . . . . . . 15
Plugging Holes With Bolts/Sealwashers. . . . . . . . . . . . . . . 15
Outdoor Walk-in Switchgear with Common Aisle . . . . . . . . 16
Common Aisle Configuration . . . . . . . . . . . . . . . . . . . . . . . 17
Lights, Receptacle, and Fan . . . . . . . . . . . . . . . . . . . . . . . . 18
Heater/Thermostat (Optional) . . . . . . . . . . . . . . . . . . . . . . . 18
Panelboard (Optional). . . . . . . . . . . . . . . . . . . . . . . . . . . . . 18
Outline of Single Aisle Walk-in . . . . . . . . . . . . . . . . . . . . . . 21
Outline of Common Aisle Walk-in . . . . . . . . . . . . . . . . . . . . 21
TABLES
Table 1:
Replacement Air Filters . . . . . . . . . . . . . . . . . . . . . . . . . . . . 19
iv
© 1992 Square D All Rights Reserved
Bulletin No. 6055-16
June 1999
SECTION 1—INTRODUCTION
Outdoor Walk-in Switchgear
Section 1—Introduction
This bulletin contains instructions for receiving, handling, storage, and
installation (including foundation preparation) for outdoor, walk-in switchgear.
The walk-in enclosure detailed in this bulletin is built around the standard
Metal-Clad Indoor Switchgear.
NOTE: For more information on Square D Indoor Metal-Clad Switchgear
(Series 5), refer to instruction bulletin 6055-30.
The outdoor walk-in switchgear assembly is a combination of switchgear and
aisle space subassembly components that are attached during installation.
The switchgear components are always shipped fully assembled. The aisle
spaces for the single aisle configuration are shipped as fully assembled
components, while the aisle space for the common aisle needs to be
assembled during installation. Installation instructions for both aisle types are
included in this bulletin.
Read these instructions and inspect the equipment carefully. Become
familiar with the device before trying to install, operate, or maintain it.
Figure 1:
© 1992 Square D All Rights Reserved
Outdoor Walk-in Switchgear
1
Outdoor Walk-in Switchgear
Section 2—Safety Precautions
Bulletin No. 6055-16
June 1999
SECTION 2—SAFETY PRECAUTIONS
DANGER
HAZARD OF ELECTRIC SHOCK, BURN, OR EXPLOSION
• Only qualified electrical personnel familiar with medium voltage
circuits are to perform work described in this set of instructions.
Workers must understand the hazards involved in working with or
near medium voltage equipment.
• Perform such work only after reading and understanding all of the
instructions contained in this bulletin.
• Before performing visual inspections, tests, or maintenance on this
device, disconnect all sources of electric power. Assume all circuits
are live until they are completely de-energized, tested, grounded,
and tagged. Pay particular attention to the design of the power
system. Consider all sources of power, including the possibility of
backfeeding.
• Always use a properly rated voltage sensing device to confirm that
power is off.
• Replace all devices, doors, and covers before turning on the power
to this equipment.
• Handle this equipment carefully and install, operate and maintain it
correctly in order for it to function properly. Neglecting fundamental
installation and maintenance requirements may lead to personal
injury, as well as damage to electrical equipment or other property.
• Be aware of potential hazards, wear personal protective equipment,
and take adequate safety precautions.
• Do not make any modifications to the equipment or operate the
system with interlocks removed. Contact your local Square D
representative for additional instructions if the equipment does not
function as described in this manual.
• Carefully inspect your work area and remove any tools and objects
left inside the equipment.
• All instructions in this manual are written with the assumption that
the customer has taken these measures before performing
maintenance or testing.
• Avoid exposing internal components of the switchgear to outdoor
conditions.
Failure to follow these instructions will result in death or serious
injury.
2
© 1992 Square D All Rights Reserved
Bulletin No. 6055-16
June 1999
Outdoor Walk-in Switchgear
Section 3—Receiving, Handling, and Storage
SECTION 3—RECEIVING, HANDLING,
AND STORAGE
Receiving
Upon receipt, check the packing list against the equipment received to
ensure the order and shipment are complete. Claims for shortages or errors
must be made in writing to Square D within 15 days after delivery. Failure to
give such notice will constitute unqualified acceptance and a waiver of all
such claims by the purchaser.
Immediately inspect the switchgear sections for any damage which may have
occurred in transit. If damage is found or suspected, file a claim with the
carrier immediately and notify Square D. Delivery of equipment to a carrier at
any of the Square D plants or other shipping point constitutes delivery to the
purchaser regardless of freight payment and title. All risk of loss or damage
pass to the purchaser at that time.
Handling
The shipping sections are designed to be lifted by a crane. Attach
a sling to the lifting lugs on the roof of each of the shipping sections as
shown in Figure 2. A spreader bar may be necessary to maintain proper
lifting angles. If a crane is not available, contact Square D for special
arrangements for unloading the switchgear sections.
CAUTION
IMPROPER LIFTING OF EQUIPMENT CAN DAMAGE LIFTING EYES
The interior angle of lifting sling should not exceed 90°. Angles greater
than 90° apply greater inward pressure on lifting eyes which can damage
and dislodge eyes from switchgear.
Failure to follow this instruction can result in injury or equipment
damage.
Sling
90° Maximum
90° Maximum
Figure 2:
© 1992 Square D All Rights Reserved
Lifting Method
3
Outdoor Walk-in Switchgear
Section 3—Receiving, Handling, and Storage
Storage
Bulletin No. 6055-16
June 1999
The timing of the shipment should be coordinated so that the foundation is
completed before delivery so that the switchgear and aisle sections can be
lifted from the truck to their permanent positions. If this is not possible and
you must store this equipment, follow the following guidelines. The
switchgear and front aisle shipping sections are packaged for protection
during shipment. This packaging is not suitable for outdoor storage. If
the switchgear must be stored, store it indoors or under a shelter protected
from rain, snow, dirt, and dust, until final assembly is completed.
Unsatisfactory storage conditions can cause damage to the bussing and
sensitive electrical and/or electronic components. Inspect the gear regularly
during storage for signs of damage. When storing, consider the following:
• Supporting Foundation
To prevent distortion, the storage foundation must be level and flat. If the
base is made of a material other than concrete, elevate the gear above
ground level to minimize the effects of ground moisture. If pier mounting
is required contact Square D’s After Shipment Customer Service Group.
• Ventilation
If extended storage is required, switchgear vents must be unobstructed
for free air circulation.
• Heat
If extended storage is required and the storage building is not heated,
heat switchgear sections. To do so, connect the internal space heaters
(see wiring diagrams) or place heaters in the front and rear of the
switchgear.
Foundation Requirements
4
The standard walk-in enclosure is designed for installation on a concrete pad.
Refer to the factory order drawings for any additional mounting details which
may be required on specific orders. The pad must be flat and leveled to 1/8
in. per square yard to ensure proper alignment and to prevent distortion of
the gear.
© 1992 Square D All Rights Reserved
Bulletin No. 6055-16
June 1999
Outdoor Walk-in Switchgear
Section 3—Receiving, Handling, and Storage
Figure 3 and Figure 4 on page 6 illustrate typical floor plans. Refer to the
applicable drawings before using the typical foundation specifications.
Conduit Location
Conduits should be stubbed a maximum of one inch above floor steel.
Conduit placement should be very accurate to ensure no mechanical
interference with the switchgear floor steel.
Avoid continuous loops of reinforcing rod or structural steel around any single
conductor three-phase power circuit.
8.0
5.0
8.0 6.0
20.0
203
36.0
203 152
508
Rear
Aisle 48.0
Space 1219
6.0
914
152
5.0
127
2.5
127
64
9.0
229
7.8
198
12.0 20.0
305
508
15.0
9.0 9.0
381
30.0
762
3.0
3.0
5.0
76
127
9.0
13.5
229
343
229
343
1.9
48
Control
Power
381
Switchgear 92.5
2348
Conduit
Area
Conduit
Location
Conduit
Area
7.8
15.0
Conduit
Location
13.5
76
198
229
1.9
48
Control
Power
10.0 8.0 8.0 10.0
254 203 203
254
8.0
8.0
169.1
203
203
4293
36.0 Meter Bay
2.5
2.5
63
63
Aisle
24.0
18.0
457
64
279
36.0
48.0
22.0
Switchgear Bay
Meter Bay
Transition Bay
559
1219
914
1942
2.5
11.0
607
76.5
Location of
Anchor Bolts
by Customer
(min. 3/4 in. diameter
hardware suggested)
Dual measurements
Figure 3:
© 1992 Square D All Rights Reserved
inches
millimeters
Typical Single Aisle Floor Plan
(Not for construction.)
5
Outdoor Walk-in Switchgear
Section 3—Receiving, Handling, and Storage
Bulletin No. 6055-16
June 1999
8.0
8.0 6.0
20.0
203
5.0
36.0
203 152
508
Rear
Aisle 48.0
Space 1219
6.0
914
152
127
5.0
2.5
127
64
9.0
229
7.8
198
12.0 20.0
305
508
9.0 9.0
15.0
381
30.0
762
3.0
3.0
5.0
76
127
9.0
13.5
229
343
229 229
343
1.9 Control
48
Power
Switchgear 92.6
2350
Conduit
Area
Conduit
Location
Conduit
Area
7.8
381
Conduit
Location
13.5
76
198
15.0
1.9 Control
48
Power
10.0 8.0 8.0 10.0
254 203 203
254
8.0
8.0
203
203
36.0 Meter Bay
2.5
2.5
63
63
262.2
6656
Aisle
77.0
1955
Switchgear 92.6
2350
18.0
24.0
457
Dual measurements
inches
millimeters
64
279
36.0
48.0
22.0
Switchgear Bay
Meter Bay
Transition Bay
1219
914
Figure 4:
6
2.5
11.0
607
559
Location of Anchor
Bolts by Customer
(min. 3/4 in. diameter
hardware suggested)
Typical Common Aisle Floor Plan
(Not for construction.)
© 1992 Square D All Rights Reserved
Bulletin No. 6055-16
June 1999
Outdoor Walk-in Switchgear
Section 4—Installation
SECTION 4—INSTALLATION
Standard Components and Parts
The following components and parts are shipped standard with each unit:
• Caulk to be used only to seal cracks found after final installation
• 1/2 in. (13 mm) gasket for repair if the unit gasket is damaged during
shipment
• One set per shipping section of four 1/2–13 bolts and seal washers for
replacing bolts which held the lifting lugs on the roof
NOTE: See instruction bulletin 6055-30 for components shipped with the
indoor switchgear.
Single Aisle Installation
Follow instructions below for single aisle installation of outdoor walk-in
switchgear. For common aisle installation see “Common Aisle” on page 16.
1. Verify that the conduit placement on the foundation is accurate according
to customer drawings. Error in conduit placement may prohibit the proper
installation of switchgear as described in this section (see NOTE of
Step 4 below).
Figure 5:
Preparing to Unload Shipping Sections
2. Unload the switchgear shipping sections from the delivery truck.
The shipping sections are designed to be lifted by a crane. Attach a
sling to the lifting lugs on the roof of each of the shipping sections as
shown in Figure 2. A spreader bar may be necessary to maintain proper
lifting angles. If a crane is not available, contact Square D for special
arrangements for unloading the switchgear sections.
CAUTION
IMPROPER LIFTING OF EQUIPMENT CAN DAMAGE LIFTING EYES
The interior included angle of lifting sling should not exceed 90°. Angles
greater than 90° apply greater inward pressure on lifting eyes which can
damage and dislodge eyes from switchgear.
Failure to follow this instruction can result in injury or equipment
damage.
© 1992 Square D All Rights Reserved
7
Outdoor Walk-in Switchgear
Section 7—Standard Components and Parts
Bulletin No. 6055-16
June 1999
3. Remove the shipping covers. Be careful not to damage the
instrumentation on the front doors when removing shipping covers.
Figure 6:
Unloading a Section
Figure 7:
Removing Shipping
Covers
NOTE: Covering for the shipment may vary from the wooden panels
shown in Figure 6.
4. Install the end switchgear shipping section (see Figure 8). Carefully align
the openings on the bottom of the switchgear sections with conduits on
the foundation before lowering the switchgear into place.
NOTE: When more than two shipping sections are involved, any error in
conduit location can cause a cumulative error significant enough to
prohibit the proper installation by the assembly sequence described in
this section. To lessen cumulative error, unload and install the center
shipping section first and work toward either end.
Figure 8:
8
Placing First Section
Figure 9:
Unloading Second Section
© 1992 Square D All Rights Reserved
Bulletin No. 6055-16
June 1999
Outdoor Walk-in Switchgear
Section 7—Standard Components and Parts
5. Level the switchgear shipping section using steel shims if necessary.
6. Verify that the factory-installed gasket attached to one side of the
shipping section is in place before installing the subsequent shipping
sections. If damaged or missing, repair it using the gasket material
provided. Make sure there is no gap between splices if repairs are made.
7. Using a crane, install the second switchgear shipping section (see
Figure 9 on page 8).
8. Level the switchgear shipping section using steel shims if necessary.
9. Verify that the switchgear sections are level, aligned, and fit snugly
together. If the sections do not fit properly, lift the most recently placed
section by crane, remove any obstructions, and re-install.
Figure 10:
Securing Switchgear Sections.
10. Secure the second section to the previously installed section with the
3/8-16 x 1.0 carriage bolts located on the front of the switchgear, rear of
the switchgear, and across the roof of the switchgear (see Figure 10).
11. Install the equipment space sections (as shown at right in Figure 11).
Equipment space sections are designed similar to switchgear units and
can be unloaded and installed in the same manner.
Figure 11:
© 1992 Square D All Rights Reserved
Securing Equipment Space to Switchgear
9
Outdoor Walk-in Switchgear
Section 7—Standard Components and Parts
Bulletin No. 6055-16
June 1999
12. After the switchgear and equipment space sections have been installed,
verify that all of the sections are aligned accurately, and that the bases
and roof lines are level. Use a water level and a straight-edge to do so.
13. The floor of the front aisle will be level only if the switchgear is level.
14. Secure the equipment space sections to the adjoining switchgear
shipping section with the bolts located on the front of the switchgear, rear
of the switchgear, and across the roof of the switchgear.
15. Using a crane, install the first aisle section.
16. The front aisle is shipped in sections of up to four bay sections. The
sections are braced with temporary shipping sheet metal angles, bars,
and channels (see Figure 12).
NOTE: Do not remove any of these braces until the shipping section is in
place and bolted to the switchgear section.
Figure 12:
Braced Front Aisle Section
17. Verify that the vertical sections, the base, and the roof are aligned with
the switchgear shipping sections. Use steel shims if necessary. It is
important that the bolt holes on the aisle roof support brackets align with
the corresponding holes on the front of switchgear sections.
Figure 13:
10
Aligning Aisle with Switchgear Section
© 1992 Square D All Rights Reserved
Bulletin No. 6055-16
June 1999
Outdoor Walk-in Switchgear
Section 7—Standard Components and Parts
18. Attach the aisle section to the switchgear by bolting each bay’s aisle roof
support bracket to the front of the switchgear and the aisle roof to the
switchgear roof (see Figure 14).
NOTE: Insert the connecting bolts loosely until all are in place;
then tighten.
3/8-16 Hardware
(attaches aisle roof to
switchgear roof)
Aisle Roof
Gasket
Switchgear Roof
Aisle Roof Support
3/8 -16 Hardware
(attaches aisle roof
support bracket to front of
switchgear)
Figure 14:
Attaching Aisle Roof Support Bracket to Switchgear
19. Bolt the aisle base to the switchgear base with 3/8-16 x 1.0 in. bolts (see
Figure 15). If required, pry the aisle base in place with an alignment bar.
Alignment Bar Hole
Switchgear Door
Aisle Base
3/8-16 x 1.0 Bolt
Flat and Lock Washer
Switchgear Base
Bolting Pad
Figure 15:
© 1992 Square D All Rights Reserved
Aisle and Switchgear Base Connection
11
Outdoor Walk-in Switchgear
Section 7—Standard Components and Parts
Bulletin No. 6055-16
June 1999
20. After the aisle section is in place and attached to the switchgear section,
remove the end shipping braces (see attached aisle section in Figure 16).
Do not remove the braces from in front of the switchgear as it may be
necessary to lift the aisle section again if it does not align properly.
21. Using a crane, set the second aisle section onto the concrete pad
approximately 12 in. (305 mm) from the section in place
(see Figure 17).
Figure 16:
Moving Sections with Braces in Place
22. Remove the end braces from the new section and lift it carefully by crane
into place (see Figure 17).
NOTE: Do not remove the end braces before it is sitting on the pad; doing
so may distort the assembly.
Figure 17:
12
Placing Second Aisle Section
© 1992 Square D All Rights Reserved
Bulletin No. 6055-16
June 1999
Outdoor Walk-in Switchgear
Section 7—Standard Components and Parts
23. Attach the second aisle section to the switchgear by bolting each bay’s
aisle roof support bracket to the front of switchgear and the aisle roof to
the switchgear roof (see Figure 14 on page 11).
NOTE: Insert the connecting bolts loosely until all are in place;
then tighten.
Figure 18:
Switchgear with All Sections in Place
24. Attach the second aisle section to the first aisle section by bolting the
aisle roof supports together (see Figure 19).
Aisle Roof
Gasket
1/4-20 Carriage Bolt
(attaches two aisle bay
sections together)
Aisle Roof Support
Figure 19:
Attaching Second Aisle Section to First Aisle Section
25. Bolt the aisle base to the switchgear base with 3/8-16 x 1.0 in. bolts (see
Figure 15 on page 11). If required, pry the aisle base in place with an
alignment bar.
26. After all aisle sections are bolted in place, remove the aisle shipping
braces in front of the switchgear.
© 1992 Square D All Rights Reserved
13
Outdoor Walk-in Switchgear
Section 7—Standard Components and Parts
Bulletin No. 6055-16
June 1999
27. Mount the aisle roof caps to the roof at each end, using 1/4-20 threadforming washerhead screws supplied (see Figure 20).
28. Mount the switchgear roof cap to the roof at each end, using 1/4-20
thread-forming washerhead screws; then to the aisle roof support using
two 1/4-20 carriage bolts, seal washers, and locknuts (see Figure 20).
Aisle Roof Cap
Figure 20:
Switchgear Roof Caps
Roof Cap Mountings
29. Inspect the walk-in switchgear for any openings that may expose
equipment to rain. To do this, enter the walk-in enclosure, close the
doors, and look for any light coming through the joints, mainly in the
corners (see Figure 21). Make note of them and seal them with caulk.
Look mainly for cracks which could be directly exposed to rain.
Figure 21:
14
Checking Enclosure for Openings in Seal
© 1992 Square D All Rights Reserved
Bulletin No. 6055-16
June 1999
Outdoor Walk-in Switchgear
Section 7—Standard Components and Parts
30. Remove lifting lugs located on the roof of switchgear (see Figure 22 and
Figure 23) and plug holes with the factory-supplied 1/2-13 bolts and seal
washers (see Figure 24) furnished with each shipping section.
CAUTION
HAZARD OF EQUIPMENT DAMAGE
Make sure that all 1/2-13 bolts and seal washers are in place; they not only
seal, but hold the roof to the switchgear.
Failure to follow this instruction can result in injury or equipment
damage.
© 1992 Square D All Rights Reserved
Figure 22:
Removing Large Lifting Lugs
Figure 23:
Removing Small Lifting Lugs
Figure 24:
Plugging Holes with Bolts/Seal Washers
15
Outdoor Walk-in Switchgear
Section 7—Standard Components and Parts
Common Aisle
Bulletin No. 6055-16
June 1999
The same basic guidelines and assembly procedures used for single aisle
installation also apply to the common aisle. Refer to single aisle installation
procedures for general information. Specific procedures for common aisle
assembly are detailed in this section.
Figure 25:
Outdoor Walk-in Switchgear with Common Aisle
The common aisle switchgear is shipped with the “low side” and the “high
side” switchgear sections fully assembled and ready to set on a concrete
pad. The aisle will be shipped in sub-assemblies.
16
© 1992 Square D All Rights Reserved
Bulletin No. 6055-16
June 1999
Common Aisle Installation
Outdoor Walk-in Switchgear
Section 7—Standard Components and Parts
1. Install the switchgear “high side” shipping section (see Figure 26).
2. Line-up and bolt the bases to the “high side” switchgear.
3. Install the switchgear “low side” shipping section and bolt it to the base
(see Figure 26).
NOTE: The line-up of all switchgear sections and bases must be accurate
and square, and the floor must be level. Use shims if necessary.
4. Install the roof sub-assemblies, attaching them to the switchgear sections
(see Figure 26).
5. Add the end panel sub-assemblies. Use 3/8-16 x 1-1/2 in. carriage bolts
to attach them to the side sheet. Use 3/8-16 x 1 in. hex-head bolts to
attach the sub-assemblies to the roof.
6. Make sure the gaskets attached to one side of the roof and around all
bolted flanges are in place. If damaged, repair it using the factorysupplied 1/2 in. gasket material. Ensure that there is no gap between the
splices if repaired.
7. Attach the roof caps to the aisle and the switchgear roof.
8. Remove the lifting lugs and seal the holes with factory-supplied 1/2-13
bolts and seal washers.
CAUTION
HAZARD OF EQUIPMENT DAMAGE
Make sure that all 1/2-13 bolts and seal washers are in place; they not
only seal, but hold the roof to the switchgear (see Figures 21, 22, and
Figure 24 on page 15).
Failure to follow this instruction can result in injury or equipment
damage.
Roof Subassembly
Aisle Space
“High Side” Switchgear Assembly
“Low Side” Switchgear Assembly
Base Subassembly
Figure 26:
© 1992 Square D All Rights Reserved
Common Aisle Configuration
17
Outdoor Walk-in Switchgear
Section 5—Electrical Hook-Up
Bulletin No. 6055-16
June 1999
The electrical hook-up varies from unit to unit; it may be from a panelboard
(see Figure 29) or directly in the switchgear. Normally, there are three
circuits:
SECTION 5—ELECTRICAL
HOOK-UP
• Lights and fan with thermostat. Thermostat is set at set at 80 °F (27 °C).
• Receptacles (one at each end)
• Heater with thermostat (optional). Heater is set at 50 °F (10 °C)
Refer to the wiring diagrams furnished with the unit for the locations of the
circuit breakers and the electrical connections of the shipping sections.
Figure 27:
18
Lights, Receptacle, and Fan
Figure 28:
Heater/Thermostat (Optional)
Figure 29:
Panelboard (Optional)
© 1992 Square D All Rights Reserved
Bulletin No. 6055-16
June 1999
Outdoor Walk-in Switchgear
Section 6—Inspection and Maintenance
SECTION 6—INSPECTION AND
MAINTENANCE
DANGER
HAZARD OF ELECTRIC SHOCK, BURN, OR EXPLOSION
• Only qualified electrical personnel familiar with medium voltage
circuits are to perform work described in this set of instructions.
Workers must understand the hazards involved in working with or
near medium voltage equipment.
• Perform inspection and maintenance only with the main sources of
power disconnected and locked open with a “work” lock.
• Always use a properly rated voltage sensing device to confirm that
power is off.
• Be sure there is no backfeed through any feeder circuit.
• Grounc the main and feeder circuits before touching the main bus,
bus pads, or primary contacts.
Failure to follow these instructions will result in death or serious
injury.
Inspection and maintenance for the walk-in enclosure should be performed
on the basis of environmental conditions and experience. Abnormal
operation or conditions may require immediate corrective action.
The inspection for the switchgear is outlined in detail in instruction bulletin
6055-30. The following instructions apply only to the walk-in enclosure.
Replace the air filters every six months or as applicable. Table 1 (below) lists
correct filter applications.
Table 1:
Replacement Air Filters
Filter Location*
Bay Width
Square D Part No.
Size (Inches)
22 in. (559 mm)
46005-679-01
11 in. x 13 in.
(279 mm x 330 mm)
36 in. (914 mm),
48 in. (1219 mm)
46005-243-01
11 in. x 19.5 in.
(279 mm x 495 mm)
22 in. (559 mm)
44005-679-02
3.3 in. x 20 in.
(84 mm x 508 mm)
36 in. (914 mm)
46005-243-03
3.3 in. x 34 in.
(84 mm x 864 mm)
48 in. (1219 mm)
46005-418-02
3.3 in. x 46 in.
(84 mm x 1168 mm)
Rear Door
Rear Eaves
*filter material is 1/2 in. (13 mm) thick rubberized hair filter pad or equivalent (Paratex™).
During regular inspection intervals, inspect for the following:
• Check for possible leaks in the front aisle, in each cable compartment, and
in the roof of the indoor switchgear. Check the roof, using a flashlight,
through the vent openings from the front aisle. If large puddles of water are
found at the doors, check the door gaskets.
• Check the seeping holes in the cable compartment doors to ensure they
are not clogged.
• Check the heater and fan in the front aisle for proper operation. Check the
thermostat settings (see “Section 5—Electrical Hook-Up” on page 18).
Verify that space heaters in the switchgear are operating.
• Check that the door panic latch (for use in an emergency) is working
properly.
© 1992 Square D All Rights Reserved
19
Outdoor Walk-in Switchgear
Section 7—Outlines
Bulletin No. 6055-16
June 1999
SECTION 7—OUTLINES
111.6
2833
102.2
104.5
2595
114.5
2907
2653
74.0
1879
77.0
92.5
1955
2348
Figure 30:
Outline of Single Aisle Walk-in
114.5
2907
104.5
102.2
2653
2595
75.0
1904
96.9
2460
77.0
96.9
1955
2460
270.8
6875
Switchgear Assembly - Low Side
Aisle Assembly
Figure 31:
20
Switchgear Assembly - High Side
Outline of Common Aisle Walk-in
© 1992 Square D All Rights Reserved
Bulletin No. 6055-16
June 1999
Outdoor Walk-in Switchgear
Section 8—Maintenance Log
SECTION 8—MAINTENANCE LOG
DATE
INITIALS
© 1992 Square D All Rights Reserved
ACTION
21
Outdoor Walk-in Switchgear
Section 8—Maintenance Log
Bulletin No. 6055-16
June 1999
MAINTENANCE LOG
DATE
22
INITIALS
ACTION
© 1992 Square D All Rights Reserved
Outdoor Walk-in Switchgear, 4.76—15.0kV Metal-Clad Switchgear, MASTERCLAD™, Series 3
Square D and
are registered trademarks and MASTERCLAD is a trademark of Square D
Company and related companies. All other trademarks are the intellectual property of their
respective companies
Square D Company
330 Weakley Road
Symrna, TN 37167 USA
(615) 459-5026
www.squared.com
Electrical equipment should be serviced only by qualified electrical maintenance personnel. No
responsibility is assumed by Square D for any consequences arising out of the use of this material.
Bulletin No. 6055-16 June 1999 © 1992 Square D All Rights Reserved.
Replaces 6055IM9203 dated 8/92.

