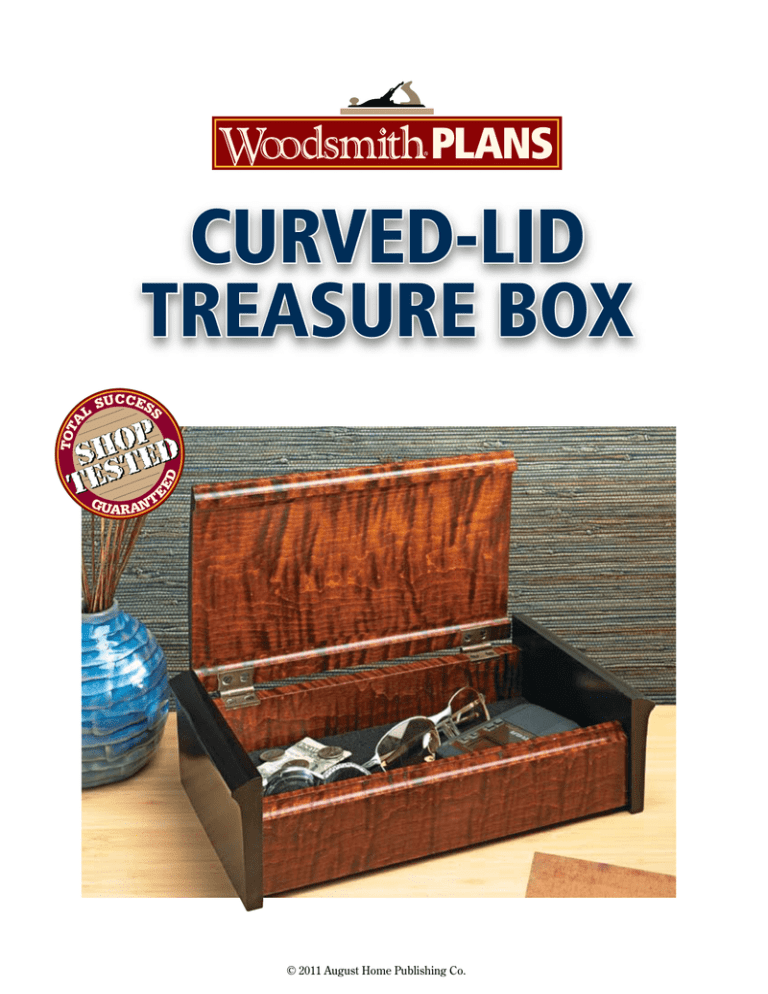
curved-lid
treasure box
© 2011 August Home Publishing Co.
Feature
Project
Curved-Lid Treasure Box
The curved lid and ebonized sides of this attractive box show off the
highly figured wood and your woodworking skills.
I
{ With its felt-lined compartment and sleek design, this
treasure box will be at home in just about any setting.
1
WoodsmithShop.com
t’s tough to point out the best
thing about this treasure box.
For starters, it has a broad contoured lid and matching front and
back panels, which show off the
beauty of the wood. Since the project is so small, splurging for highly
figured, expensive wood really
won’t end up costing much. The
bold ebonized sides add an interesting design element, too. And for
practicality, the lid is attached with
a couple of hinges and the inside
compartment is lined with felt.
In addition to adding up to a
beautiful box, you’ll find that these
features present some woodworking challenges, as well.
For the joinery, I kept things
simple — dowel joints for the sides
and tongue and groove for the bottom. And I’ll show you a sure-fire
way to line up the holes for the
dowels using a shop-made jig.
© 2011 August Home Publishing Co. All Rights Reserved.
a.
!/4
SIDE VIEW
NOTE: All parts made
from !/2"-thick hardwood
10
!/2
!/4" rad.
A
5!/4
BACK
2
2
B
BOTTOM
A
A
FRONT
BOTTOM
1
10
FRONT
!/4"-dia. x !/4"deep dowel
pin hole
B
!/4
Dowel pin holes are drilled
before assembly. See page 7
for a simple drilling jig
!/4
!/2
Ease three edges
with sandpaper
Assembling the Front, Back & Bottom
At the heart of the treasure box is
the basic case, formed by the front,
back, and bottom. Later, you’ll
attach the sides with dowel joints
and finally, the hinged lid. But
these curved pieces rely on having
a square case. So, you can begin
by cutting the front, back, and side
pieces to size from 1⁄2"-thick stock.
Front & Back. The drawings below
give you an overview of the steps
for shaping the front and back.
Both pieces have a groove on the
inside face that will hold the bottom.
I started by cutting this groove at
the table saw using a dado blade.
Then, once you’ve cut the groove,
you can set the back aside.
Next, you’ll rout a cove along
the top edge of the front. This cove
(and another you’ll make later on
the front of the lid) will form the
recess to open the lid.
Bottom. After you’ve completed
the front and back, the next thing
to do is make the bottom. There’s
not much to do here. Rabbets on the
front and back edges create tongues
that fit into the grooves in the front
and back pieces. Once again, I
turned to the table saw and a dado
blade to make these cuts.
Dowel Joints. Now you’re ready to
drill a few holes for the dowel joints.
To keep the holes properly positioned, I used a simple, shop-made
jig. You can find out how to make
the jig yourself by turning to page
7. When using the jig, I put a piece
of tape on the drill bit to mark the
depth of the hole, as you see in the
right illustration below.
Assembly. The assembly is pretty
straightforward, just apply a little
glue on the edges of the bottom and
in the groove on the front and back.
Then, use a couple of clamps to hold
everything together.
How-to: make the front & back
NOTE: See
page 7 for
more on jig
Push
block
A
Dado
blade
A
!/4" brad
point bit
!/2" core box bit
a.
!/4
!/4
a.
END VIEW
!/4
A
!/4
A
Create the Groove. Using a dado blade
on the table saw and a push block, cut the
groove that will hold the bottom.
2
a.
END
VIEW
!/4
Use tape
as depth A
gauge
A
Tape
SECTION
VIEW
Rout the Cove. At the router table, use
a core box bit to rout the cove profile on
the top edge of the front.
WoodsmithShop.com
#/8
!/4
Jig
Drill for Dowels. A simple, shop-made
drilling jig makes it easy to line up the holes
for the dowel joints.
© 2011 August Home Publishing Co. All Rights Reserved.
#/4
FULL-SIZE LID PATTERN
5#/4
9!%/16
Use full-size pattern as
guide for creating curve
on top surface of lid
a.
SIDE SECTION
VIEW
C
Cove on front edge
of lid acts as
finger recess
!/4" rad.
C
LID
!/4
!/4" rad.
LID
Front
Back
1
@#/32
#/4
b.
NOTE: Cut mortises
to fit hinge leaf
1
SIDE SECTION
VIEW
C
LID
Hinge
mortise
NOTE: Lid is made from
#/4"-thick hardwood
#/32
Back
#/32
Shaping the Lid
After completing the front, back,
and bottom assembly, it’s time to
move on to the lid. (You may be
tempted to start on the sides, but
the assembly goes much smoother
if you add them last.) Though shaping the lid looks complicated, it’s
not too tough to do if you break it
down into a few simple steps.
Shaping the lid. After cutting a blank
for the lid and planing it square and
flat, I started working on shaping
it at the table saw. The box below
shows you the basic process.
As you can see, I copied the fullsize pattern (above) and glued it on
both edges of the blank with some
spray adhesive. This gave me a
how-to: make the curved lid
a.
Lid
blank
Use pattern as
guide to rough
cut with plane
END
VIEW
C
LID
Tall
auxiliary
fence
Aux.
fence
a.
Tilt blade
and cut to
waste side
of pattern
Angle Cut. With the pattern attached for reference,
tilt the saw blade to stay just outside the line. Once it’s
lined up, nibble off the corners from both edges.
3
WoodsmithShop.com
END
VIEW
Plane to waste
side of line,
then sand
smooth
Planing a Curve. Using a block
plane, take even strokes from end
to end and remove high spots.
visual reference and made shaping
the piece much easier.
Using the pattern as a guide, raise
the table saw blade, and tilt it to
match the lower part of the curved
layout line. Make a cut on both
edges to remove the waste.
Now take another look at the pattern, and reset the fence and the
angle of the blade to make a second
cut. This time, remove the waste a
little higher up on the blank. Note:
Be sure to use a tall auxiliary fence
to make these cuts safely.
A little hand work. Now it’s time to
reach for your block plane and refine
the shape. Set the blade to take very
thin shavings. Then you can knock
down the high spots by taking long
strokes from end to end. Skewing
the blade helps you get smoother
cuts. Check your progress often by
comparing the layout lines on the
pattern to the workpiece.
Sand to Final Shape. I finished up by
hand sanding the lid. I started with
100-grit paper and quickly moved
through the grits to 220. Once
you’re happy with the curve of the
top of the lid, you can move on to
shaping the underside.
© 2011 August Home Publishing Co. All Rights Reserved.
shop Tip
Add the coves. To shape the underside of the lid, you’ll need to head
back to the router table. With the
same core box bit setup you used
earlier to shape the front, you can
cut the matching cove on the front
edge of the lid. The illustrations
below also show how to reset the
fence to cut two grooves to form the
curved shape inside the lid.
Finally, with a dado blade on the
table saw set to match the depth of
the grooves, you can remove the rest
of the waste between the two routed
grooves. I used the miter gauge with
an auxiliary fence to guide these
cuts. It’s also a good idea to set the
rip fence to limit the outside edge of
the cut and prevent cutting into the
cove profile (right drawing below).
Plane & Scrape. To clean up the saw
marks left by the dado blade, use a
block plane and card scraper. This
combination makes short work of
removing the saw marks on the flat
part of the bottom. Then, finish up
by doing a little hand sanding.
Hinge mortises. With the lid shaped
and sanded smooth, it’s time to add
the hinge mortises. You’ll want to
have your hinges on hand before
you do this. Then you can make
sure the mortises you cut match the
leaf both in width and depth.
Auxiliary miter
fence
Auxiliary miter
fence
Layout lines
C
Back
a.
#/4" dado
blade
Back
1
#/4
a.
#/4" dado
blade
END VIEW
END VIEW
@#/32
1
#/32
#/32
C
Hinge Mortises. First, you’ll want to set the height of the dado blade to match the thickness of the hinge leaf. Make the first cut on the layout line. Then, slide the box over to the
other layout mark to complete the cut. Use the rip fence as a stop for the second cut.
There are a variety of different
techniques for cutting hinge mortises, but the easiest way in this
case is at the table saw. Using the
dado blade, you can quickly cut perfect mortises in both the case and
the lid. The illustrations in the box
above show the details.
The most important thing to keep
in mind when using this method
is to make sure the blade is set to
the correct height. You may want to
make a few test cuts to sneak up on
the fit. And you’ll need to shift the
table saw fence over 1⁄32" when cutting the lid mortises.
Materials, Supplies &
Cutting Diagram
1⁄ x 2 - 10
A Front/Back (2)
2
1⁄ x 51⁄ - 10
B Bottom (1)
2
4
3⁄ x 53⁄ - 915⁄
C Lid (1)
4
4
16
3⁄ x 3 - 6
D Sides (2)
4
• (1 pr.) 11⁄4" x 1" x 3⁄32" Hinges w/Screws
• (1) 1⁄4"- dia. Hardwood Dowel
!/2" x 5!/2" - 36" Hard Maple (1.4 Bd. Ft.)
A
A
B
#/4" x 6!/2" - 24" Hard Maple (1.1 Bd. Ft.)
D D
C
ALSO NEEDED:
Posterboard, Felt
HOW-TO: Complete the lid
C
C
LID
!/2"-dia. core
box bit
a.
Rip fence
acts as
stop
LID
C
a.
!/4
END VIEW
!/2
C
!/2
a.
Waste
END VIEW
5
C
!/4 Waste
!/4
LID
Dado
blade
!/2"-dia. core
box bit
END VIEW
Aux.
miter fence
!/4
C
Waste
Outside Cove. With only half of
the bit exposed, rout the cove profile on the front of the lid.
4
Inside Coves. Then, reset the fence to
expose the full bit, and rout a !/4"-deep
groove !/2" in from both edges.
WoodsmithShop.com
Remove the Waste. At the table saw, use a dado
blade to remove the waste between the grooves.
The rip fence acts as a stop.
© 2011 August Home Publishing Co. All Rights Reserved.
a.
Lid (open)
TOP VIEW
!/32
Dowel
NOTE: Sides are made from
#/4"-thick hardwood with
grain running vertically
Back
!/8
Sand chamfer on
ends of dowels
Lid
D
Hinge
!/4
D
1" brass
hinge
b.
#/4
%/16 !/4
D
Lid
!/2" rad.
Front
3
FRONT
SECTION
VIEW
!/4"-dia. x !/2"
dowels
D
SIDE
Dowels
Felt-covered
board
#/16
Bottom
6
#/8
Add felt-covered posterboard
to the bottom of box assembly
c.
Adding the Sides & Final Assembly
Once you’ve completed the lid and
base, the next step is to make the
sides. But before you begin, I want
to point out the grain orientation. As
you can see in the drawing above,
you’ll want to be sure the grain
runs vertically. This way, not only
will the sides match the bottom,
but they’ll expand and contract at
the same rate, preventing splitting
due to seasonal changes.
#/4
Start with flat stock. The sides have
a tapered and curved profile (pattern
in left margin). But before you start
to work on the shape, you’ll need
to mark the positions of the dowel
holes using dowel centers.
The box at the bottom of the page
shows you how to do this. To help
determine the reveals, I positioned
spacers behind the back and below
the bottom. Once all of the locations
1" brass
hinge
#4 x ½" Fh
brass
woodscrew
Back
are marked, use the drill press to
drill the matching holes.
Shaping the Sides. Now you’re ready
to shape the sides. Once again, the
full-size pattern will be helpful.
how-to: drilling matching dowel holes
!/4"
brad point
bit
!/8"-thick
spacer
Fixed
block
3
Side
blank
Tape on bit
acts as depth
gauge
Dowel
centers
a.
Pattern attached
to both ends
Side blank
Tape
!/4
#/16"-thick
spacer
FULL-SIZE
SIDE
PATTERN
5
Marking Holes. Using spacers to position the case,
add dowel centers in the holes in the front, back, and
bottom. Then, mark the hole locations on the sides.
WoodsmithShop.com
SECTION VIEW
Drilling the Dowel Holes. With the positions
marked, use the drill press to make sure the holes
are perfectly straight and will fit the case properly.
© 2011 August Home Publishing Co. All Rights Reserved.
I started by clipping off the corner
at the table saw, as shown in the box
below. Then I moved to the router
table for the next step.
Using a larger (1"-dia.) core box
bit, set the fence to rout a channel
to form the top curve. After that, it’s
back to the table saw to make a taper
cut. As you can see in the right drawing in the box, I attached the piece
to a taller “carrier board” for safety.
Final Shaping & Sanding. At this
point, you just need to do some
sanding to smooth out the curves
and the taper. And since the sides
are going to be ebonized, I decided
to pre-raise the grain by wiping on
a little water. After a few minutes, I
sanded the pieces again with 220grit sandpaper. This way, the fibers
won’t swell as much when I apply
the ink to ebonize the pieces.
Ebonizing. I used India ink (available at art supply stores) to ebonize
the sides, as shown in the box above.
You could use dye, but I’ve had better results with the colorfast ink.
Since I had to color the sides separately, I dyed the case and lid before
assembly, as well. Cherry dye really
brings out the figure of the curly
maple. (I used TransTint dye from
Rockler: 1 qt. water, 6 tsp. Orange,
and 4 tsp. Reddish Brown.) Just tape
shop tip
After sanding the sides, start ebonizing
by using the dropper to spread a liberal
amount of ink on the surface.
the ends of the case to avoid getting
dye on them — it could prevent the
glue from bonding properly.
Assembly. The nice thing about
using dowel joints is that it makes
aligning the assembly a breeze. All
you need to do is add a little bit of
glue to the dowels and along the
edge of the case, and clamp the
box. I used softwood blocks on
the clamps to avoid marring the
ebonized sides. Apply just enough
pressure to keep the sides tight
to the case. When the glue dried,
Then, with a disposable foam brush, you
can spread the ink across the surface and
work it into the grain as much as possible.
I finished the box by adding a few
coats of spray lacquer.
After the clear finish has cured,
add the hinges and attach the lid.
Since you’ve already cut the mortises, this step is also pretty straightforward. (I used 11⁄4" x 1" x 3⁄32"
Precision Box Hinges #PB-405 from
Horton Brasses, Inc.) I drilled pilot
holes for the brass screws to make
installing them easier.
A felt liner. Finally, attach felt to
posterboard with spray adhesive,
and cut it to fit in the bottom.
shaping the sides
Push
block
D
With blade
tilted slightly,
cut to outside
of pattern
a.
Attach
workpiece
to carrier board
with double-sided
tape for
safety
SIDE
1"-dia. core
box bit
a.
END VIEW
Cut to waste
side of pattern
#/4
END
VIEW
END VIEW
Pattern
6
Core Box Groove. Use the pattern to
set the bit height and fence position.
Then rout the groove in the blank.
WoodsmithShop.com
a.
End
Cut to
waste
side of
pattern
!/4
Top Angle. With the pattern on the
blank, tilt the blade to match the angle
and cut away the corner.
Tilt blade to
match pattern
Taper Cut. After attaching the blank to
a carrier board for safety, tilt the blade to
match the pattern (3º) and cut the taper.
© 2011 August Home Publishing Co. All Rights Reserved.
Tips From
Our Shop
Dowel Jig
Before you can assemble the curvedlid treasure box, you’ll need to drill
some holes for the dowel joinery.
The problem is it’s often difficult to
drill straight holes in the end grain
of a workpiece. To make this task
easier, I built a drilling jig to position
and drill the holes for the dowels.
As you can see in the drawing, the
jig has a base made out of 1⁄4" hardboard. Hardwood strips are attached
to the bottom and front edges to
serve as stops for the workpieces.
Before attaching the vertical stop,
I drilled holes through its edge at my
drill press. These holes will guide
your bit for the holes in the front,
back, and bottom of the box.
And when I used the jig, I wrapped
the drill bit with tape, marking the
depths of the holes.
a.
8
These
holes used
for drilling
two holes
in ends of
box bottom
!/4" Hdbd.
!/4"-dia.
hole
This hole used
only for drilling
hole in ends of
box front and back
Box
bottom
8
Box front/back
4!/4
1!/2
1
1
!/2
7
WoodsmithShop.com
Workpiece is
tight against
both fences
when drilling
© 2011 August Home Publishing Co. All Rights Reserved.

