ROBOT . HEAD to TOE
Product User’s Manual –
MD30C
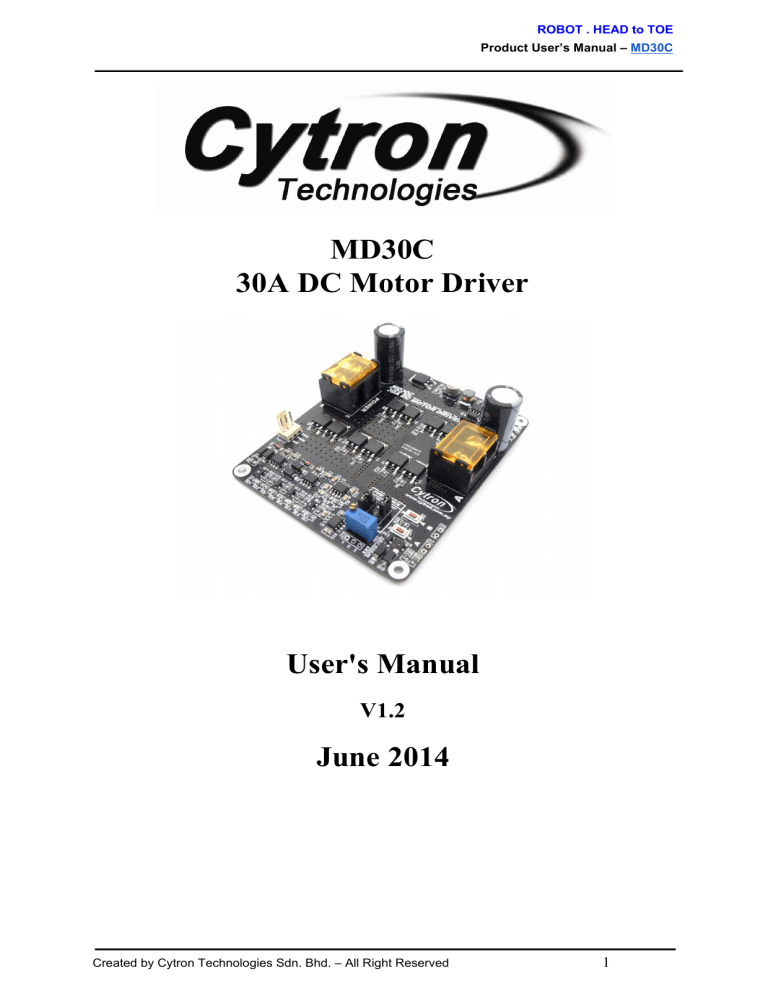
MD30C
30A DC Motor Driver
User's Manual
V1.2
June 2014
Created by Cytron Technologies Sdn. Bhd. – All Right Reserved
1
ROBOT . HEAD to TOE
Product User’s Manual –
MD30C
Index
1.
Introduction
3
2.
Packing List
4
3.
Product Specification and Limitations
5
4.
Board Layout
6
5.
Dimension
8
6.
Hardware Installation
9
7.
Warranty
16
Created by Cytron Technologies Sdn. Bhd. – All Right Reserved
2
ROBOT . HEAD to TOE
Product User’s Manual –
MD30C
1.0 INTRODUCTION
MD30C is the successor of MD30B which is designed to drive medium to high power
brushed DC motor with current capacity up to 80A peak and 30A continuously. Fully NMOS
design not only provides faster switching time, it is also more efficient and no heatsink or fan
is required.
Besides that, MD30C also incorporates some user friendly features such as reverse polarity
protection and onboard PWM generator which allows it to operate without a host controller.
The motor can simply be controlled with the onboard switches and speed potentiometer.
External switches and potentiometer can also be used.
Features:
● Bi­directional control for 1 brushed DC motor.
● Motor Voltage: 5V ­ 25V.
● Maximum Current: 80A peak (1 second), 30A continuously.
● Reverse polarity protection.
● 3.3V and 5V logic level input.
● Fully NMOS H­Bridge for better efficiency and no heat sink is required.
● Speed control PWM frequency up to 20KHz (Actual output frequency is same as
input frequency when external PWM is selected).
● Onboard PWM generator with switches and potentiometer for standalone operation.
● Support both locked­antiphase and sign­magnitude for external PWM operation.
ROBOT . HEAD to TOE
Product User’s Manual –
MD30C
2.0 PACKING LIST
Please check the parts and components according to the packing lists. If there are any parts
missing, please contact us at
sales@cytron.com.my
immediately.
1.
2.
3.
4.
1x
MD30C
30A DC Motor Driver
2x
Mini Jumper
1x
2510 PCB Connector
­ 3 Ways (Female)
3x
2510 Terminal Pin
ROBOT . HEAD to TOE
Product User’s Manual –
MD30C
3.0 PRODUCT SPECIFICATION AND LIMITATIONS
Absolute Maximum Rating
Parameter
Min
Typical
Max
Unit
Power Input Voltage (Motor supply voltage)
5
­
25
V
I
MAX
(Maximum Continuous Motor Current)
­
­
30
A
I
PEAK
(Peak Motor Current)*
­
­
80
A
I
IDLE
(Idle Current)
­
­
100
mA
V
IOH
(Logic Input­High Level)
3
­
5.5
V
V
IOL
(Logic Input ­ Low Level)
0
­
0.5
V
Maximum PWM Frequency**
­
­
20
KHz
*Must not exceed 1 second.
**Actual output frequency is same as input frequency when external PWM is selected.
ROBOT . HEAD to TOE
Product User’s Manual –
MD30C
4.0 BOARD LAYOUT
1. Power Terminal Block
Connect to power source. For high current application, please solder the wire directly to
the pad at bottom layer.
2. Input
Pin No.
1
2
3
Pin Name
GND
PWM
DIR
Description
Ground
PWM input for speed control.
Direction Input.
3. PWM Source Selector
Select the source of the speed control PWM.
PWM Source
JP4
JP6
Internal Potentiometer
INT POT
INT PWM
External Potentiometer
EXT POT
INT PWM
External PWM Signal
X (Don’t Care)
EXT PWM
4.
Internal PWM Potentiometer
Used to control the motor speed when PWM source is internal potentiometer.
ROBOT . HEAD to TOE
Product User’s Manual –
MD30C
5. External PWM Potentiometer Port
Connect to the external potentiometer (5K ­ 10K Ohm). Used to control the motor speed
when PWM source is external potentiometer.
6. Test Button A
When this button is pressed, current flows from output A to B and motor will turn CW (or
CCW depending on the connection). External switch can also be connected for the ease of
access.
7. Test Button B
When this button is pressed, current flows from output B to A and motor will turn CCW
(or CW depending on the connection). External switch can also be connected for the ease
of access.
8. Motor Terminal Block
Connect to motor. For high current application, please solder the wire directly to the pad
at bottom layer.
9. Red LED A.
Turns ON when the output B is low and output A is high. Indicates the current flows from
output A to B.
10. Red LED B
Turns ON when the output A is low and output B is high. Indicates the current flows from
output B to A.
11. Green Power LED
Turn on when the MD30C is powered up.
ROBOT . HEAD to TOE
Product User’s Manual –
MD30C
5.0 DIMENSION
Created by Cytron Technologies Sdn. Bhd. – All Right Reserved
8
ROBOT . HEAD to TOE
Product User’s Manual –
MD30C
6.0 HARDWARE INSTALLATION AND GETTING STARTED
6.1 Battery and Motor Connection
Battery and motor can be connected to the
MD30C either via the screw terminal block, or it
can be soldered directly to the pad at the bottom layer of the PCB. Make sure the battery and
motor are connected to the correct port. Connecting battery to the motor port will burn the
MOSFET.
NOTE:
For application where the current is > 20A, it’s recommended to solder the wire directly to
the pad at bottom layer.
Battery is connected to MD30C via terminal block
Created by Cytron Technologies Sdn. Bhd. – All Right Reserved
9
ROBOT . HEAD to TOE
Product User’s Manual –
MD30C
Motor is connected to MD30C via terminal block
Battery is soldered directly to MD30C
Created by Cytron Technologies Sdn. Bhd. – All Right Reserved
10
ROBOT . HEAD to TOE
Product User’s Manual –
MD30C
Motor is soldered directly to MD30C
Created by Cytron Technologies Sdn. Bhd. – All Right Reserved
11
ROBOT . HEAD to TOE
Product User’s Manual –
MD30C
6.2 Standalone Operation
The
MD30C can operate in standalone mode. In this mode, the motor is controlled by the
onboard switches and speed potentiometer. Alternatively, external switches and
potentiometer can be used to control the motor. This allow the switches and potentiometer to
be mounted at easy to reach place.
Onboard Switches and Potentiometer
Set the jumpers as below:
JP4 :
INT POT
JP6 :
INT PWM
After that, connect the battery and motor to the MD30C. Pressing switch A will run the motor
in CW direction and pressing switch B will run the motor in CCW direction (The actual
direction is depending on the motor polarity). The speed of the motor can be controlled by the
onboard speed potentiometer.
Don’t worry if the motor does not run when the switch is pressed. This might be due to the
set speed is too low for the motor to run. Try turning the speed potentiometer CW for a few
round while pressing down one of the switch to increase the motor speed.
Created by Cytron Technologies Sdn. Bhd. – All Right Reserved
12
ROBOT . HEAD to TOE
Product User’s Manual –
MD30C
External Switches and Potentiometer
Set the jumpers as below:
JP4 :
EXT POT
JP6 :
INT PWM
Connect the external switches and potentiometer as below. Please note that the onboard
potentiometer will have no effect when JP4 is changed to EXT POT.
Created by Cytron Technologies Sdn. Bhd. – All Right Reserved
13
ROBOT . HEAD to TOE
Product User’s Manual –
MD30C
External potentiometer is connected on JP5
External switch is connected to JP7 and JP8
Created by Cytron Technologies Sdn. Bhd. – All Right Reserved
14
ROBOT . HEAD to TOE
Product User’s Manual –
MD30C
6.3 Interface with Microcontroller
To control the motor with a microcontroller, set the jumpers as below:
JP4 :
Don’t Care
JP6 :
EXT PWM
Truth table for the control logic:
PWM
DIR
Low
X (Don’t Care)
High
Low
High
High
Output A
Low
High
Low
Output B
Low
Low
High
Picture below shows an example of connecting the
MD30C
to the
SK40C
.
Created by Cytron Technologies Sdn. Bhd. – All Right Reserved
15
ROBOT . HEAD to TOE
Product User’s Manual –
MD30C
7.0 WARRANTY
●
●
●
●
Product warranty is valid for 6 months.
Warranty only applies to manufacturing defect.
Damaged caused by misuse is not covered under warranty
Warranty does not cover freight cost for both ways.
Prepared by
Cytron Technologies Sdn. Bhd.
19, Jalan Kebudayaan 1A,
Taman Universiti,
81300 Skudai,
Johor, Malaysia.
Tel:
Fax:
+607­521 3178
+607­521 1861
URL: www.cytron.com.my
Email:
support@cytron.com.my
sales@cytron.com.my
Created by Cytron Technologies Sdn. Bhd. – All Right Reserved
16


