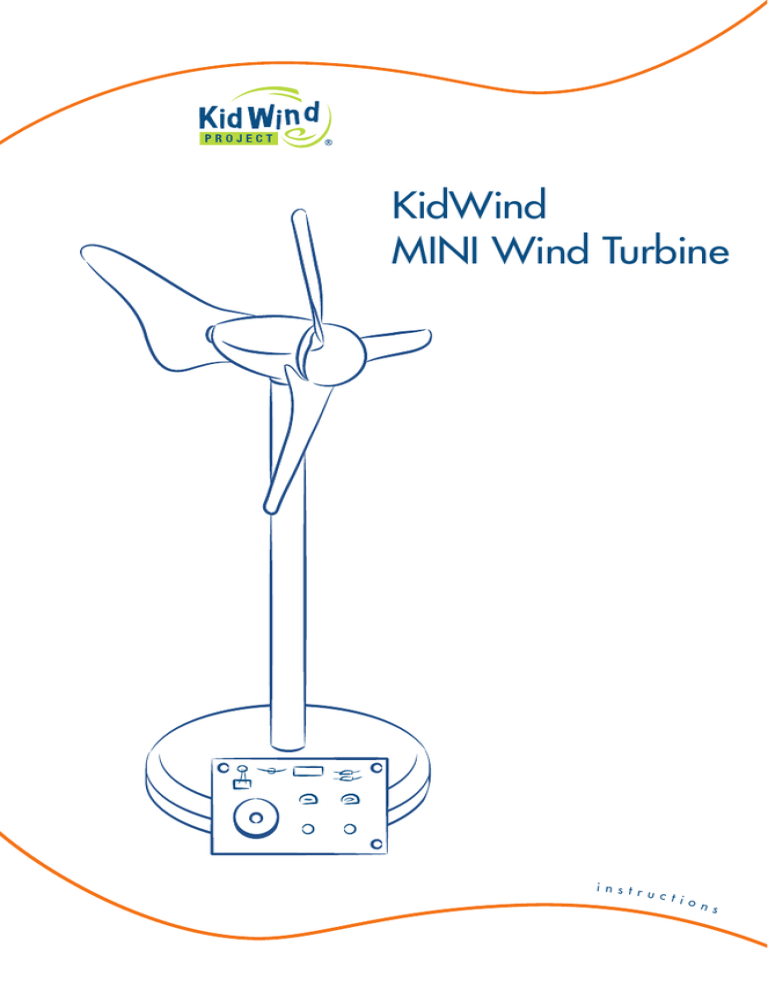
KidWind
MINI Wind Turbine
inst r u
c ti
on
s
Why Study Wind Energy?
In 2009, wind power comprised 39% of all new energy installations in the
US. As investors and power producers look to build new power infrastructure, they are choosing to build wind farms at an increasing rate.
Of our current electrical generation mix, about 2% of our energy is produced by wind turbines. That is double what we had three years ago:
approximately 20,000 wind towers.
The current US wind power capacity of 36,700 MW is capable of generating enough power for over 11 million US homes! Some industry leaders
believe that by the year 2030 we will get 15–20% of our energy from the
wind. Reaching this goal will take great effort and lots of scientists, engineers, and technicians.
The MINI Wind Turbine, and other KidWind kits, will help you explore
some of the science and engineering behind the growing field of wind
power so you can one day help move the US towards a sustainable energy
future.
US annual and cumulative wind power capacity growth
40,000
35,000
Annual Capacity Additions
30,000
Capacity (MW)
Cumulative Capacity
25,000
20,000
15,000
10,000
5000
0
’99
’00
’01
’02
’03
’04
’05
Source: US Department of Energy’s Wind Powering America
2
’06
’07
’08
’09
’10
The MINI Wind Turbine
The MINI Wind Turbine wind turbine kits are perfect for demonstrating how
wind turbines function. They also allow you to perform experiemnts with
wind power. Check out all the kits at: www.KidWind.org/shop
The MINI Wind Turbine
The MINI Wind Turbine is an easy-to-build turbine that produces
enough electricity to power LED bulbs, a sound & light panel, and
other load devices.
The MINI Wind Turbine—Blade Design kit
Be a blade engineer! With the KidWind MINI—Blade Design kit
you will also be able to use your turbine to make and test blades
that you construct yourself. See what happens to wind turbine
power output when you change the number, pitch, and shape of
the blades.
The MINI Wind Turbine is made in the US
withrecycled plastic & FSC wood.
Proceeds from its sale help us train teachers.
The KidWind MINI
1
1
1 1
MINI nacelle assembly
10” aluminum tower
Round wood base
Red MINI blade set
1
2
5
1
Sound & light panel
Alligator clip cords
Plastic bumpers
Yellow plug
The KidWind MINI—Blade Design kit
1
1
1 1
1
2
5
MINI nacelle assembly
10” aluminum tower
Round wood base
Red MINI blade set
Sound & light panel
Alligator clip cords
Plastic bumpers
1
Yellow plug
2
Resistor (50 & 100 ohm)
1
12 hole crimping hub
8
Corrogated plastic sheets
12Dowels
1 Multimeter
1
KidWind protractor
3
Building the MINI Turbine
1.Unwrap the wires of your MINI nacelle.
Unwrap wires and pass
them through the tower.
2.Feed the wires down the aluminum tower.
3. Feed the wires through the wooden base.
4.Insert the nacelle post into the end of the tower.
5.Slide the tower through the wooden base.
Feed the wires through
the hole in the wooden
base.
6.Feed the wires through the hole in the yellow
cap.
7. Insert the cap into the end of the tower.
8.Stand up your MINI Turbine.
9.Push the red blade set onto the shaft of the
generator.
Feed the wires through
the plastic plug and
insert it into the tower.
Converting to blade testing turbine
The MINI Wind Turbine–Blade Design kit
includes a 12 Hole Crimping Hub and blade
materials. This hub makes it easy to change
blades and try your own designs.
Pull off the red plastic blade set. The best way to
do this is to pry it off slowly using a screwdriver
or something similar. Replace it with the 12 hole
crimping hub and you are ready to make and test
your own blades. See page 12 for tips on how to
make and test blades.
Stand up the tower and
attach the red blades or
12 hole crimping hub.
4
Connecting Your MINI to
Devices and Loads
KidWind MINI
The MINI Wind Turbine comes with a sound &
light panel that you can connect to your turbine to
demonstrate power output. Be sure to connect red
wires to red and black wires to black.
The MINI Wind Turbine can power a variety of
electrical devices beyond the included sound &
light panel (especially if you build a mini wind
farm)!
The sound & light panel
uses the power your
MINI Wind Turbine
generates to light an
LED or play a song.
For more fun experiments, try pumping water with
the KidWind water pump, electrolyzing water in
a hydrogen fuel cell, or storing energy in a super
capacitor. You can also connect it to another
DC motor, which can spin a small propeller. All
of these items can be found at
www.KidWind.org/shop
The MINI Wind Turbine Blade Design Kit
The MINI—Blade Design Kit comes with a simple
multimeter so you can quantify how much power
your turbine generates. The following directions
will help you connect your MINI to the meter and
Carefully remove blades,
using a screwdriver to pry
against the motor.
5
Resistors
record voltage and amperage.
Resistors are electrical
components with a known
resistance. There is a
standard system of colored
bands to show what the
resistance of a resistor is.
Measuring voltage
The MINI Blade Design kit
includes a 50 ohm resistor
and a 100 ohm resistor.
Attach the wires from the generator to the multimeter. Polarity is not relevant at this point.
To check the voltage, select DC volt (V) and set
the number to 20.
Place your turbine out in the wind or in front of a
fan and let it spin. It is normal for the voltage readings to fluctuate because of the inconsistent nature
of the wind or unbalanced blades.
Voltage is related to how fast the DC generator is
spinning. The faster it spins, the higher the voltage. With no load on the generator, it has little
resistance and can spin very fast.
You can measure voltage with no load, but it is
more realistic to place a resistor in the circuit and
measure the voltage across the resistor. We commonly use 10, 30, 50 or 100 ohm resistors.
Measuring amperage
To calculate your turbine’s power output, you
will need to measure current as well. When
measuring current you are monitoring how many
electrons are being pushed through the wire by
the turbine. We measure current from our turbine
in milliAmperes.1A =1000 mA.
To measure current, place a load in series with the
multimeter so the generator is forced to do some
work. Set the meter to 200 or 20 mA, which is a
typical range for our devices.
The current that your turbine produces depends on
6
Measuring DC
Voltage
Measuring
Current
Voltage, Current &
Resistance
V
20
A
20
200
Voltage (measured in volts),
is also called “potential
difference” or “electromotive
force” (EMF). It is a measure
of the amount of “potential
energy” available to make
electricity flow in a circuit.
It is the electric “pressure”
causing the current to flow.
Electric current is a measure
of the rate at which electric
charge (electrons) are
flowing through a circuit. It is
given in the unit of amperes
(“amps”). Smaller amounts
of current are often stated
in milliAmps (mA). A mA is
1⁄1000 of an amp.
Electrical resistance is the
opposition to the flow of
electricity. Measured in
ohms, it reflects how much
electric “pressure” (voltage)
is required to push a given
amount of current through
part of an electric circuit.
To measure the power your
turbine is producing, you
need to do some math with
these values (see page 16).
7
the load placed in the circuit and the torque your
blades are generating.
Graph your Data
Experiments for your
MINI Wind Turbine
The MINI Wind Turbine was designed to demonstrate wind power technology while helping you
do some simple experiments!
V
Experiment 1: changing wind speed
Wind speed
Try graphing the
relationship between
voltage and wind speed
or amperage and wind
speed.
a
Wind speed
connecting wires
To make an electrical circuit,
the conductive metal wires
of each element must be
in direct contact with those
of the next. Make sure
the ends of the wires are
stripped, then connect them
with clip cords or by twisting
them together.
8
This experiment can be done with the red blade
set or your homemade blades using the crimping
hub. Place the turbine about three feet in front of a
fan, and turn it on high. What happens when you
turn the fan to medium or low? Does the LED bulb
light up at any wind speed?
Now leave the fan on medium and move your turbine away from the fan by about a foot. Continue
moving the turbine away from the fan, one foot at
a time, until the LED bulb no longer works. How
far away can you get? Why is the turbine unable
to power the light bulb as you back away from
the fan?
The KidWind MINI—Blade Design includes a
multimeter. What happens to the voltage or current as you move your turbine further from the fan,
or decrease the wind speed?
Experiment 2: blade design
The amount of power your turbine can produce
depends on blade efficiency. To build efficient
blades, you must capture the wind and reduce
drag as they spin around. Blade design experi-
ments are a fun and engaging way to explore
how design affects power production. The
blades on modern turbines “capture” the wind
and use it to rotate the drive shaft of a generator.
How well you design and orient your blades can
greatly impact how fast the blades spin and how
much power your turbine produces.
If you are doing this for a science fair or school
project, you should focus on just one of these
variables at a time, as your results can get confusing quite quickly.
Can you beat the
engineers?
The red blade set is designed
to be very efficient. If you
are able to design a blade
set that is better than our
red blades, we want to hear
about it! Send us a note at
www.KidWind.org.
You can do a lot of great experiments by isolating blade variables and examining how they
affect the power output of your turbine. Try these
variables to get started:
• blade pitch (angle)
• number of blades
• blade size
• blade materials
• blade shape
After attaching your new blades, try to light the
LED bulb or measure your voltage, current, or
power with a multimeter. How has the efficiency
of your turbine changed? Try a few blade designs to learn what makes blades more efficient.
H
fo
Experiment 3: building a MINI wind farm
A wind farm is a collection of wind turbines in
the same location. This may also be called a
“wind power plant,” because many wind turbines
working together can produce a lot of electricity—just like coal or nuclear power plants. Wind
turbines are often grouped together in wind
farms because this is the most economical way to
generate electricity from the wind.
Examples of a water
pumping turbine and
a modern electricity
generating turbine (not
to scale)
9
Two or more KidWind MINIs can be wired
together to make a MINI Wind Farm!
Connecting turbines
MINI wind farm, wired
in Series
When you connect your various components
together (KidWind MINIs, load, meter, etc.), you
can make more complicated electrical circuits.
There are two ways of connecting components in
a circuit: series and parallel.
A circuit wired in series has components connected end to end, like a chain. The electrons
must travel a single path through all of the various
parts of the circuit.
MINI wind farm, wired
in Parallel
Output of Series Vs.
Parallel
When you have multiple
turbines wired in series, the
voltage should increase with
each additional turbine, but
the current will stay the same.
If you wire the turbines in
parallel, the current will
increase with each additional
turbine, but the voltage will
not change.
10
A circuit wired in parallel provides a different
path for a current to travel through each of the
components. In parallel, each component has a
separate loop.
If you are connecting the KidWind MINIs in
series, connect the wires of the turbines from positive (red wire) to negative (black wire), making
one continuous loop through the circuit.
If you are connecting the turbines in parallel,
connect each positive wind turbine wire (red)
individually to the red lead from the multimeter
or load device. Connect each negative wind
turbine wire (black) individually to the black lead
from the multimeter or load device.
The wires you use to connect your MINI Wind
Farm to various loads act just like the high voltage
transmission lines that bring the electricity of real
wind farms to our homes and schools!
If you use a multimeter to record voltage and cur-
Circuits
rent as you add wind turbines to your wind farm,
you will find some interesting results.
G
G
+
+
+
G
+
G
+
G
DC Generator
(such as your
turbine)
+
G
G
+
+
G
Bulb
+
+
(or other
G
load)
G
Place some objects to act as trees or houses in
front of your MINI and see how the power output
changes. How does this disturbance affect the
turbine output or performance? Some people
want to put wind turbines on the roofs of homes.
Do an experiment and see if you think this is a
good idea. Can you design a shroud around the
turbine to collect more wind? Some inventors think
this might be a good idea. What do you think?
G
G
+
+
+
+
G
G
G
If multiple wind turbines are placed too close
to one another or there are obstructions near a
wind turbine, the efficiency of the turbines will be
reduced.
+
Experiment 4: How does turbulence affect
wind turbines?
Parallel circuit Series circuit
Wind park effect
Each wind turbine extracts some energy from the
wind, so winds directly downwind of a turbine
are slower and more turbulent. For this reason,
wind turbines in a wind farm are typically placed
3–5 rotor diameters apart perpendicular to the
prevailing wind and 5–10 rotor diameters apart
parallel to the prevailing wind. Energy loss due to
the “wind park effect” may be 2–5%.
What effect do you find when you move the
turbines around in your MINI wind farm? Place a
few turbines very close together, or right behind
each other. Do you notice a reduction in the
efficiency of your wind farm?
Here’s an example of a
shrouded wind turbine.
5
7
This wind farm was
designed to minimize
“wind park effect.”
11
More
drag
Less
drag
Tips on Making Blades
Efficient blades are key to maximizing power from
a wind turbine. Sloppy or poorly-made blades
will never produce enough energy to power
anything. It takes time and thought to make good
blades!
An important concept to keep in mind when making turbine blades is drag. Drag, or wind resistance, is the force that opposes the rotation of the
blades. The amount of drag a blade experiences
depends on how fast it is moving through the air
and the surface area of the blade. Faster rotation
means more wind resistance. More surface area
means more wind resistance. Ask yourself, “are
my blades creating too much drag?” If they are
adding drag to your system it will slow down
and—in most cases—low RPM means less power
output.
Tips on improving blades
•Shorten the blades: Wind turbines with longer
blades tend to generate more power. While this
is also true on our small turbines, it is often difficult for students (and teachers) to make large,
long blades that don’t add lots of drag and
inefficiency. Try shortening them a few inches.
•Change the pitch: Students commonly set the
angle of the blades to around 45° the first time
they try to use the turbine. Try making the blades
flatter toward the fan (0°–5°). Pitch dramatically
affects power output, so play with it a bit and
see what happens. You can use a protractor to
measure the pitch.
12
• Use fewer blades: To reduce drag, try using 2, 3, or 4 blades.
• Use lighter material: To reduce the weight of the blades, use less material or
lighter material.
• Smooth surfaces: Smooth blade surfaces create less drag. Try removing
excess tape or smoothing rough edges to reduce drag.
• Find more wind: Make sure you are using a decently sized box or room fan
with a diameter of at least 14”–18”.
• Blades vs. fan: Are your blades bigger than your fan? If the tips of your
blades are outside the fan wind, they are not catching any wind; they are
just adding drag!
• Blade shape: The tips travel much faster than the root and can travel faster if
they are light and small. If you have wide or heavy tips you may be adding
lots of drag.
0°
45°
90°
Finding a way to twist the blades (0° near the tip and around 10°–20° near
the root) can really improve performance.
Caution
Do not touch the blades while they are spinning! They are moving very fast and will hurt
your hand if they hit you.
Do not stand in the “plane of rotation” of the blades (to the side of the blades) in case something hits
them and flies off. Stand in front of or behind the turbine.
Wear safety goggles when the turbine is spinning.
13
The Power in the Wind
If a large truck or a 250lb linebacker was moving
toward you at a high rate of speed, you would
move out of the way, right?
Why do you move? You move because in your
mind you know that this moving object has a
great deal of energy as a result of its mass and its
motion. And you do not want to be on the receiving end of that energy.
Just as those large moving objects have energy,
so does the wind. Wind is the movement of air
from one place to another. That’s the motion part.
What is air though? Air is a mixture of gas molecules. It turns out that if you get lots of them (and
I mean lots of them) together in a gang and they
start moving pretty fast, they can definitely give
you a serious push. Just think about hurricanes,
tornadoes, or a very windy day!
Why aren’t we scared of light winds while we
stay inside during a hurricane or wind storm? The
velocity of those gangs of gas molecules have
a dramatic impact on whether or not we will be
able to stay standing on our feet. In fact, in just
a 20 mph gust you can feel those gas molecules
pushing you around.
Humans have been taking advantage of the
energy in the wind for ages. Sailboats, ancient
windmills, and their newer cousins the electrical
wind turbines, have all captured the energy in the
wind with varying degrees of effectiveness. They
all use a device such as a sail or blade to “catch”
14
the wind. Sailboats use wind energy to propel
them through the water. Windmills use this energy
to turn a rod or shaft.
Swept
area
A simple equation for the power in the wind is
described below. This equation describes the
power found in a column of wind of a specific
size moving at a particular velocity.
r
P=½ ρ (π r2) V3
P = Power in the Wind (watts)
ρ = Density of the Air (kg/m3)
1.2 kg/m3 at sea level and 20ºC
r = Radius of your swept area (m)
V = Wind Velocity (m/s)
π = 3.14
Swept area is the area
of the circle inscribed
by the tips of a wind
turbine’s blades.
From this formula you can see that the size of
your turbine and the velocity of the wind are very
strong drivers when it comes to power production.
If we increase the velocity of the wind or the area
of our blades, we increase power output.
The density of the air has some impact as well.
Cold air is more dense than warm air, so you can
produce more energy in colder climates.
Typical output
The power of wind farms
Typical output for the MINI:
Recall the Power in the Wind equation:
P = ½ ρ (π r ) V
2
3
What are we changing in this equation when we
add wind turbines and create a wind farm? The
density of the air will not change. Adding more
turbines will not change the wind velocity, either.
The part of the equation you are changing is the
swept area (r).
Voltage: 1–4 volts
Amperage: 20–100 milliamps (.020–.1 amps)
If your numbers have come
out much higher than this,
something is amiss. Check
your units!
15
Advanced Calculations
Determining the power output of your KidWind MINI
These calculations are more advanced than just measuring voltage or current
alone and require you to have learned how to use your multimeter properly.
During these calculations, be mindful of the units to which your multimeter is
set. Make sure it is set to volts or amps, rather than millivolts or milliamps. If
you do not use the correct units, your calculations will come out wrong.
The equation for electrical power is shown below:
P=V×I
P = Power in watts
V = Voltage in volts
I = Current in amps
Example:
Your MINI Wind Turbine is producing 3v at 50mA. How much power is
your turbine producing?
P=V×I
P = 3 × .050 A
P = .15 watts
Ohm’s law
Using Ohm’s law, multimeter measurements, and resistors, we can do some
simple calculations to determine current output. The foundation of these
basic electrical computations is referred to as Ohm’s law, after the German
physicist George Ohm. In 1827, Ohm described measuring voltage and
current through simple electrical circuits containing various lengths of wire.
Ohm’s law:
V=I×R
V = voltage in volts
I = current in amps
R = resistance in ohms
16
Using algebra we can rearrange this equation so we can determine the
current from voltage and resistance:
I = V/R
Current= Voltage/Resistance (ohms)
Resistor= 50 ohms
Voltage= 1 volt
I = V/R
I = 1/50 = 0.020 amps = 20 milliamps
Computing power using voltage, current, and resistance
It can be difficult to calculate power by measuring current and voltage
simultaneously. You need two multimeters and lots of clip cords. In certain
situations, we can make this a bit easier using Ohm’s law.
Remember: Power = Voltage × Current
Using substitution of Ohm’s law, we can replace the current measurement
I with V/R and derive the equation below.
P=V×I
P = V × (V/R)
P = (V × V)/R
P = V2/R
If we know the voltage that our turbine is producing and the resistance in the
circuit, we can determine our power output.
Examples:
V = 3 volts
R = 50 ohms
P = V2/R
Power = (32) /50
= 9/50
= 0.18 watt
= 180 milliwatts
Using these equations, you can now easily calculate how much power your
turbine is producing in different experiments.
17
4m
iblade)
Wind Turbine Information
Higher RPM
(150-200)
40 mused for centuries to pump water or move heavy rocks
Windmills have been
to grind seeds into grain. A wind
turbine
is the modern advancement of the
Low RPM
(10-20)
Tail vane
windmill, using the wind to turn an electrical generator instead.
Active yaw control
(computerized)
Wind turbine scale
Gear box
The smallest production wind turbines have a rotor diameter of 1 m and only
produce enough power to charge a few 12 volt batteries­: about 100 watts.
10 whole
kW rated
power
A wind turbine that could power your
house
is still considered “small.”
This wind turbine might have a rotor diameter of 7 m and could produce
10 kW
(10,000
1,500 kW
rated watts)
power in a 25 mph wind.
A Steel
typical
“large” tower
or utility scale wind turbine has a rotor diameter of 80 m
monopole
and stands on a tower 80–100 m tall. This wind turbine could produce
1.5 MW (1,500,000 watts)—enough electricity for about 400 American
homes in a 30 mph wind.
Utility scale turbines are getting bigger and
bigger.
Some turbines today
Guyed
tower
can produce over 5 MW and have a rotor diameter of 126 meters!
Lattice tower
SCALE OF WIND MACHINES
80 m
24 m
12 m
UTILITY SCALE
18
RESIDENTIAL SCALE
WATER PUMPER
1.8 m
YOU
Energy transformations
Wind turbines transform the kinetic energy of the
wind into electricity.
The force of the wind on the blades causes them
to move. Blades are usually shaped like airfoils,
using lift to spin the blades faster than the wind.
The blades and the hub together are called the
rotor. The blades on large utility scale turbines
change their pitch to react to wind speed. The
red blades on your MINI have a fixed pitch,
more similar to a residential scale turbine. With
the crimping hub, you can manually change pitch.
As the rotor turns, it spins a drive shaft which is
connected to a generator. The spinning generator
converts mechanical (rotational) energy into the
electrical energy we use every day. Many large
wind turbines often have a gearbox between the
rotor and the generator, so that the generator can
spin much faster than the blades are spinning.
Generators on large grid-connected turbines spin
at 1200 to 1800 revolutions per minute (RPM).
On the smaller, residential turbines, the rotor and
the generator spin at the same speed, anywhere
from 0–500 RPM since there is no gearbox.
Your MINI does not have a gear box and is
considered a “direct drive” device. That means
you have to get the blades spinning very fast to
create usable power. Large turbine manufacturers
have started to make turbines without gearboxes,
but to do this they need generators with lots of
heavy magnets and wire. This makes the tower
designers job much harder.
Lif
t
The airfoil shape of most
wind turbine blades
uses lift to increase rotor
speed.
Other KidWInd Kits
At KidWind we have other kits
which let you experiment with
gearboxes and winding your
own generators. Check them
out at www.KidWind.org/shop
19
800 Transfer Road, Suite 30B, St. Paul, MN 55114
www.kidwind.org ✦ Phone:877.917.0079
Fax: 208.485.9419
© Copyright 2011 All rights reserved

