Lesson 1 Introduction to Maple Syrup Industry
advertisement
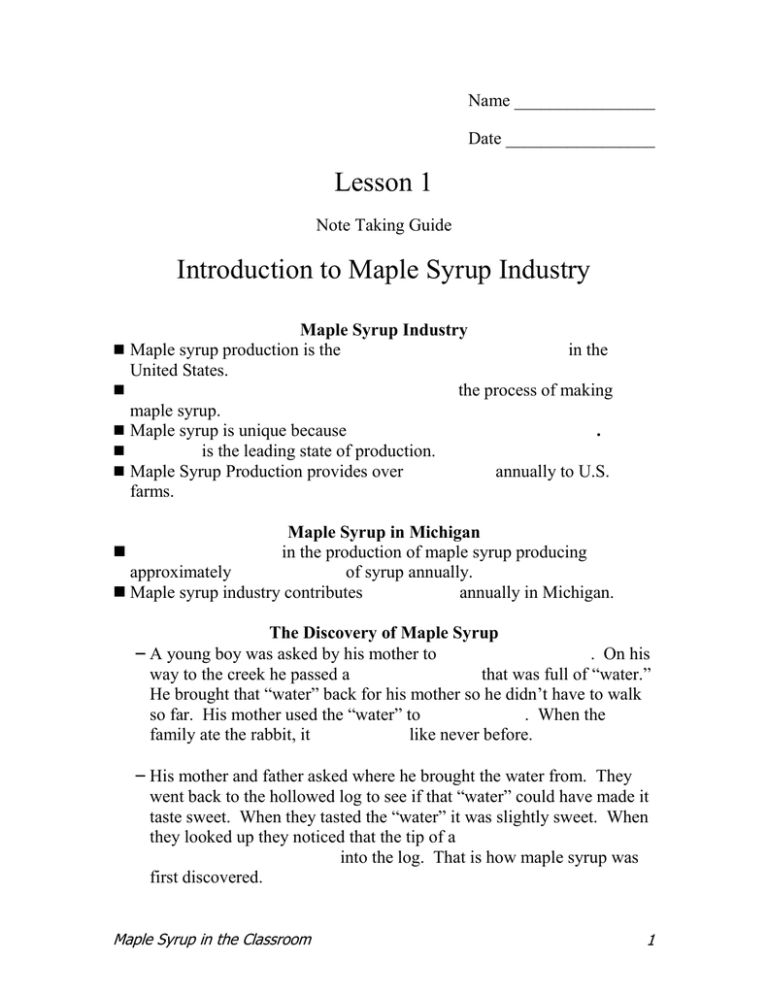
Name ________________ Date _________________ Lesson 1 Note Taking Guide Introduction to Maple Syrup Industry Maple Syrup Industry Maple syrup production is the oldest agricultural enterprise in the United States. Native Americans taught European settlers the process of making maple syrup. Maple syrup is unique because production rarely meets demand. Vermont is the leading state of production. Maple Syrup Production provides over $50 million annually to U.S. farms. Maple Syrup in Michigan Michigan ranks 5th in the production of maple syrup producing approximately 90,000 gallons of syrup annually. Maple syrup industry contributes $2.5 million annually in Michigan. The Discovery of Maple Syrup – A young boy was asked by his mother to fetch a pail of water. On his way to the creek he passed a hollowed out log that was full of “water.” He brought that “water” back for his mother so he didn’t have to walk so far. His mother used the “water” to cook a rabbit. When the family ate the rabbit, it tasted sweet like never before. – His mother and father asked where he brought the water from. They went back to the hollowed log to see if that “water” could have made it taste sweet. When they tasted the “water” it was slightly sweet. When they looked up they noticed that the tip of a maple tree branch was broken and dripping sap into the log. That is how maple syrup was first discovered. Maple Syrup in the Classroom 1 Where and When is Maple Syrup Made? Maple syrup is only produced commercially in the northeastern United States and southeastern Canada. Maple syrup is made during the months of February, March and April. Maple sap runs when there are freezing nights and warm days during late winter and early spring. The Basic Process Select Trees to Tap Tap Trees Collect Sap Boil Sap Test for Finished Syrup Filter and Can Syrup Maple Syrup in the Classroom 2 Name ________________ Date _________________ Lesson 2 Note Taking Guide Tree Anatomy Anatomy of a Tree Crown – Leaves – Branches Trunk – Bark – Cambium Layer – Sap Wood – Heart Wood Roots – Tap Roots – Fibrous Roots Crown The crown is the entire area of the tree that contains branches with leaves. The size and shape of the canopy is effected by the environment and the tree species. The leaves serve as the energy factory for the tree to grow as is it collects the energy from the sun. Maple Syrup in the Classroom 3 Function of Leaves Leaves 1. Photosynthesis is the process by which plants produce their food. 2. The leaf carries out transpiration which is the loss of water and the gas exchange of CO2. 3. The leaf can store some food, which can be transferred to other areas of the plant. Leaves Leaves contain cells full of hloroplasts. Chloroplasts are the ultimate energy factories of the tree. Chloroplasts convert sunlight and carbon dioxide into glucose (sugar) and oxygen in the process of photosynthesis. Cross Section of Leaf Chloroplasts concentrated in Palisade. Xylem and Phloem connect all the way to roots. Maple Syrup in the Classroom 4 Basic Reaction Photosynthesis Balanced Reaction – 6 CO2 + 6 H2O = C6H12O6 + 6 O2 Leaf Parts 1. The blade, which is the main body of the leaf. 2. The petiole, which is the structure which attaches the blade to the stem. 3. The midrib, which is the large central vein down the middle of the leaf. 4. The apex, which is the tip of the leaf. 5. The base, which is the bottom of the leaf and attaches to the petiole, or if a petiole is absent, directly to the stem. (A leaf with no petiole is said to be "sessile.") 6. The margin, which is the edge of the leaf. Types of Leaves 1. Simple leaves which are undivided leaves or have a totally intact blade. 2. Compound leaves which are leaves whose blade is divided into several distinct leaflets. 3. Needle leaves which are narrow, compact leaves such as pine or fir needles. Function of Trunk or Stem Trunk 1. Transports water and nutrients from the roots to the leaves. 2. Supports the leaves of a plant and also the fruit and flowers. 3. Food storage. 4. Diametrical growth in the cambium, where cell division occurs. Maple Syrup in the Classroom 5 Cross Section of Trunk Xylem and Phloem transports water and nutrients throughout the tree. Xylem transports materials up. Phloem transports materials down. Sapwood stores liquid and food produced by the tree. Functions of Roots Roots 1.Absorbs water, oxygen and nutrients (root hairs take up H2O and nutrients). 2.Transports water and nutrients to the stem. 3.Anchors the plant and keeps it in a stable position. 4.Stores food in the form of starch (for example in the taproot of a carrot or turnip). – Note: Maple tree feeder roots start just six inches below the surface of the soil. Maple Syrup in the Classroom 6 Types of Roots 1. The fibrous root system, such as in corn or beans in which the roots branch from the bottom of the plant; or 2. The taproot where a long tapering root, such as in the carrot and dandelions, develops. Is All Sap Equal? Maple Syrup in the Classroom 7 Name ________________ Date _________________ Lesson 3 Note Taking Guide Sap Movement Physiology SAP… Too Move or Not Too Move? Many factors effect sap movement during the syrup season. – Freezing Nights and Warm Days – Minimum and Maximum Temperature – Length of Freeze and Thaw – Availability of Soil Moisture – Sap Sugar Concentration The Details Freezing temperatures cause the gases in the tree (CO2 and O2) to contract causing a negative pressure (vacuum) in the tree. This allows more water (if available) to be absorbed by the roots. Warm temperatures cause the gases to expand creating a positive pressure in the tree. The Details Cont. The taphole allows pressure to escape the tree in the form of gases and liquids (sap). This cycle continues throughout the season. Pressures of up to 50 PSI (pounds per square inch) have been recorded. Maple Syrup in the Classroom 8 Name ________________ Date _________________ Lesson 4 Note Taking Guide Tree Identification Identifying Maple Trees All native species of Maple trees may be used to produce syrup. Maple trees are easily identified even after their leaves have fallen because of their opposite budding pattern and thin twigs. American Beech may also be used as they are part of the maple family. Identifying Maple Trees There are four easily noted tree characteristics that can be used to identify trees when the leaves are not available. – Budding Pattern – Shape of Buds – Shape of Twigs – Bark Pattern Budding Patterns The following are the two common budding patterns found in hardwood (non-coniferous) trees. – Opposite Buds or branches are found directly across from each other. – Alternate Buds or branches are found alternating from side to side. Maple Syrup in the Classroom 9 Alternate Budding Opposite Budding Maple Syrup in the Classroom 10 American Beech Fagus grandifolia Budding Pattern - Alternate Buds - Seven times as long as wide. Twigs - Thin Bark - Silver and smooth. This is the tree many people carve words into. Sugar Maple Acer saccharum Budding Pattern - Opposite Buds - Sharp and pointed. Twigs - Thin Bark - Rough with the long irregular vertical plates that peal away from the trunk. Maple Syrup in the Classroom 11 Red Maple Acer rubrum Budding Pattern - Opposite Buds - Blunt or rounded red buds. Twigs - Thin Bark - Young growth 4-8 inches have smooth light gray bark that gives way to gray or black ridges. Silver Maple Acer saccharinum Budding Pattern - Opposite Buds - Clumps of blunt or rounded red buds. Twigs - Thin Bark - Similar to Red Maple. Maple Syrup in the Classroom 12 Norway Maple Acer platanoides Budding Pattern - Opposite Buds - Blunt or Rounded Twigs - Thin Bark - Smooth bark with a diamond shape pattern similar to an ash tree. – Note: Norway maples are a non-native species planted as ornamental trees and are not commonly used to produce maple syrup. Maple Syrup in the Classroom 13 Name ________________ Date _________________ Lesson 5 Note Taking Guide Tapping and Collecting How Many Taps? Each tree must be measured and evaluated to determine the number of taps to put in the tree. It must also be checked to ensure the tree is healthy enough to be tapped. Tapping guidelines based on diameter of the trunk will provide the basis for this decision. Tapping Guidelines Traditional (Not Recommended) Diameter……….# of Taps 10-15 1 15-20 2 20-25 3 25+ 4 Conservative (Recommended) Diameter……....# of Taps 12-18 1 18+ 2 Tree Diameter Tape Biltmore Stick String Measuring Tree Diameter – Note: When using any method above remember to measure diameter at 4.5 feet from the base of the tree DBH (diameter breast height). Maple Syrup in the Classroom 14 Diameter Tape Wrap tape around tree. Read tape where the “0” mark lines up with the corresponding numbers . Biltmore Stick First establish the point to be measured on the tree, which is 4.5 feet above the ground. Find the “Diameter of Tree (inches)” side of the stick. Stand facing the center of the tree and hold the stick horizontally at arms length (25 inches) so you can see the measurement increment. Line up the zero end of the stick with the left side of the trunk of the tree and look (do not move your head) to the point where the right side of the trunk meets the stick. Maple Syrup in the Classroom 15 – – – – – – Using a String Cut a string 57 inches long. Color the last 19 inches. Wrap the string around the tree. If the uncolored end touches the string in the colored section the tree diameter is between 12 and 18 inches. If the ends of the string do not meet the tree has a diameter larger than 18 inches. If the uncolored end touches the string in the uncolored section the tree diameter is less than 12 inches. Healthy Tree? After identifying the correct trees to tap you must: – Check around the base of the trunk for any visible signs of damage. – Check the crown of the tree for visible signs of die back. – Check the trunk to see if it is hollow. Tree Selection If any of the fore mentioned visible signs of damage or stress are present, select other trees to tap until the tree has had an opportunity to heal. Tapping Procedure Use a clean / sterile 5/16” or 7/16” sharp drill bit. Use slow drill speed. Drill a straight clean hole at a slight 10 degree angle up into the tree. Drill the hole depth not more than 2”. – Tip: Measure up from the tip of your drill bit 2 inches and wrap with a piece of masking tape to use a depth gauge. Setting the Spile Maple Syrup in the Classroom 16 Setting the Spile Place spile in the tree with barb pointing down (plastic spile). Tap in place with hammer so the spile may not easily be pulled out by hand. Be careful not to overdrive the spile causing the bark to split. Plastic Spile in Tree Collecting and Storing Sap Sap should be collected as soon as possible after a run. Sap may be stored in pails on trees or in a large tank. Sap should be stored in a cool location. Sap may be stored up to a couple of days depending on temperature. Sap should be clear like water. If sap becomes cloudy or yellow it should be discarded. Filtering the Sap Sap should be filtered before it is put into a storage tank. Use a wire mesh screen to remove leaves, twigs and insects that may have fallen into the sap buckets. Sap may also be filtered before boiling with a finer cloth filter. Maple Syrup in the Classroom 17 Name ________________ Date _________________ Lesson 6 Note Taking Guide Boiling and Filtering Syrup How much syrup will you make? Jones Rule or Rule of 86 To calculate the number of gallons of sap required to make one gallon of syrup divide 86 by the % sugar content (brix) of the sap measured by a sap hydrometer. 1 % ………………....86 gallons 1.5% ………………..57.33 gallons 2% ………………….43 gallons 2.5% ………………..34.4 gallons 3% ………………….28.6 gallons Making Syrup Sap must be boiled down to concentrate the sugar (sucrose). It will require several hours of boiling to remove the water and concentrate the sap. The hotter the fire the faster the evaporation. Be creative to utilize methods to boil off the water as rapidly as possible, no two sugar houses are the same. Making Syrup Scum may develop on the surface, remove scum with a wire strainer. Bubbles may form very rapidly from time to time until foam overflows the pot. You can use a drop of oil or butter to dissipate the bubbles. Making Syrup You will need to keep adding sap to your pot so you will have enough syrup to filter and can. Maple Syrup in the Classroom 18 – Tip: You will need to boil off approximately 20 gallons of water to get a half gallon of syrup. Watch the pot very closely as you get close to finished syrup. – Tip: Keep a thermometer in the boiling sap. When the temperature starts to rise above 212 degrees you know that you are getting close. Making Syrup Finished (complete) syrup can be tested with: – Hydrometer - 66% sugar or brix – Thermometer - 219 degrees Fahrenheit – Weight - maple syrup weighs 11 pounds per gallon Evolution of Evaporators Hollowed Out Log with Hot Rocks Single Kettle over Open Fire Multiple Kettles over Open Fire Flat Bottom Pan over Open Fire Flat Bottom Pan over an Arch with Stack Modern Evaporator - Flue Pan over an Arch Testing Finished Syrup It is extremely important to correctly measure finished syrup. Syrup that is “under” or not finished will spoil. “Over” syrup will darken in color and sugar will be wasted as it often crystallizes. A hydrometer is the most accurate method for measuring finished syrup. A thermometer is a good indicator when the sap is getting close to syrup and should be monitored closely. Using a Hydrometer Maple Syrup in the Classroom 19 Filtering Syrup Solids of calcium and magnesium called sugar sand precipitate during boiling. Finished syrup must be filtered before canning to remove the sugar sand. Two types of filter will be used. – Paper – Felt Filtering Cont. Secure both the felt and paper filter over a large clean pot. The paper filter should be on top of the felt. Poor the syrup through the filter. – Tip: Filters will need to be moved to expose and utilize all of the filter surface. Filters will also become clogged and need to be cleaned. It is best practice to simply back flush with hot water, dry and reuse. Canning or Bottling Syrup Syrup may be canned in commercial plastic or tin jugs as well as conventional mason jars. Syrup must be at or above a temperature of 180 degrees Fahrenheit. After container is filled and lid is secured it must be turned upside down to sterilize and seal the container. Maple Syrup in the Classroom 20 Name ________________ Date _________________ Lesson 7 Note Taking Guide Cleaning and Sanitizing Equipment Cleaning Equipment All equipment should be cleaned at the end and the beginning of the season. Clean equipment is the key to making quality syrup and preventing bacteria growth. Bacteria causes the sap to spoil as well as the production of darker and off flavor syrup. Cleaning Equipment Clean your pot, storage container and gathering pails throughout the season to make sure they stay sterile. Clean using only warm water during the season. Clean with warm water and a 10% bleach solution at the end of the season. Rinse well to remove all bleach residue. Maple Syrup in the Classroom 21
