How to add descriptive links on Cascade (word)
advertisement

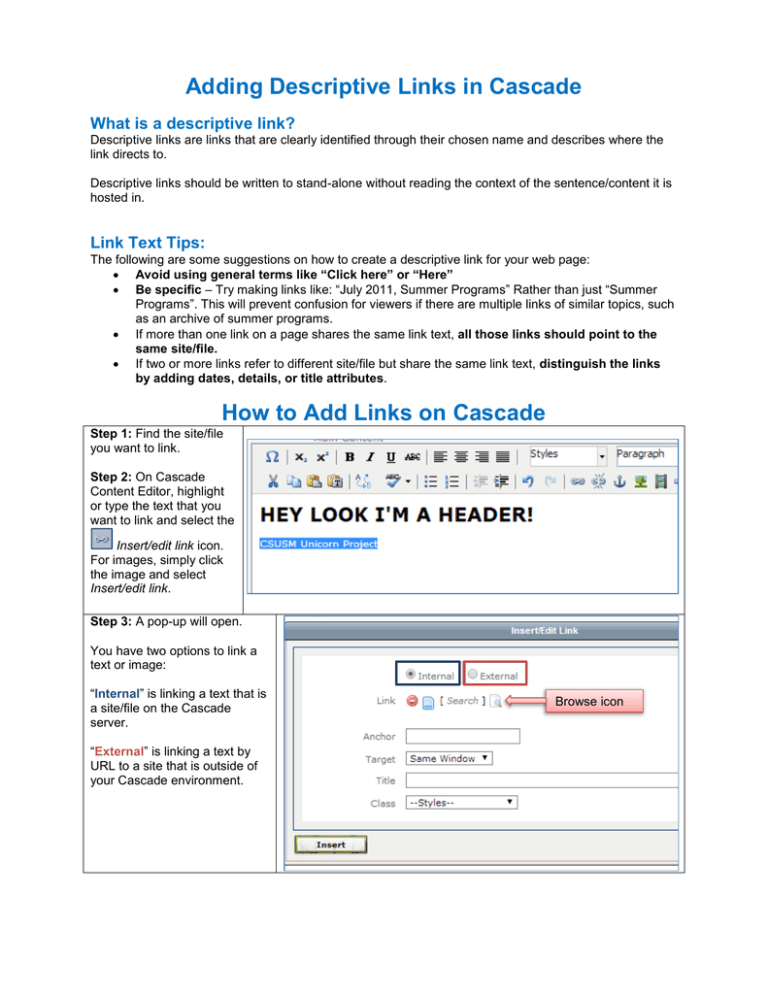
Adding Descriptive Links in Cascade What is a descriptive link? Descriptive links are links that are clearly identified through their chosen name and describes where the link directs to. Descriptive links should be written to stand-alone without reading the context of the sentence/content it is hosted in. Link Text Tips: The following are some suggestions on how to create a descriptive link for your web page: Avoid using general terms like “Click here” or “Here” Be specific – Try making links like: “July 2011, Summer Programs” Rather than just “Summer Programs”. This will prevent confusion for viewers if there are multiple links of similar topics, such as an archive of summer programs. If more than one link on a page shares the same link text, all those links should point to the same site/file. If two or more links refer to different site/file but share the same link text, distinguish the links by adding dates, details, or title attributes. How to Add Links on Cascade Step 1: Find the site/file you want to link. Step 2: On Cascade Content Editor, highlight or type the text that you want to link and select the Insert/edit link icon. For images, simply click the image and select Insert/edit link. Step 3: A pop-up will open. You have two options to link a text or image: “Internal” is linking a text that is a site/file on the Cascade server. “External” is linking a text by URL to a site that is outside of your Cascade environment. Browse icon Step 3A Internal: Select the Browse icon. A Browse pop-up will open where you can look for the site/file that is on the Cascade server to link it to the text. After selecting a site/file, a confirmation window will pop-up. Select Confirm. Step 3B External: Copy and paste the URL to the Link box. Step 4: For Internal and External links! Add a link title. Title is only necessary if two or more links refer to different site/file but share the same link text. Step 5: After adding a link title, select the Insert button. The text is linked and highlighted blue. Step 6: Select the Submit button at the bottom of the Content Editor to finalize your page.


