Notes on Procedure for Experiment No. 29
advertisement
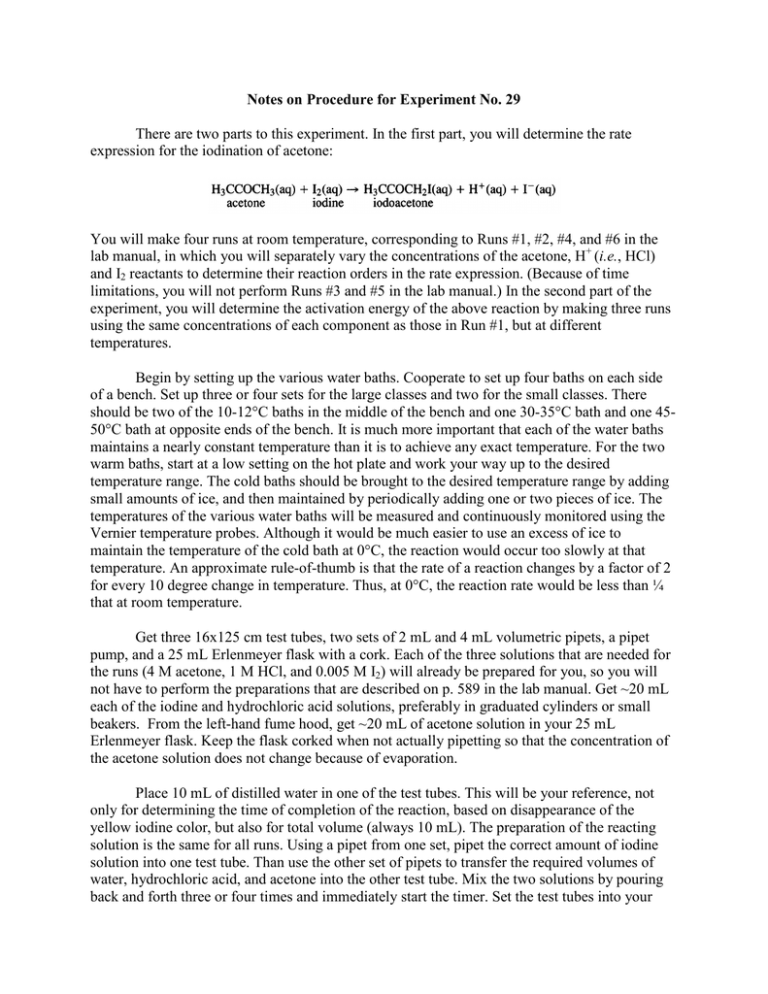
Notes on Procedure for Experiment No. 29 There are two parts to this experiment. In the first part, you will determine the rate expression for the iodination of acetone: You will make four runs at room temperature, corresponding to Runs #1, #2, #4, and #6 in the lab manual, in which you will separately vary the concentrations of the acetone, H+ (i.e., HCl) and I2 reactants to determine their reaction orders in the rate expression. (Because of time limitations, you will not perform Runs #3 and #5 in the lab manual.) In the second part of the experiment, you will determine the activation energy of the above reaction by making three runs using the same concentrations of each component as those in Run #1, but at different temperatures. Begin by setting up the various water baths. Cooperate to set up four baths on each side of a bench. Set up three or four sets for the large classes and two for the small classes. There should be two of the 10-12°C baths in the middle of the bench and one 30-35°C bath and one 4550°C bath at opposite ends of the bench. It is much more important that each of the water baths maintains a nearly constant temperature than it is to achieve any exact temperature. For the two warm baths, start at a low setting on the hot plate and work your way up to the desired temperature range. The cold baths should be brought to the desired temperature range by adding small amounts of ice, and then maintained by periodically adding one or two pieces of ice. The temperatures of the various water baths will be measured and continuously monitored using the Vernier temperature probes. Although it would be much easier to use an excess of ice to maintain the temperature of the cold bath at 0°C, the reaction would occur too slowly at that temperature. An approximate rule-of-thumb is that the rate of a reaction changes by a factor of 2 for every 10 degree change in temperature. Thus, at 0°C, the reaction rate would be less than ¼ that at room temperature. Get three 16x125 cm test tubes, two sets of 2 mL and 4 mL volumetric pipets, a pipet pump, and a 25 mL Erlenmeyer flask with a cork. Each of the three solutions that are needed for the runs (4 M acetone, 1 M HCl, and 0.005 M I2) will already be prepared for you, so you will not have to perform the preparations that are described on p. 589 in the lab manual. Get ~20 mL each of the iodine and hydrochloric acid solutions, preferably in graduated cylinders or small beakers. From the left-hand fume hood, get ~20 mL of acetone solution in your 25 mL Erlenmeyer flask. Keep the flask corked when not actually pipetting so that the concentration of the acetone solution does not change because of evaporation. Place 10 mL of distilled water in one of the test tubes. This will be your reference, not only for determining the time of completion of the reaction, based on disappearance of the yellow iodine color, but also for total volume (always 10 mL). The preparation of the reacting solution is the same for all runs. Using a pipet from one set, pipet the correct amount of iodine solution into one test tube. Than use the other set of pipets to transfer the required volumes of water, hydrochloric acid, and acetone into the other test tube. Mix the two solutions by pouring back and forth three or four times and immediately start the timer. Set the test tubes into your plastic test tube holder. This will give you a white background to better observe the color change and prevent heating the solution due to handling with your warm hands. Watch for the disappearance of the yellow iodine color by looking down through the top of the test tube through the full column of the solution, rather than from the side. In the second part of the experiment, you will perform three runs using the same amounts of the three solutions as were used in Run #1, but at different temperatures. For each of the three runs, after pipetting the solutions into the two test tubes, place them in the appropriate temperature bath for three to four minutes to allow them to reach the bath temperature before you mix them. Then take them out, mix them, start the timer and put the test tube back into the bath. You can save some time by starting the cold one first. The reaction rate in the lowest temperature bath is sufficiently slow that you can get another test tube and do the runs in the two warm baths while the cold one is still reacting. Just keep checking it so that you do not miss the completion time. Accuracy is more important for the runs at different temperatures. Assuming that all of the reaction orders are small whole numbers, for the first four runs you need to measure the completion time accurately enough to determine if the rate was the same, was twice as fast, or was four times as fast, corresponding to reaction orders of zero, one or two. Remember that you are determining the reaction rate in each run by observing the disappearance of the iodine, i.e., -∆[I2]/∆t. When you finish, you will have four sets of data at different temperatures, viz., the three in the cold and warm temperature baths, plus Run #1 at room temperature. When you are finished, put the waste in the jug in the right-hand fume hood. Return the test tubes, flask and cork, pipets, and pipet pump to the trays under the window. Summary of Runs and Volumes of Solutions Run # (lab manual) Iodine vol (mL) Acetone vol (mL) HCl vol (mL) Water vol (mL) Total vol (mL) Temp #1 #2 #4 #6 2 2 2 4 2 4 2 2 2 2 4 2 4 2 2 2 10 10 10 10 RT RT RT RT #8 2 2 2 4 10 RT (–10) #9 2 2 2 4 10 RT (+10) #10 2 2 2 4 10 RT (+20) Note: Because of time limitations, you will skip Runs #3, #5 and #7 in the lab manual, which involve tripling the amounts of the reactants.
