Water Hardness Study
advertisement

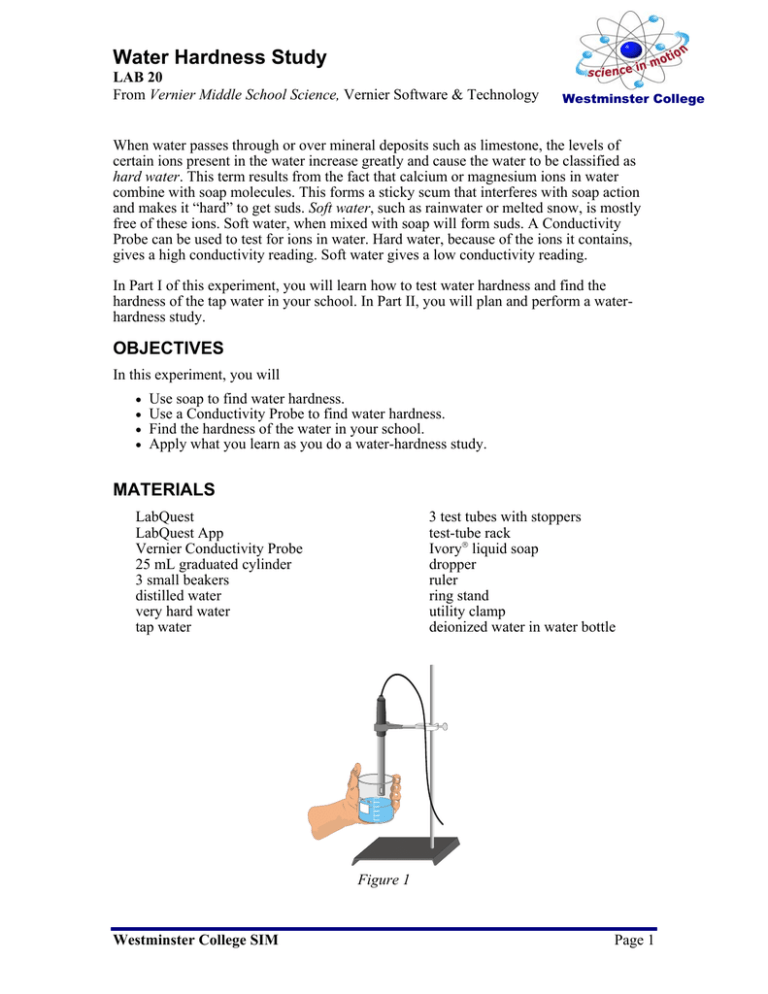
Water Hardness Study LAB 20 From Vernier Middle School Science, Vernier Software & Technology Westminster College When water passes through or over mineral deposits such as limestone, the levels of certain ions present in the water increase greatly and cause the water to be classified as hard water. This term results from the fact that calcium or magnesium ions in water combine with soap molecules. This forms a sticky scum that interferes with soap action and makes it “hard” to get suds. Soft water, such as rainwater or melted snow, is mostly free of these ions. Soft water, when mixed with soap will form suds. A Conductivity Probe can be used to test for ions in water. Hard water, because of the ions it contains, gives a high conductivity reading. Soft water gives a low conductivity reading. In Part I of this experiment, you will learn how to test water hardness and find the hardness of the tap water in your school. In Part II, you will plan and perform a waterhardness study. OBJECTIVES In this experiment, you will • • • • Use soap to find water hardness. Use a Conductivity Probe to find water hardness. Find the hardness of the water in your school. Apply what you learn as you do a water-hardness study. MATERIALS LabQuest LabQuest App Vernier Conductivity Probe 25 mL graduated cylinder 3 small beakers distilled water very hard water tap water 3 test tubes with stoppers test-tube rack Ivory® liquid soap dropper ruler ring stand utility clamp deionized water in water bottle Figure 1 Westminster College SIM Page 1 Water Hardness Study PROCEDURE Part IA Soap Sudsing Tests 1. Place 10 mL of distilled water in one test tube. Place 10 mL of very hard water in a second test tube. Place 10 mL of tap water in a third test tube. 2. Add one drop of Ivory® liquid soap to each test tube and insert the stoppers. Shake each test tube the same number of times. 3. Use a ruler to measure the suds height (in cm) in each test tube. Record the results in the data table. Part IB Conductivity Tests 4. Fill a clean beaker halfway with distilled water. Fill a second beaker halfway with very hard water, and the third beaker halfway with tap water. 5. Set the Conductivity Probe on the 0–2000 µS/cm (microsiemens/centimeter, a unit of electrical conductivity) position. Connect the conductivity Probe 1 to Channel 1 and turn on the LabQuest by pressing the power button. Power Channel Choose New from the File menu. File - New 6. Measure the conductivity for each of the three water samples. a. Raise the beaker until the hole in the probe end is completely submerged in the solution as shown in Figure 1. Swirl the solution briefly. b. Once the reading is steady, record the conductivity reading. c. Before testing the next sample, carefully use a water bottle filled with deionized water to rinse the probe. DATA Suds height (cm) Conductivity (µS/cm) Distilled water Very hard water Tap water Westminster College SIM Page 2 Water Hardness Study Part II A Water Hardness Study 7. Use the skills you gained in Part I and do a study of water available in your community. You might compare surface water (from streams and ponds) with groundwater (from wells and springs). A study of the different bottled waters sold at local stores can also be done. Explain the hardness of the waters you test. Type of Water Sample Suds height (cm) Conductivity (µS/cm) PROCESSING THE DATA 1. Is the tap water hard? Explain how you decided on your answer. 2. Where does your tap water come from? How does that source affect the hardness of the water? 3. How did the hardnesses of the waters you tested in Part II compare? 4. Why is each of the waters you tested in Part II as hard (soft) as it is? EXTENSIONS 1. Study the effectiveness of different water softeners. Westminster College SIM Page 3 Water Hardness Study 2. Study the hardness of tap water at various places in your community. 3. Compare the hardness of hot tap water with the hardness of cold tap water. 4. Find out what makes hard water hard. Westminster College SIM Page 4


