How to Upload Syllabi into Digital Measures
advertisement
How to Upload Syllabi into Digital Measures
Each Fall and Spring, approximately a month or so after the beginning of the semester, you will notice that your teaching schedule has been
entered for you. After that time, you can upload your syllabi for your courses. There are two primary steps in this process:
1. Prepare your syllabi files. Please save your syllabi as PDF files.
2. Upload each syllabus PDF file to the appropriate location in Digital Measures.
Step 1: Prepare Your Syllabi Files
Note: If your syllabi are already saved as PDFs, you may skip this step.
From Word (or whichever application you use to create your syllabi), save the document as a PDF file.
When saving the PDF, be sure to name the file with a descriptive name (e.g., with your last name, course
number, year, such as “MorganF12PSY318.pdf”). Consider the following tips:
Try to keep file names short but meaningful
Avoid using spaces. Underscores (First_second) or capital letters (FirstSecond) are the best
alternative.
Do not use special characters (. < > : " / \ | ? * # @ & ! ^ $ ( ) ; + { } [ ])
Mac users: Be sure to include the file extension in the name (.pdf)
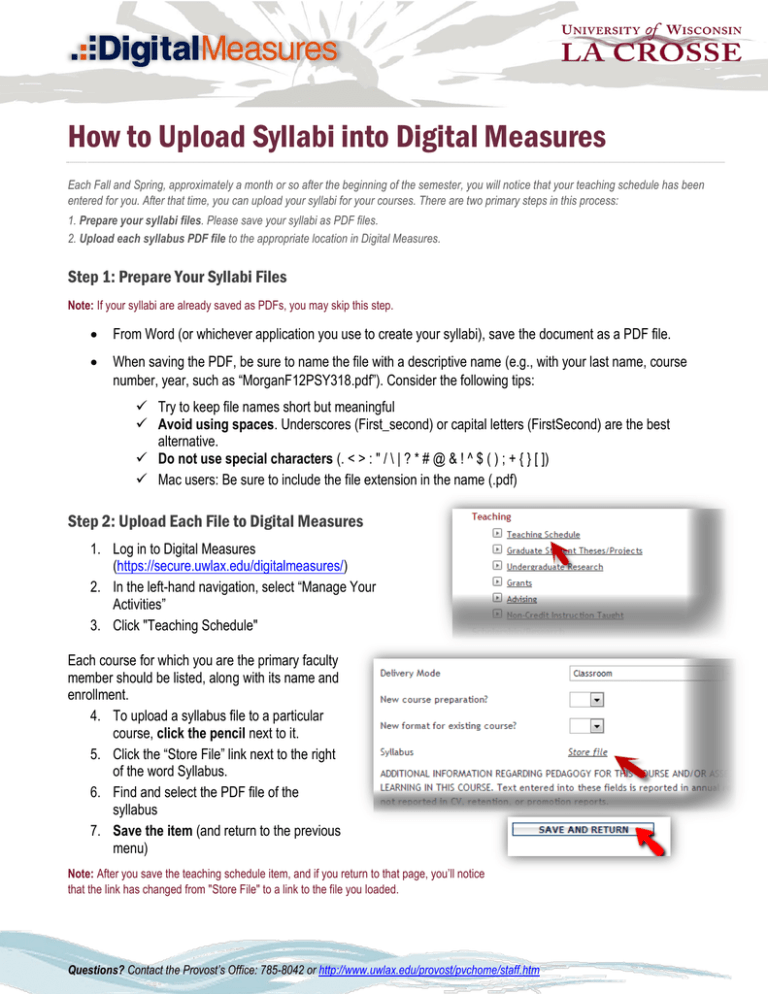
Step 2: Upload Each File to Digital Measures
1. Log in to Digital Measures
(https://secure.uwlax.edu/digitalmeasures/)
2. In the left-hand navigation, select “Manage Your
Activities”
3. Click "Teaching Schedule"
Each course for which you are the primary faculty
member should be listed, along with its name and
enrollment.
4. To upload a syllabus file to a particular
course, click the pencil next to it.
5. Click the “Store File” link next to the right
of the word Syllabus.
6. Find and select the PDF file of the
syllabus
7. Save the item (and return to the previous
menu)
Note: After you save the teaching schedule item, and if you return to that page, you’ll notice
that the link has changed from "Store File" to a link to the file you loaded.
Questions? Contact the Provost’s Office: 785-8042 or http://www.uwlax.edu/provost/pvchome/staff.htm
