What is the difference between red light and blue light?
advertisement
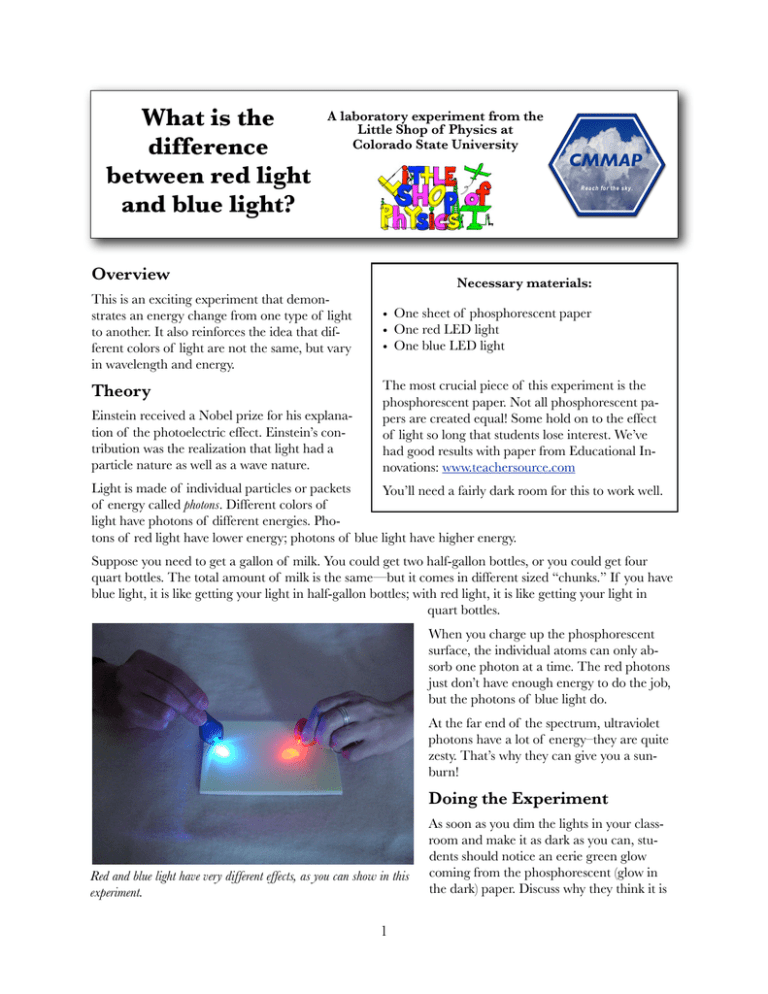
What is the difference between red light and blue light? A laboratory experiment from the Little Shop of Physics at Colorado State University Reach for the sky. Overview This is an exciting experiment that demonstrates an energy change from one type of light to another. It also reinforces the idea that different colors of light are not the same, but vary in wavelength and energy. Theory Einstein received a Nobel prize for his explanation of the photoelectric effect. Einstein’s contribution was the realization that light had a particle nature as well as a wave nature. CMMAP Necessary materials: • One sheet of phosphorescent paper • One red LED light • One blue LED light The most crucial piece of this experiment is the phosphorescent paper. Not all phosphorescent papers are created equal! Some hold on to the effect of light so long that students lose interest. We’ve had good results with paper from Educational Innovations: www.teachersource.com Light is made of individual particles or packets You’ll need a fairly dark room for this to work well. of energy called photons. Different colors of light have photons of different energies. Photons of red light have lower energy; photons of blue light have higher energy. Suppose you need to get a gallon of milk. You could get two half-gallon bottles, or you could get four quart bottles. The total amount of milk is the same—but it comes in different sized “chunks.” If you have blue light, it is like getting your light in half-gallon bottles; with red light, it is like getting your light in quart bottles. When you charge up the phosphorescent surface, the individual atoms can only absorb one photon at a time. The red photons just don’t have enough energy to do the job, but the photons of blue light do. At the far end of the spectrum, ultraviolet photons have a lot of energy–they are quite zesty. That’s why they can give you a sunburn! Doing the Experiment Red and blue light have very different effects, as you can show in this experiment. 1 As soon as you dim the lights in your classroom and make it as dark as you can, students should notice an eerie green glow coming from the phosphorescent (glow in the dark) paper. Discuss why they think it is glowing. Where did the energy come from to produce the glow? Tell them that you are going to give them a special tool to write and draw on the paper. Pass out the blue flashlight and let them experiment with drawing and writing messages on the paper. Have the students notice how the brightness of their messages changes with time. After students have experimented with the blue flashlights, have them predict what would happen if they used a red flashlight on the phosphorescent paper. Have them try this, and discuss. Summing Up This activity is a nice way to transition into energy conservation. The amount of energy that comes out as light can’t be more than the energy that was put in. If you shine your blue light on the surface for a long time, it will charge it up more; the image will persist for a longer time. Another interesting thing: if you shine the red light on a bright spot on the paper, you may find that the spot actually gets dimmer. What is happening is this: if the paper is warm, it glows more brightly. This means the energy is used up faster. Shining the red light on the paper can warm it up right where the red light hits; this will make the surface discharge faster, leaving a dark spot. For More Information CMMAP, the Center for Multi-Scale Modeling of Atmospheric Processes: http://cmmap.colostate.edu Little Shop of Physics: http://littleshop.physics.colostate.edu 2
