Publish a PowerPoint 2003 file to a
advertisement
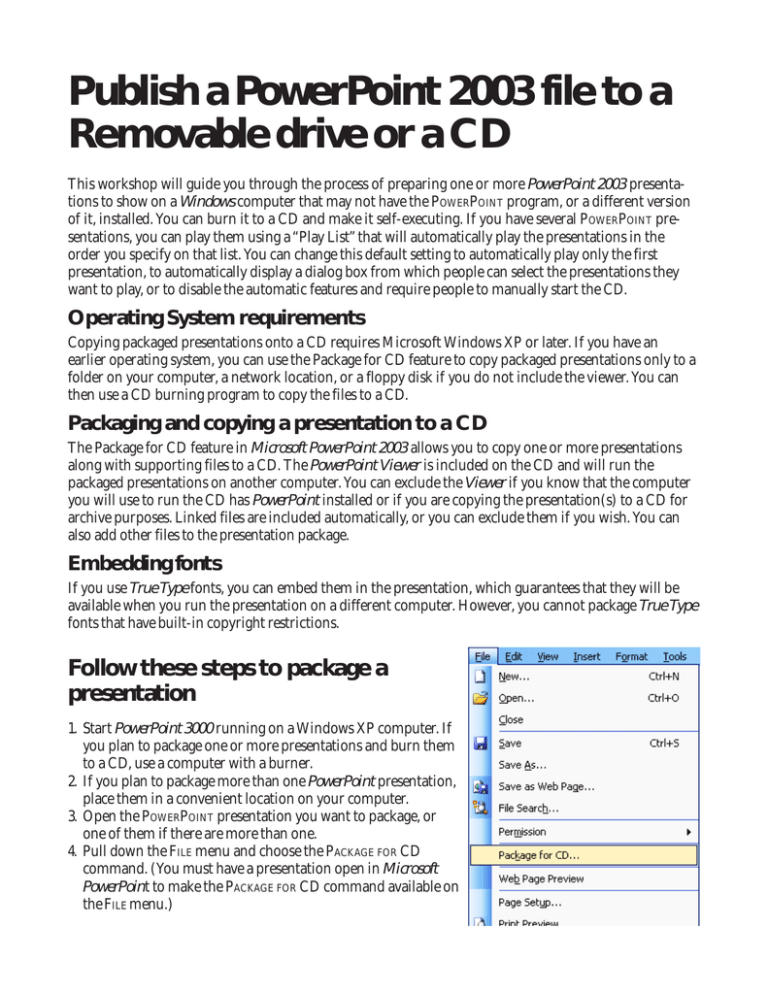
Publish a PowerPoint 2003 file to a Removable drive or a CD This workshop will guide you through the process of preparing one or more PowerPoint 2003 presentations to show on a Windows computer that may not have the POWERPOINT program, or a different version of it, installed. You can burn it to a CD and make it self-executing. If you have several POWERPOINT presentations, you can play them using a “Play List” that will automatically play the presentations in the order you specify on that list. You can change this default setting to automatically play only the first presentation, to automatically display a dialog box from which people can select the presentations they want to play, or to disable the automatic features and require people to manually start the CD. Operating System requirements Copying packaged presentations onto a CD requires Microsoft Windows XP or later. If you have an earlier operating system, you can use the Package for CD feature to copy packaged presentations only to a folder on your computer, a network location, or a floppy disk if you do not include the viewer. You can then use a CD burning program to copy the files to a CD. Packaging and copying a presentation to a CD The Package for CD feature in Microsoft PowerPoint 2003 allows you to copy one or more presentations along with supporting files to a CD. The PowerPoint Viewer is included on the CD and will run the packaged presentations on another computer. You can exclude the Viewer if you know that the computer you will use to run the CD has PowerPoint installed or if you are copying the presentation(s) to a CD for archive purposes. Linked files are included automatically, or you can exclude them if you wish. You can also add other files to the presentation package. Embedding fonts If you use True Type fonts, you can embed them in the presentation, which guarantees that they will be available when you run the presentation on a different computer. However, you cannot package True Type fonts that have built-in copyright restrictions. Follow these steps to package a presentation 1. Start PowerPoint 3000 running on a Windows XP computer. If you plan to package one or more presentations and burn them to a CD, use a computer with a burner. 2. If you plan to package more than one PowerPoint presentation, place them in a convenient location on your computer. 3. Open the POWERPOINT presentation you want to package, or one of them if there are more than one. 4. Pull down the FILE menu and choose the PACKAGE FOR CD command. (You must have a presentation open in Microsoft PowerPoint to make the PACKAGE FOR CD command available on the FILE menu.) 5. The PACKAGE FOR CD dialog displays. Notice the choices. 6. Name the CD (or Folder). If you are burning to a CD, you must be at a computer that has a CD burner. The package for CD feature can copy presentations to a blank recordable CD (CD-R), a blank rewritable CD (CD-RW), or a CD-RW with existing content. If you use a CD-RW disc with content, the content will be overwritten. Add Files 1. Click the ADD FILES button. 2. See the LOOK IN dialog. Browse to the location of your files you want to add. Select the first file you want to add (the one that is open is already on the list), and click the ADD button. 3. Continue to add the files you want on the CD or in the folder. Options choices 1. Click the OPTIONS button and review the choices on this dialog. By default, the PowerPoint Viewer is included. 2. With the VIEWER selected, click the DOWN ARROW opposite the box under SELECT HOW PRESENTATIONS WILL PLAY IN THE VIEWER. You have these choices: Play all presentations automatically in the specified order; play only the first presentation automatically; let the user select which presentation to view; or don’t play the CD automatically. Note: By default, the CD is set up to play all presentations automatically in the order you specify (sometimes referred to as an autorun CD), but you can change this default setting to automatically play only the first presentation, to automatically display a dialog box from which people can select the presentations they want to play, or to disable the automatic features and require people to manually start the CD. Select one of these choices. 3. If you have linked files, select that choice. 4. Embed any TRUETYPE fonts. 5. Notice the HELP PROTECT THE POWERPOINT FILES section that provides you with two places to enter a password. One is to open each file and one is to modify each file. Note When you set passwords in Package for CD, those passwords apply to .ppt, .pot, .pps, and PowerPoint .mht files that have been converted to .ppt files, in the package. The passwords apply to the packaged versions of the presentations only and do not affect passwords you may have set in the original files. You can remove the password before you package the presentation if you want unrestricted access to your packaged presentation. Because the Microsoft PowerPoint Viewer does not allow presentation editing, a password to modify a presentation is ignored when a presentation is viewed. 6. Click the OK button. You are back at the PACKAGE FOR CD dialog. Copy to CD 1. 2. 3. 4. Click the Copy to CD button. The program will prompt you to insert a blank disc in the CD burner. When the program is finished burning the CD, you are finished. Close the program. If the program does not find a CD burner on the computer, you will see the following notice: Copy to a Folder 1. Follow the previous instructions for publishing to a CD. If you are copying to a folder, you may want to select the option to let the user select which presentation to view. 2. Instead of clicking the COPY TO CD button, click on the COPY TO FOLDER button. 3. Specify the name of the folder. 4. Specify the location of the folder. Play the presentation 1. To play the presentation or presentations you have saved in a folder, open the folder and click on pptview.exe to run the VIEWER. 2. Click on the presentation you want to run. 3. See on the following page, a screen picture of the folder contents. At the right, see the files that make up the contents of the folder. Play the CD 1. Put the CD disc in a CD drive. 2. The first presentation starts automatically, and as one finishes playing, the next one begins. 3. You can stop the slide show at any time by pressing the ESC key.
