Document 11456001
advertisement
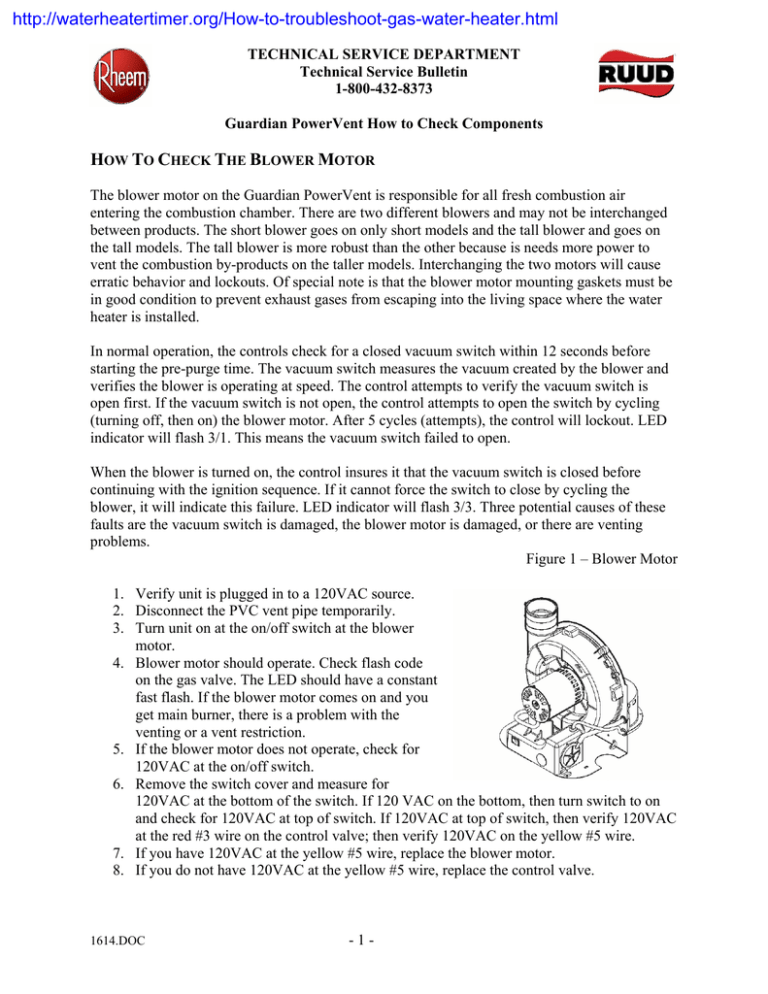
http://waterheatertimer.org/How-to-troubleshoot-gas-water-heater.html TECHNICAL SERVICE DEPARTMENT Technical Service Bulletin 1-800-432-8373 Guardian PowerVent How to Check Components HOW TO CHECK THE BLOWER MOTOR The blower motor on the Guardian PowerVent is responsible for all fresh combustion air entering the combustion chamber. There are two different blowers and may not be interchanged between products. The short blower goes on only short models and the tall blower and goes on the tall models. The tall blower is more robust than the other because is needs more power to vent the combustion by-products on the taller models. Interchanging the two motors will cause erratic behavior and lockouts. Of special note is that the blower motor mounting gaskets must be in good condition to prevent exhaust gases from escaping into the living space where the water heater is installed. In normal operation, the controls check for a closed vacuum switch within 12 seconds before starting the pre-purge time. The vacuum switch measures the vacuum created by the blower and verifies the blower is operating at speed. The control attempts to verify the vacuum switch is open first. If the vacuum switch is not open, the control attempts to open the switch by cycling (turning off, then on) the blower motor. After 5 cycles (attempts), the control will lockout. LED indicator will flash 3/1. This means the vacuum switch failed to open. When the blower is turned on, the control insures it that the vacuum switch is closed before continuing with the ignition sequence. If it cannot force the switch to close by cycling the blower, it will indicate this failure. LED indicator will flash 3/3. Three potential causes of these faults are the vacuum switch is damaged, the blower motor is damaged, or there are venting problems. Figure 1 – Blower Motor 1. Verify unit is plugged in to a 120VAC source. 2. Disconnect the PVC vent pipe temporarily. 3. Turn unit on at the on/off switch at the blower motor. 4. Blower motor should operate. Check flash code on the gas valve. The LED should have a constant fast flash. If the blower motor comes on and you get main burner, there is a problem with the venting or a vent restriction. 5. If the blower motor does not operate, check for 120VAC at the on/off switch. 6. Remove the switch cover and measure for 120VAC at the bottom of the switch. If 120 VAC on the bottom, then turn switch to on and check for 120VAC at top of switch. If 120VAC at top of switch, then verify 120VAC at the red #3 wire on the control valve; then verify 120VAC on the yellow #5 wire. 7. If you have 120VAC at the yellow #5 wire, replace the blower motor. 8. If you do not have 120VAC at the yellow #5 wire, replace the control valve. 1614.DOC -1- TECHNICAL SERVICE DEPARTMENT Technical Service Bulletin 1-800-432-8373 Guardian PowerVent How to Check Components HOW TO CHECK THE VACUUM SWITCH At beginning of a call for heat, the vacuum switch is OPEN. If the blower motor is not working, then check: 1. Vacuum switch tubing is not kinked and connected. 2. Vacuum switch is connected with two red and black wires. 3. Vent over-temperature switch is not activated. 4. The control insures that the vacuum switch is open before it turns on the blower. If the control cannot force the switch to open by cycling the blower, it will indicate this failure. After 5 cycles (attempts), the control will lockout. LED Indicator will flash 3/1 times. Replace vacuum switch. 5. Next, the control insures that the vacuum switch is closed before it turns on the pilot and main burner. If the control cannot force the switch to close by cycling the blower, it will indicate this failure. After 5 cycles (attempts), the control will lockout. LED Indicator will flash 3/3 times. 6. Check venting for obstructions, then….. Figure 2 – Vacuum Switch Assuming the blower motor is running – 1. Verify 120VAC at the red wire to the bottom of the vacuum safety switch. (There should always be 120VAC at this wire, even when the unit is in stand-by mode.) 2. Measure 120VAC at the blue wire on the vacuum safety switch. 3. If there is no power at the blue wire, then verify blower motor draft of 0.75 inches w.c. with a magnahelic gauge. Replace vacuum safety switch if there is at least .75 inches w.c. Otherwise, replace the blower motor. HOW TO CHECK THE THERMISTOR (TEMPERATURE SENSOR) The temperature sensing mechanism is electronic; not mechanical. The thermistor is nothing more than a resistor installed in the temperature sensing bulb of the control valve. As the water temperature cools, the thermistor will increase its resistance value (in thousands of OHMS). The control module knows that a specific resistance value is equal to a specific water temperature. Eventually, the resistance value gets so high that is causes the electronic control module to demand heat and start a cycle. As the water is heated, the resistance value in the thermistor drops. The resistance value is based on temperature; so when the water gets to the proper temperature (a known resistance value), the control module ends the demand for heat. Eventually, the resistance value gets so high that is causes the electronic control module to demand heat and start a cycle. As the water is heated, the resistance value in the thermistor 1614.DOC -2- TECHNICAL SERVICE DEPARTMENT Technical Service Bulletin 1-800-432-8373 Guardian PowerVent How to Check Components drops. The resistance value is based on temperature; so when the water gets to the proper temperature (a know resistance value), the control module ends the demand for heat. Verify temperature calibration: Measure the resistance value of the thermistor by measuring between the two white wires of the red Molex connect. Make sure the connector is not attached to the control module or you will get a false reading. Verify thermistor is good with an Ohms resistance test. At room temperature, resistance is approximately 10.4 k Ohms (10,400 Ohms S). 1. Remove the red Molex plug. Measure the Ohms resistance value between the two white wires on the plug. 2. If there is no resistance at all, then replace the gas control valve. 3. If there is any resistance, then the thermistor is probably OK. The actual resistance during this Ohms check will be determined by the temperature of the water. If you introduce cold water into the tank, you will see a change in the resistance. Figure 3 – Thermistor and ECO Check HOW TO CHECK THE ECO (ENERGY CUT-OFF) The ECO is a one time use safety device that trips at 200°F. Verify ECO is good by doing a continuity check between the two red wires at the red Molex connector. Continuity means the one time use ECO is not tripped. Lack of continuity means the one time use ECO is tripped. Replace the control valve. Remove the red Molex connector before conducting the continuity test. 1. Remove the red Molex plug. Measure the continuity between the two red wires on the plug. 2. If there is no continuity at all, then replace the gas control valve. 3. If there is continuity, then the ECO is OK. HOW TO CHECK THE GAS CONTROL VALVE Pilot Side of Gas Valve - Ignition attempt by the control board means you should be hearing the spark ignitor along the orange wire. Check to make sure the valve is turned ON. At the same time, 120V opens pilot vein of gas valve. You will have 120V at the yellow #7 pilot valve wire. If you have 120V and there is gas vacuum, then you must have a pilot flame. If not replace the control valve. The "trial for ignition" will last for 75 seconds. The unit will try 3 times total for ignition, it will initiate a post-purge (30 seconds) to clear the combustion chamber, and then go into lockout. LED indicator will flash 1/1 times. 1614.DOC -3- TECHNICAL SERVICE DEPARTMENT Technical Service Bulletin 1-800-432-8373 Guardian PowerVent How to Check Components Main Valve Side of Gas Valve - After pilot flame has been recognized (rectified), the spark will stop and main valve is energized. Check to make sure the valve is turned ON and you have a pilot flame. You will have 120V at the blue#6 main valve wire. If you have 120V and there is gas vacuum and a pilot flame, then you must have main burner flame. If not replace the control valve. The control mechanism is a replaceable part. However, proper troubleshooting must be used to distinguish between the board and the gas valve mechanisms. The gas valve control board logic is proprietary to Rheem. Three times (cycles) and the valve locks out on the respective code. In some instances, the control will reset by cycling the power to the control valve. Figure 4 – FV Wiper Gas Control HOW TO CHECK THE VENT OVER TEMPERATURE SAFETY SWITCH Blower motor thermal safety switch (vent over temperature) is set to 180°F with automatic reset. It is wired in series after the vacuum safety, and before the control module. If the sensor does not cool, there will be no power to the blue #8 terminal on the control valve. Without power at the blue #8, the control module will not forward power to the pilot side of the gas valve. After cycling, there is no flame rectification and will force a lockout (1/1 flash – Ignition Failure). Verify continuity through the thermal safety switch. IF no continuity, then switch is open. Cool the switch to reset. 1. Remove the on/off switch cover panel. 2. Disconnect the blue wire to the vacuum safety switch. 3. Disconnect the Molex plug. 4. Measure continuity along the blue wire from the spade terminal to the Molex plug. The vent over-temperature switch is a normally closed switch. You should have continuity. The switch is good. 5. If you do not have continuity, then cool the over temp switch. You can accelerate this process with a cold rag placed on the switch. Once the switch cools to less than 180°F, you will get continuity. If not, replace the switch. Figure 5 – Vent Over Temperature Safety Switch 1614.DOC -4- TECHNICAL SERVICE DEPARTMENT Technical Service Bulletin 1-800-432-8373 Guardian PowerVent How to Check Components HOW TO CHECK THE IGNITOR Checking the ignitor is accomplished by first listening for the ‘sparking’ sound. It sounds like a rapid ticking. Listen for the spark ignitor. If you do not hear spark, verify 120V at the blue #8 wire, and then blue #6 pilot wire on the control. If you have blower motor and power, but do not hear the sparking sound, then replace the control module. 1. If you hear spark, then reset heater. Using insulated pliers, remove the orange cable from the control. 2. When you hear spark again, slowly move the orange wire terminal back to the control and verify spark with at least 1/8 inch gap. 3. If there is no spark, then replace the control. 4. If there is spark, turn heater off and verify continuity of orange wire. 5. Check ignitor gap of 1/8 inch between probe and hood. Check ignitor for cracks and other damage. Replace ignitor assembly Figure 6 – Ignitor Assembly HOW TO CHECK THE ELECTRONIC GAS CONTROL Checking the electronic gas control is a function of “power in means power out”. If the unit is plugged into an electrical source and turned on at the on/off switch, then there is always power to the control module. Verify 120V at the red #3 wire position. If there is power at this location, then the control module is receiving 120VAC and must work. You should be hearing spark and have pilot and main burner. If you see a steady, solid green light on the LED, then the control has failed its internal self diagnostics. Each time there is a call for heat, the control module performs a self check. If it fails this check, then replace the gas control valve Figure 7 – Gas Valve Connections 1614.DOC -5-
