Creating Folders in Foliotek
advertisement

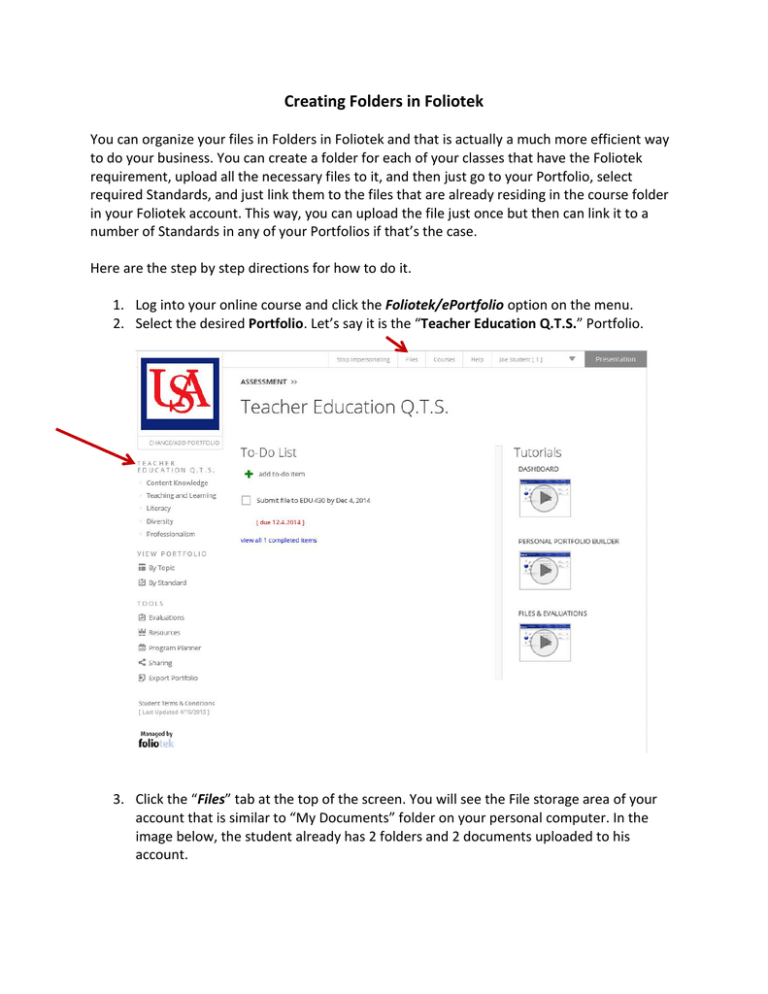
Creating Folders in Foliotek You can organize your files in Folders in Foliotek and that is actually a much more efficient way to do your business. You can create a folder for each of your classes that have the Foliotek requirement, upload all the necessary files to it, and then just go to your Portfolio, select required Standards, and just link them to the files that are already residing in the course folder in your Foliotek account. This way, you can upload the file just once but then can link it to a number of Standards in any of your Portfolios if that’s the case. Here are the step by step directions for how to do it. 1. Log into your online course and click the Foliotek/ePortfolio option on the menu. 2. Select the desired Portfolio. Let’s say it is the “Teacher Education Q.T.S.” Portfolio. 3. Click the “Files” tab at the top of the screen. You will see the File storage area of your account that is similar to “My Documents” folder on your personal computer. In the image below, the student already has 2 folders and 2 documents uploaded to his account. 4. Click the “New Folder” button. Type a name for your folder (e.g., EDU 340) and click OK. 5. Now that we have a folder for our EDU 340 class, we need to upload files to it. Click on the name of the folder. 6. There are no files yet in the folder as you can see in the image below, just a navigation button [Up one level] that will take you back to the top level of the Files area. Click the “add” button with a green plus sign in front of it. 7. In the “Add File” window, the “Upload new file” radio button will be selected by default as shown below. Click “next.” 8. Now click on the “Add Files” button but be patient. It is actually a hot spot that is supposed to work not only with personal computers but also with tablets, notepads, and other touch screen devices, so move your cursor around and click it only when your curser icon changes from a beam to a pointing finger. 9. Your navigation window will open and you need to find the files you must upload to Foliotek on your computer or external drive devices. In this example, they are located in the “Foliotek Practice” folder. 10. Select the file you need (e.g., “MindMaps.docx) and click Open. The file will be loaded and listed above the “Add Files” button. 11. Let’s say we need to upload more files. You can add several files at once saving a lot of time on this task. Click the “Add Files” button once again and select several files in your browsing window using the keyboard shortcuts: pressing the Shift key and selecting the first and the last of desired adjacent files or pressing the Ctrl key and clicking all desired non-adjacent files. The files will be selected as shown below. 12. Click the “Open” button. 13. The selected three files will be uploaded and listed in your window as shown in the image above. If you are done with your file uploading, click the green “OK” button. 14. You will return to your “Files” view and see all your folders and separately uploaded files. Now you need to link your standards to the appropriate files that you have uploaded to Foliotek. Click the “ASSESSMENT” option at the top of the screen and then a corresponding category on the left hand menu. Let’s say it’s the Teaching and Learning category. 15. Once you spot the correct standard to which you are expected to upload a file, just click on it. In the example below it’s the third standard on the list. 16. We start by clicking the “Add File” button. (It doesn’t matter whether you use the “green plus” button or the “blue plus” button, they work the same.) 17. Now you need to pay attention and make the right choice. Since we have already uploaded the necessary files to our “Files” area, we need to check the second radio button – “Add existing file.” 18. The window that will open will take you to the “Files” view and you will be able to see all your folders and uploaded files. Let’s click our EDU 340 course folder to find our files. 19. To link 2 files at a time to the same standard, just check the boxes next to the desired files and click the green button “Add selected files.” 20. You see now both files listed under the selected Standard as shown below. If you linked any of the files by mistake, you can always check the box next to them and click the “remove selected file(s)” button to un-link them. That will not delete your file from your Foliotek account, it will just remove the connection from that file to this standard, so you can connect the file to another, appropriate standard later, without having to upload it again. To permanently delete an uploaded file, you need to disconnect it from all standards, go to your “Files” area, and delete it there. 21. When we click on our Teaching and Learning category on the left hand menu, we see the number of files we uploaded (connected) to the third standard and the date and time when we did it. Always check this view to make sure you completed the process. NOTE: You can easily move your files from one folder to another when you are in the “Files” area. Just select your file or files by checking their boxes, click the “move selected” button and choose the new destination folder from the dropdown list in the Folder Name field. Click OK and you are done.


