IRM-S01BN LED STROBE LIGHT
advertisement
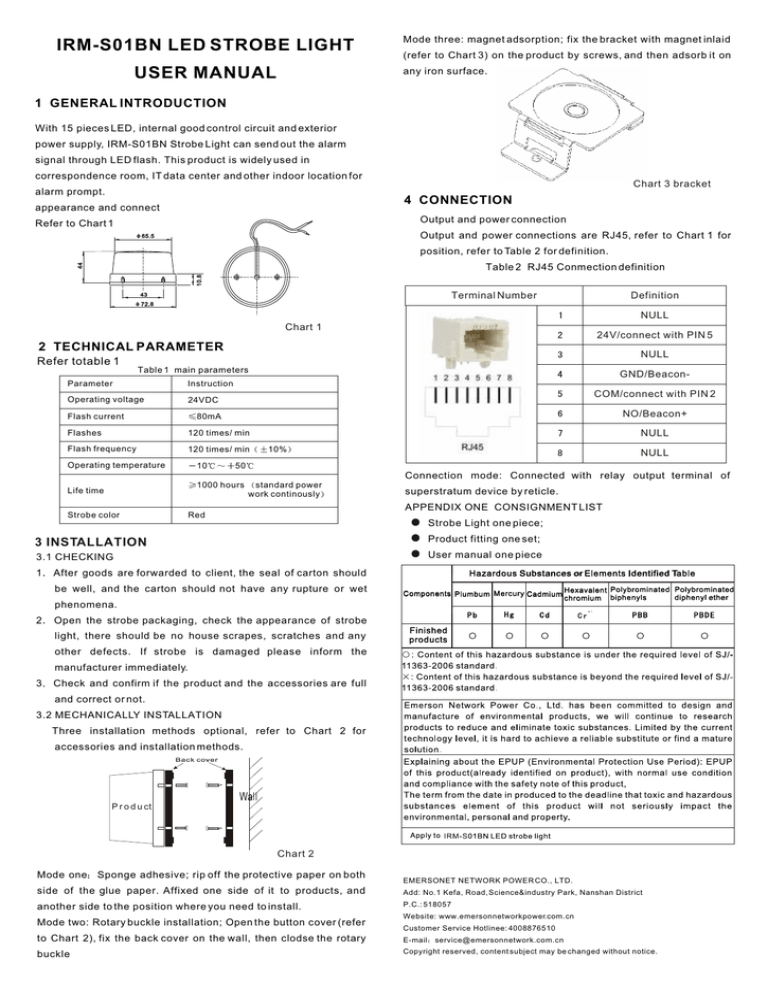
IRM-S01BN LED STROBE LIGHT USER MANUAL Mode three: magnet adsorption; fix the bracket with magnet inlaid (refer to Chart 3) on the product by screws, and then adsorb it on any iron surface. 1 GENERAL INTRODUCTION With 15 pieces LED, internal good control circuit and exterior power supply, IRM-S01BN Strobe Light can send out the alarm signal through LED flash. This product is widely used in correspondence room, IT data center and other indoor location for alarm prompt. Chart 3 bracket 4 CONNECTION appearance and connect Output and power connection Refer to Chart 1 Output and power connections are RJ45, refer to Chart 1 for position, refer to Table 2 for definition. Table 2 RJ45 Conmection definition Terminal Number Definition NULL Chart 1 24V/connect with PIN 5 2 TECHNICAL PARAMETER Refer totable 1 NULL Table 1 main parameters Parameter Instruction Operating voltage 24VDC Flash current GND/BeaconCOM/connect with PIN 2 NO/Beacon+ 80mA Flashes 120 times/ min Flash frequency 120 times/ min Operating temperature 10 NULL 10% NULL 50 Connection mode: Connected with relay output terminal of 1000 hours Life time Strobe color standard power work continously superstratum device by reticle. APPENDIX ONE CONSIGNMENT LIST Red Strobe Light one piece; 3 INSTALLATION Product fitting one set; 3.1 CHECKING User manual one piece 1 After goods are forwarded to client, the seal of carton should be well, and the carton should not have any rupture or wet phenomena. 2 Hazardous Substances or Elements Identified Table Polybrominated Polybrominated Components Plumbum Mercury Cadmium Hexavalent diphenyl ether chromium biphenyls Open the strobe packaging, check the appearance of strobe light, there should be no house scrapes, scratches and any Finished products other defects. If strobe is damaged please inform the manufacturer immediately. 3 Check and confirm if the product and the accessories are full and correct or not. 3.2 MECHANICALLY INSTALLATION Three installation methods optional, refer to Chart 2 for accessories and installation methods. P r o d u ct Chart 2 Mode one Sponge adhesive; rip off the protective paper on both EMERSONET NETWORK POWER CO., LTD. side of the glue paper. Affixed one side of it to products, and Add: No.1 Kefa, Road, Science&industry Park, Nanshan District another side to the position where you need to install. P.C.: 518057 Mode two: Rotary buckle installation; Open the button cover (refer Website: www.emersonnetworkpower.com.cn Customer Service Hotlinee: 4008876510 to Chart 2), fix the back cover on the wall, then clodse the rotary E-mail service@emersonnetwork.com.cn buckle Copyright reserved, content subject may be changed without notice.
