Adding Files in Resources

Adding Files in Resources
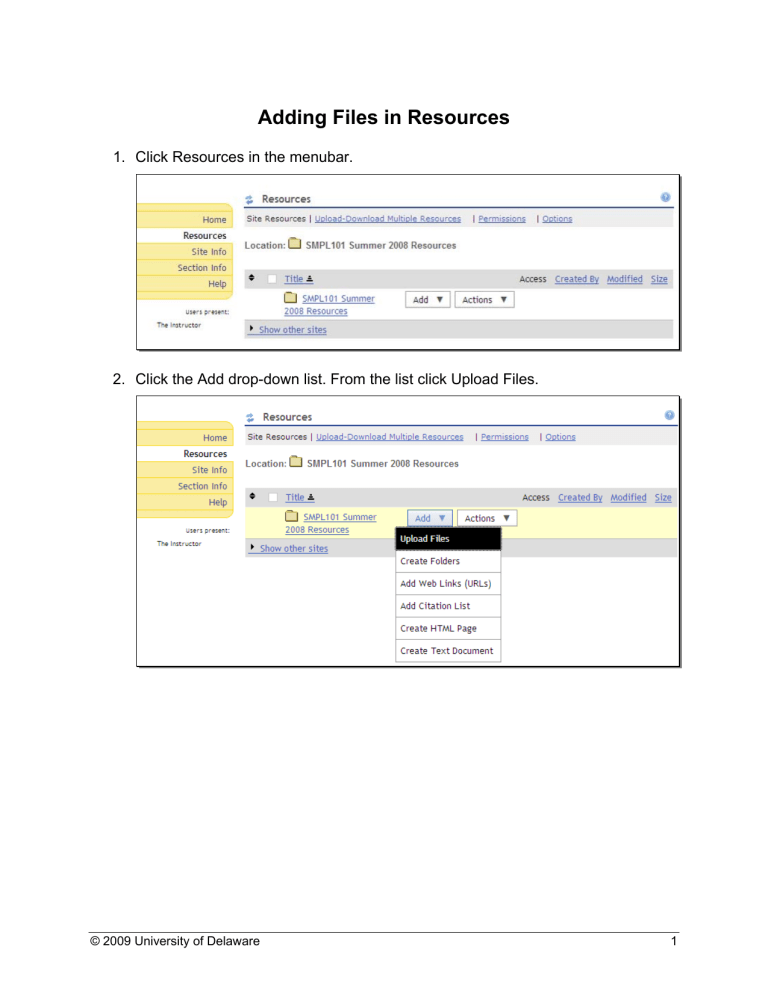
1. Click Resources in the menubar.
2. Click the Add drop-down list. From the list click Upload Files.
© 2009 University of Delaware 1
3. Click Browse. Select a file on your computer. Click Open.
© 2009 University of Delaware 2
4. If you want to add more than one file, click Add Another File and repeat the process above. Click Upload Files Now when you are finished selecting files.
5. You might want to notify your students when you have uploaded new resources.
There are several email notification options:
•
None is the default behavior
•
Low priority respects student email notification preferences set in their My
Workspace Preferences.
•
High priority notifies every participant regardless of their preferences.
© 2009 University of Delaware 3
6. You can also create folders in Resources. They provide a good way to organize your content by week, module or type of content.
7. Click the Add drop-down list and select Create Folders.
8. Type a Folder Name. If you want to add more than one folder, click Add Another
File and type another name. Click Create Folders Now button when you are finished naming folders.
© 2009 University of Delaware 4
9. Once you have created at least one folder, you can move files from one to the other. Check the files you want to move. Click the Move option.
10. Click the Paste moved items icon ( ) next to the folder to which you want to move the selected file(s). The file will appear in the new folder (notice the indentation from the other file).
© 2009 University of Delaware 5
© 2009 University of Delaware 6


