Folie 1 - Classes - Oregon State University
advertisement
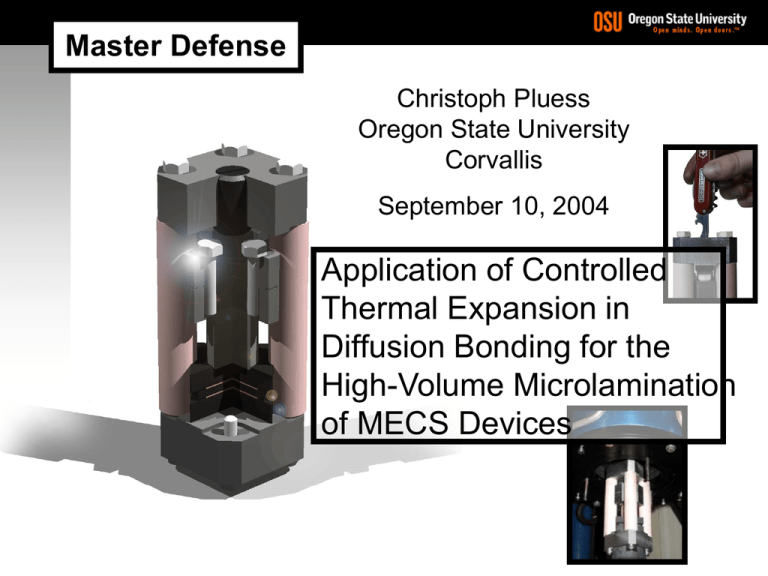
Master Defense Christoph Pluess Oregon State University Corvallis September 10, 2004 Application of Controlled Thermal Expansion in Diffusion Bonding for the High-Volume Microlamination of MECS Devices 1 of 36 Table of Contents Introduction Literature & Patent Review Theoretical Concept & Device Design Finite Element Analysis (FEA) Experimental Approach Results & Conclusions Questions & Discussion 2004 Christoph Pluess 2 of 36 Introduction Bulk m-Fluidic Devices (MECS) 2004 Christoph Pluess 3 of 36 Introduction Microlamination (Paul et al., 1999) Patterning • Laser Micromachining • Chemical Etching Registration • Pin Alignment • TEER (Thermal Enhanced Edge Registration) t p T p Bonding • Diffusion Bonding • Diffusion Brazing OSU Device 2004 Christoph Pluess 4 of 36 Introduction Why is this topic relevant? Example: Solid-State Diffusion Bonding within a Vacuum Hot Press Vacuum Hot Press, Nano/Micro Fabrication Facility Production Capability: • Pump-down: 0.75-1h • Ramp-up: 0.75-1h • Bonding: 0.5-1h • Cool-down: 2-3h Cycle Time: 4-6h 2004 Christoph Pluess 5 of 36 Introduction Why is this topic relevant? Example: Solid-State Diffusion Bonding within a Vacuum Hot Press Device Size: • Large Substrate MECS Devices • Large Hot Press System ($) • Pressure Uniformity Vacuum Hot Press, Nano/Micro Fabrication Facility 2004 Christoph Pluess 6 of 36 Introduction Using thermal expansion? Possible solution? Conveyor Furnace “Sequoia”, MRL Industries DCTE Fixture • DCTE, free source of pressure • low expanding frame • high expanding inner parts Continouous Furnace System • Similar to microelectronics industry • high-volume microlamination 2004 Christoph Pluess 7 of 36 Introduction DCTE Bonding Fixture • Is this a plausible approach for microlamination? • Can a particular fixture design provide control over: • Pressure magnitude? • Pressure timing? • Pressure sensitivity? 2004 Christoph Pluess 8 of 36 Literature & Patent Review Is this idea unique? • Use of thermal expansion for pressure application first stated by PNNL in 1999 • Most papers/publications try to minimize effects of thermal expansion • Patents where thermal expansion is used to apply pressure/force: • Clamping ring for wafers • Belt press using DCTE US 5,460,703 (1995) US 6,228,200 (2001) 2004 Christoph Pluess 9 of 36 Literature & Patent Review Is this idea unique? Patent Application Publication US 2003/0221777 A1 McHerron et al. International Business Machines Corp. (IBM) Method and Apparatus for Application of Pressure to a Workpiece by Thermal Expansion 2003, McHerron, IBM 2004 Christoph Pluess 10 of 36 Literature & Patent Review IBM Patent Application • Lamination of multilayer thin film structures (MLTF) • Use for continuous production and high throughput • Reduction of capital expenditures for lamination of MLTF • Is this a plausible approach for microlamination? • Can a particular fixture design provide control over: • Pressure magnitude? • Pressure timing? • Pressure sensitivity? 2004 Christoph Pluess 11 of 36 Theoretical Model Theoretical Study and Model Development Gap closure function: Resulting strain in zdirection: Resulting pressure in zdirection : g (T ) g0 Dz(T ) g0 (e,i ze,i f ,i z f ,i ) (T TR ) total g (TB ) h f Dz f (TB ) lam total Elam 2004 Christoph Pluess 12 of 36 Theoretical Model Sensitivity Analysis Applying reasonable material properties and sizes: • initial gap variations of 1mm pressure change 1.6 MPa assumed accuracy with feeler gage 5mm 8.0 MPa Geometrical Sensitivity: 1.6 MPa/mm • temperature fluctuations of 5°C pressure change 4.7 MPa Thermal Sensitivity: 0.94 MPa/°C • Lowering thermal sensitivity increases geometrical sensitivity • Lowering geometrical sensitivity increases thermal sensitivity 2004 Christoph Pluess 13 of 36 Fixture Concept Pressure Timing: Initial gap adjustment Low expanding fixture frame High expanding engagement block Pressure Magnitude: Preloading and force storage with spring elements Pressure Sensitivity: Spring constant 2004 Christoph Pluess 14 of 36 Fixture Design Fixture Frame: Initial gap setting Inner Parts: Load Cell Bonding Platens Inconel Disc Springs Engagemen t Block Cu Laminae • Designed to fit in hot press ( 3”) • Max. service temperature 800°C • Bonding area 25x25mm (2 stations) 2004 Christoph Pluess 15 of 36 Fixture Model (FEM) Purpose of FE-Model • Validation of developed fixture design • Proof of feasibility • Theoretical assessment of pressure magnitude, timing and sensitivity 2004 Christoph Pluess 16 of 36 Fixture Model (FEM) Expansion Behavior (in zdirection) • gap closure function: Dz gap Dze (T ) Dz f (T ) 1.056mm / C 0.665mm / C 0.391mm / C DT DT 2004 Christoph Pluess 17 of 36 Fixture Model (FEM) p-Timing, p-Magnitude, p-Sensitivity D FEM (T ) Dp 0.13MPa 0.0065MPa / C DT 20C • 150 times less sensitive than simple fixture model (0.94MPa/°C) 2004 Christoph Pluess 18 of 36 Fixture Simulation 2004 Christoph Pluess 19 of 36 Experimental DCTE-Fixture Prototype 2004 Christoph Pluess 20 Experimental Experimental Overview Validation Experiments Test Article Orientation Means and 95.0 Percent Confidence Intervals 5.2 4.7 Deflection of 36 4.2 3.7 3.2 2.7 0 90 Orientation 2004 Christoph Pluess 21 of 36 Experimental Experimental Overview Validation Experiments Test Article Orientation Load Cell Validation • Theoretical: 10’960 N/mm • Practical: 11’215 N/mm (+2.3%) 2004 Christoph Pluess 22 of 36 Experimental Experimental Overview Validation Experiments Test Article Orientation Load Cell Validation p-Uniformity Bonding Platens • Fuji Pressure Sensitive Film before: 3.0 3.5 4.0 4.5 5.0 5.5 6.0 MPa after: 3.0 3.5 4.0 4.5 5.0 5.5 6.0 MPa 2004 Christoph Pluess 23 of 36 Experimental Experimental Overview Validation Experiments DT 0° C 300°C Test Article Orientation Load Cell Validation p-Uniformity Bonding Platens 400°C p-Timing during Lamination 600°C 800°C • Experimental • Theoretical (FEM) 2004 Christoph Pluess 24 of 36 Experimental Experimental Overview Validation Experiments • At low temperature (180°C): Test Article Orientation Load Cell Validation p-Uniformity Bonding Platens p-Timing during Lamination p-Timing of DCTE-Fixture g0=0mm g0=30mm g0=50mm g0=70mm • T-limit of Fuji film 180°C • No contact situation with g0 > 63mm based on theoretical model • Experimental validation of DCTEFixture at low temperature! • Uniform pressure distribution 2004 Christoph Pluess 25 of 36 Experimental • T-profile optimization by Experimental Overview connecting TC directly to temperature control unit: Validation Experiments Test Article Orientation Load Cell Validation p-Uniformity Bonding Platens p-Timing during Lamination • Furnace cool down optimization with helium cooling: p-Timing of DCTE-Fixture TC Measurements 2004 Christoph Pluess 26 of 36 Experimental Experimental Overview Validation Experiments Final Experiment Test Article Orientation Fin warpage (timing) Load Cell Validation Void fraction (p-magnitude) p-Uniformity Bonding Platens p-Timing during Lamination DCTEFixture Hot Press p-Timing of DCTE-Fixture vs. TC Measurements 2004 Christoph Pluess 27 of 36 Experimental DOE Final Experiment • 24 full-factorial design with 1 replicate (32 runs) • Mode: Hot Press / Fixture • Pressure: 3 MPa / 6 MPa • Temperature: 500°C / 800°C • Time: 30’ / 60’ • 2 samples each run for a total of 64 test samples 32 32 • ANOVA on fin warpage (128 measurements) • ANOVA on void fraction (160 2004 Christoph Pluess 28 Results ANOVA Fin Warpage • No statistical significant difference observed (p-value 0.92) 3.99 mm 0.44 mm • Average fin warpage hot press: • Average fin warpage DCTE-fixture: 4.02 mm 0.44 mm Means and 95.0 Percent Confidence Intervals Interactions and 95.0 Percent Confidence Intervals 5.6 4.5 Pressure 3 6 5.1 Warpage 4.3 Warpage of 36 4.1 3.9 3.7 4.6 4.1 3.6 3.1 2.6 3.5 Fixture Hot Press Mode Fixture Hot Press Mode 2004 Christoph Pluess 29 of 36 Results Void Fraction Inspection • Metallographic preparation of the 16 samples • 10 inspection locations for each DB set (160 measurements) • Voids were marked on a transparency at 384X • Calculation of void fractions (reference length 250 mm) vf l void l0 100% 2004 Christoph Pluess 30 of 36 Results Metallographic Pictures Bond Lines (Void Shrinkage) Hot Press DCTEFixture 500°C 3 MPa 60 min 78.8% 70.5% 15.8% 23.2% 8.0% 9.6% 800°C 3 MPa 60 min 800°C 6 MPa 60 min 2004 Christoph Pluess 31 Results ANOVA & Table of Means for Void Fraction Bonding Conditions Void Fraction Hot Press S.D. Void Fraction Fixture S.D. 500°C/3MPa/30min 100.0% 0% 100.0% 0% 500°C/3MPa/60min 78.8% 8.4% 70.5% 8.7% 500°C/6MPa/30min 65.7% 10.3% 80.0% 6.2% 500°C/6MPa/60min 35.9% 12.0% 62.0% 7.3% 800°C/3MPa/30min 20.1% 6.9% 30.3% 10.3% 800°C/3MPa/60min 15.8% 9.5% 23.2% 4.2% 800°C/6MPa/30min 15.5% 3.7% 19.5% 8.5% 800°C/6MPa/60min 8.0% 2.4% 9.6% 2.8% 42.5% 6.7% 49.4% 6.0% Overall Means and 95.0 Percent Confidence Intervals 52 Void Fraction of 36 50 48 46 44 42 40 Fixture Hot Press Mode • Statistical significant difference observed • Since T & t are equal, variation is due to pressure applied 2004 Christoph Pluess 32 Results ANOVA for Void Fraction (Interactions) • Less significant difference at low pressures (frame stiffness maintained) • Less significant differences at high temperatures (void fraction less pressure sensitive at high temp.) 68 Pressure 3 6 58 48 38 28 Interactions and 95.0 Percent Confidence Intervals 100 Void Fraction Interactions and 95.0 Percent Confidence Intervals Void Fraction of 36 Temperature 500 800 80 60 40 20 0 Fixture Hot Press Mode Fixture Hot Press Mode 2004 Christoph Pluess 33 of 36 Results Comments • Timing of pressure within the DCTE-fixture did not show any problems • Although void fractions showed a difference, bond quality is comparable • Source of p-variation due to the use of high expanding stainless steel bolts (potential loss of preload) • Level of pressure was dampened due to spring implementation in frame (loss of rigidity) 2004 Christoph Pluess 34 of 36 Conclusions • Is this a plausible approach for microlamination? yes • Can a particular fixture design provide control over: ( yes) • Pressure magnitude? • Pressure timing? • Pressure sensitivity? yes yes 2004 Christoph Pluess 35 of 36 Future Research • DCTE-Fixture design for large substrates • Validation of large substrate fixture design with FEM: • Structural, p-uniformity • Thermal, T-gradients • Process optimization for continuous production line • Experimental investigation of large substrate 2004 Christoph Pluess 36 of 36 Questions & Discussion Thanks for your attention! M.S. Defense Presentation Christoph Pluess September 10th 2004 Oregon State University Corvallis USA Special thanks to: Major Professor Dr. Brian K. Paul Committee Members: Dr. Sundar V. Atre Dr. Kevin M. Drost Dr. Timothy C. Kennedy Dr. Zhaohui Wu 2004 Christoph Pluess Additional Slides 2004 Christoph Pluess Experimental First DCTE-Prototype • 7 MPa at 800°C • 5 Cu-layers bonded: 02/20/2004 • 1st successful DCTE-bond 2004 Christoph Pluess Fixture Model (FEM) FE-Model Features (ANSYS) • ¼ model 6655 elements (17’000 nodes) • LINK10 prevented use of contact elements • One solid structure (SOLID95) • Spring constant, initial gap, preload of load cell defined over real constants • Input of bonding parameters over Scalar Parameter Menu • Automatic load step definition and execution with APDL-macro 2004 Christoph Pluess FE-Model Settings Real Constant Settings Bonding Data Input Room Temperature 20 Bonding Temperature 200 Temperature of Contact 200 Bonding Area (Test Article) 625 Desired Bonding Pressure 4.0 °C °C °C mm2 MPa CTE Fixture Data Output: Preload Load Cell Active Warpage Temperature Range 0 Load Cell Force at Bonding Temperature 2500 Load Cell Force at Contact Temperature 2500 Load Cell Force at Room Temperature 3034 Preload Force (Hot Press) 682 CTE Fixture Data Input CTE Fixture Data Output: Initial Gap Gap Closure Function 0.391 mm/°C Additional Load Cell Compression -49 CTE Load Cell Fasteners 16.2 10-6/°C Spring Constant per Stack 2740 CTE Load Cell Platens 6.5 10-6/°C Active Force per Spring Stack at Room T. 758 Active Expanding Bolt Length 16.7 mm Active Force per Spring Stack at Contact 625 Thickness Load Cell Top mm Active Force per Spring Stack at Bonding T. 625 Tensile Stress Area Bolt 20.5 mm2 Tensile Stress of Bolts at Room Temp. 37 Nominal Load Disc Spring 800 N Tensile Stress of Bolts at Contact Temp. 30 Nominal Compression D.S. 0.292 mm Load Cell Compression at Room Temp. 277 Number of Springs per Stack 1 Load Cell Compression at Contact Temp. 228 Number of Spring Stacks 4 Load Cell Compression at Bonding Temp. 228 Expansion Potential CTE Fixture 70 Active CTE Compression of Load Cell 0 Starting Pressure at Contact Temperature 4.0 Pressure Sensitivity CTE Fixture in f(T) 0.0069 Pressure Sensitivity CTE Fixture in f(z) 0.0175 Adjustable Initial Gap 70 FEM Model Data Input Element Length LINK10 (T.o.) 13.668 Element Length LINK10 (C.o.) 7.332 mm mm °C N N N lbs mm N/mm N N N MPa MPa mm mm mm mm mm MPa MPa/°C MPa/mm mm FEM Model Data Output: Real Constant Settings ISTRN Value for LINK10 (Tension only) 0.02025 277 ISTRN Value for LINK10 (Compr. only) -0.02816 -206 Important Comments Check with fin buckling limit equation! Min. adjustable load of hot press is 400 lbs (+): add. compression / (-): relaxation Flat load of disc springs 1620 N Flat load of disc springs 1620 N Flat load of disc springs 1620 N Max. stress limit of ceramic bolts 55 MPa Max. stress limit of ceramic bolts 55 MPa >nominal compression, increase # of springs RC Set #3, Element Type 5 (Fasteners) RC Set #4, Element Type 6 (Set Screw) 2004 Christoph Pluess
