SharePoint Server 2010 Step by Step Small Farm 3
advertisement

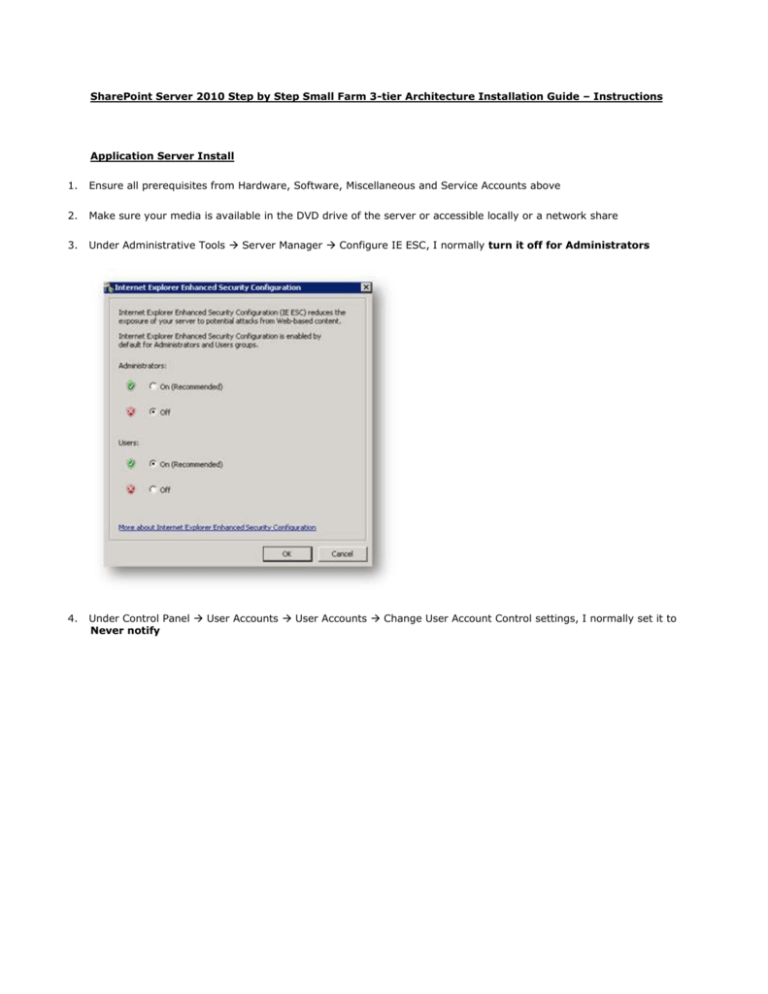
SharePoint Server 2010 Step by Step Small Farm 3-tier Architecture Installation Guide – Instructions Application Server Install 1. Ensure all prerequisites from Hardware, Software, Miscellaneous and Service Accounts above 2. Make sure your media is available in the DVD drive of the server or accessible locally or a network share 3. Under Administrative Tools Server Manager Configure IE ESC, I normally turn it off for Administrators 4. Under Control Panel User Accounts User Accounts Change User Account Control settings, I normally set it to Never notify 5. Run the splash page 6. Click on and Install software prerequisites 7. Click on Install SharePoint Server from the splash page 8. Enter your Product Key and hit Continue 9. Choose a Server Farm installation 10. Choose a Complete Server Type and specify the File Location if applicable 11. Once installed, Run the SharePoint Products Configuration Wizard now 12. Click Yes to reset services 13. Create a new server farm 14. Enter the configuration database settings along with your username/password for your Farm Administration service account defined above in the prerequisites 15. Enter a Passphrase (this is used to add servers to the farm at a later point) – don’t forget to log this somewhere! 16. Specify a Port Number you would like to use (or use the default) for Central Administration and choose the authentication provider 17. Once you hit Finish, it will automatically open the Central Administration website; click No to not participate in the Customer Experience Improvement program (unless you really want to!) 18. You can configure the farm using the Wizard or manually, I would recommend using the Wizard (and disable the services you want after the install) but if you are confident you can just install the services you need manually 19. The first part of the configuration wizard is to select the services to run on the farm. As of SharePoint 2010 beta, there was a problem getting user profiles working without using the Farm Administration account, so I would advise using this account for now, I think it can be changed later without much work. 20. Select the farm administration service account from the dropdown and select the services you want to run on the farm and press ok 21. If you now look at your SQL Server, you will notice a whole wack of new databases have been created 22. At this point it will ask you to create your first SharePoint site configured at the port 80 web application. I usually skip this step because I want my own custom web applications to be created. Go ahead and create your own Web Application & Site Collection at this point if you like 23. At the end it will give you a completion screen notifying you of all the services that have been installed 24. The next step is to change the SharePoint Web Services Root application pool to run as the Farm Administrator account by changing it in advanced settings and starting it (note: I’m not sure if this is a bug or not as you would think this would be automatically done for you) 25. Next start the Microsoft SharePoint Foundation Sandboxed Code Service (if you are allowing Sandboxed solutions on your farm). This can be found under Central Administration Manage Services on server 26. Next configure the Search Service Application under Central Administration Manage Services on server Search Service Application Search Service Applications i. Change the Default content access account to the domain service account that was created (optional) as well as the Contact e-mail address to the SharePoint Administrator defined in the prerequisites ii. Create a crawl schedule under Search Service Application Content Sources Local SharePoint Sites. I usually do a full crawl every day at midnight and incremental crawls every hour after that. 27. Next step is configuring the User Profiles. This is probably the trickiest part of the configuration. If something goes wrong here, there are many resources out there in the www to help you track down your issue and if needed, the best resource that I have found is by Spencer Harbar and outlined here: http://www.harbar.net/articles/sp2010ups.aspx ***Note make sure “replicate directory changes” is set for the farm administrator service account as defined above in the prerequisites. a. To start this user profile synchronization service, it seems that the farm administrator account needs to be a member of the local administrator group on the application server (Needs verification). Note: If you are just adding this account to the admin group now, you should restart the SharePoint Timer Service under startrun services.msc before continuing b. Under Central Administration Manage Services on Server start the User Profile Synchronization Service c. Enter the credentials of the Farm Administrator Service Account defined in the prerequisites above and press Ok d. Run IISReset from the run menu or command prompt e. At this point, a timer job called ProfileSynchronizationSetupJob will run for a while which you can see at Central Administration Monitoring Check Job status f. You should wait until the service is completely started before proceeding g. At this point, you should have the Forefront Identify Manager Service and the Forefront Identity Manager Synchronization Service running in your services.msc as your farm administrator account h. Run iisreset in startrun or from the command prompt (if you don’t do this you will get an error when you perform the next step that I outline here: http://www.khamis.net/blog/Lists/Posts/Post.aspx?List=6c8a23d1%2D47ea%2D47e5%2Db56f% 2D2bc57cb95b93&ID=28 ) i. Next step is to actually configure the User Profile Service Application under Central Administration Manage service applications (click on the User Profile Service Application link) j. Click on the Configure Synchronization Connections link under Synchronization k. Create a New Connection l. Enter the appropriate settings for the synchronization connection: i. Give the connection a name ii. Enter the domain controller name as per the prerequisites defined earlier (e.g. type nslookup from a computer on the domain) or enter the forest name (i.e. mydomain.com) and leave it on Auto discover domain controller (I would advise specifying the domain controller as I have had problems with auto-discover mode). iii. Under account name/password use the farm administration account that has replicate directory rights as per the prerequisites defined earlier iv. Press the Populate Containers button, select the containers you want synchronized and press ok. Be careful that the farm administration service account you specified as having replicating directory changes is applicable to the domain containers you select. Ensure that you only select the OU (i.e. SharePoint Users) that you want synched or else it will take a long time to complete the synch. v. Iisreset at this point (might not be needed) m. Next we want to start a full profile synchronization under Central administration Manage Services on Server User Profile Service Application Start Profile Synchronization n. At this point, it will do a bunch of stuff in user profile synchronization, a little known fact is that you can actually see the progress via a shell that Microsoft has created located here: C:\Program Files\Microsoft Office Servers\14.0\Synchronization Service\UIShell\MSIISClient.exe. It has to go through a lot of successful steps before it completes: o. To see that the user profile synchronization actually worked go to Central Administration Manage Service Applications User Profile Service Application Manage User Profiles and put your domain in the find box and it should show you a bunch of the user profiles that have been synched p. By default the user profile synchronization occurs every day at 1am but this can be changed under Central Administration Manage Service Applications User Profile Service Application Configure Synchronization Timer Job 28. Set up outgoing email, under Central Administration System Settings, Note: You need the Outbound SMTP server and from/to SharePoint administrator email address as defined in the prerequisites 29. Optional - Set up incoming email, under Central Administration System Settings, Note: You need the SMTP service setup locally on the Windows Server OS before this is done as defined in the prerequisites 30. Setup My Sites under Central administration Manage Services on Server User Profile Service Application Setup My Sites. Fill in all the properties according to your farm requirements. a. What you can do here at this point is create a new web application to host your My Sites before configuring My Sites and point to it here b. Also, create a web application/site collection that will host your preferred Search Center and point to it here c. Under Site Naming Format, I always to be on the safe side, set it to use Domain and user name Web Server Install Now that we have the main Application server up and running, the next step is to add the web server and in fact any other server to the farm 1. Ensure all prerequisites from Hardware, Software, Miscellaneous and Service Accounts above 2. Make sure your media is available in the DVD drive of the server or accessible locally or a network share 3. Under Administrative Tools Server Manager Configure IE ESC, I normally turn it off for Administrators 4. Under Control Panel User Accounts User Accounts Change User Account Control settings, I normally set it to Never notify 5. Run the splash page 6. Click on and Install software prerequisites 7. Click on Install SharePoint Server from the splash page 8. Enter your Product Key and hit Continue 9. Choose a Server Farm installation 10. Choose a Complete Server Type and specify the File Location if applicable 11. Once installed, Run the SharePoint Products Configuration Wizard now 12. Click Yes to reset services 13. Connect to an existing server farm 14. Enter the name of the Database Server and the Configuration Database name 15. Enter the same Passphrase that was used when setting up the Application server 16. If you want to host the Central Administration web site on this web server, you can do this under Advanced Settings, otherwise hit next 17. When you hit Finish, it will open the Central Administration, again, I would advise using the Wizard 18. The next step is to change the SharePoint Web Services Root application pool to run as the Farm Administrator account by changing it in advanced settings and starting it 19. Once all your servers have been added to the farm, you should now select and deselect the services you would like to run on each web/application server under Central Administration Manage Services on Server. This should clearly be thought out and planned beforehand as to which services should reside on which server based on their roles and perceived load. Notice the Server drop down from where you can select the server at the top right [12]. 20. Just start and stop the services you need for each web or application server from this page **Update**: There have been a lot of people asking which services to turn on and off for the application and web servers. Jeff Cate has just posted a great blog on SharePointSolutions.com [13] which talks about this. I have been trying to find a good reference for this for ages! In it he indicates that: The web front end should have these services: 1. Microsoft SharePoint Foundation Web Application (this is what turns IIS into a SharePoint “page-serving” machine) 2. Search Query and Site Settings Service (the process that takes the user’s query string and looks it up in the index) 3. SharePoint Server Search Service (but just the functionality that is necessary for the query processor) 4. Central Administration (assuming you didn’t decide to move it to the Application Server) And the application server should have: 1. Access Database Service 2. Application Registry Service 3. Business Data Connectivity Service 4. Excel Calculation Services 5. Managed Metadata Web Service 6. Microsoft SharePoint Foundation Incoming E-mail 7. Microsoft SharePoint Foundation Workflow Timer Service 8. PerformancePoint Service 9. Secure Store Service 10. SharePoint Server Search (but just the scheduled content crawling and indexing building functionality) 11. User Profile Service 12. Visio Graphics Service 13. Web Analytics Data Processing Service 14. Web Analytics Web Service 15. Word Automation Services 16. Word Viewing Service The hardest part is adjusting the the search application topology, I suggest reading Jeff’s blog on SharePointSolutions.com [13] if you would like to do this. And there you have it, a small 3-tier server farm using SharePoint 2010! References [1] http://technet.microsoft.com/en-us/library/cc263199.aspx [2] http://technet.microsoft.com/en-us/library/cc262485.aspx [3] http://www.microsoft.com/downloads/details.aspx?FamilyID=66ab3dbb-bf3e-4f46-9559ccc6a4f9dc19&displaylang=en [4] http://go.microsoft.com/fwlink/?LinkId=165962 [5] http://www.microsoft.com/downloads/details.aspx?FamilyID=ae7387c3-348c-4faa-8ae5949fdfbe59c4&displaylang=en [6] http://go.microsoft.com/fwlink/?LinkId=165748 [7] http://www.microsoft.com/downloads/details.aspx?familyid=656C9D4A-55EC-4972-A0D7B1A6FEDF51A7&displaylang=en [8] http://go.microsoft.com/fwlink/?linkID=160770 [9] http://go.microsoft.com/fwlink/?LinkID=166231 [10] http://technet.microsoft.com/en-us/library/ee662513.aspx [11] http://technet.microsoft.com/en-us/library/ee721049.aspx and http://sharepointdevwiki.com/display/spadmin2010/10+-+Creating+the+delegate+user+for+farm+account [12] http://technet.microsoft.com/en-us/library/ee794878.aspx [13] http://sharepointsolutions.com/sharepoint-help/blog/2011/02/how-to-scale-out-a-sharepoint2010-farm-from-two-tier-to-three-tier-by-adding-a-dedicated-application-server/


