Reel Table Of Contents/ Running guide
advertisement
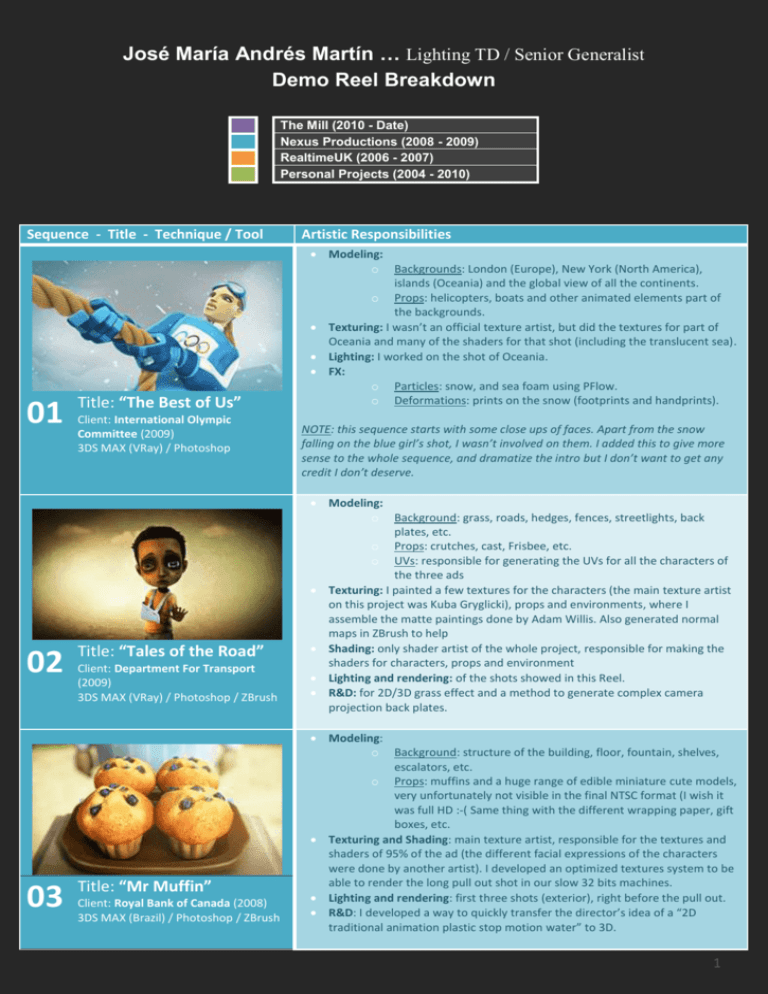
José María Andrés Martín … Lighting TD / Senior Generalist Demo Reel Breakdown The Mill (2010 - Date) Nexus Productions (2008 - 2009) RealtimeUK (2006 - 2007) Personal Projects (2004 - 2010) Sequence - Title - Technique / Tool 01 02 03 Title: “The Best of Us” Client: International Olympic Committee (2009) 3DS MAX (VRay) / Photoshop Title: “Tales of the Road” Client: Department For Transport (2009) 3DS MAX (VRay) / Photoshop / ZBrush Title: “Mr Muffin” Client: Royal Bank of Canada (2008) 3DS MAX (Brazil) / Photoshop / ZBrush Artistic Responsibilities Modeling: o Backgrounds: London (Europe), New York (North America), islands (Oceania) and the global view of all the continents. o Props: helicopters, boats and other animated elements part of the backgrounds. Texturing: I wasn’t an official texture artist, but did the textures for part of Oceania and many of the shaders for that shot (including the translucent sea). Lighting: I worked on the shot of Oceania. FX: o Particles: snow, and sea foam using PFlow. o Deformations: prints on the snow (footprints and handprints). NOTE: this sequence starts with some close ups of faces. Apart from the snow falling on the blue girl’s shot, I wasn’t involved on them. I added this to give more sense to the whole sequence, and dramatize the intro but I don’t want to get any credit I don’t deserve. Modeling: o Background: grass, roads, hedges, fences, streetlights, back plates, etc. o Props: crutches, cast, Frisbee, etc. o UVs: responsible for generating the UVs for all the characters of the three ads Texturing: I painted a few textures for the characters (the main texture artist on this project was Kuba Gryglicki), props and environments, where I assemble the matte paintings done by Adam Willis. Also generated normal maps in ZBrush to help Shading: only shader artist of the whole project, responsible for making the shaders for characters, props and environment Lighting and rendering: of the shots showed in this Reel. R&D: for 2D/3D grass effect and a method to generate complex camera projection back plates. Modeling: o Background: structure of the building, floor, fountain, shelves, escalators, etc. o Props: muffins and a huge range of edible miniature cute models, very unfortunately not visible in the final NTSC format (I wish it was full HD :-( Same thing with the different wrapping paper, gift boxes, etc. Texturing and Shading: main texture artist, responsible for the textures and shaders of 95% of the ad (the different facial expressions of the characters were done by another artist). I developed an optimized textures system to be able to render the long pull out shot in our slow 32 bits machines. Lighting and rendering: first three shots (exterior), right before the pull out. R&D: I developed a way to quickly transfer the director’s idea of a “2D traditional animation plastic stop motion water” to 3D. 1 José María Andrés Martín – Lighting TD / Generalist 04 05 06 Title: “Comfort: ‘Matilda’” Client: Unilever (2011) Softimage (Mental Ray) / Photoshop / ZBrush / Mudbox / After Effects / Nuke “Meet Dave” Client: Energy Saving Trust (2009) 3DS MAX (VRay) / Photoshop “Buzz! Jr Monster Rumble” Client: SCEE (2007) 3DS MAX (VRay) / Photoshop / After Effects Demo Reel Breakdown Modeling: although I was co-leading this ad with Jacob González, our responsibility also included being part of pretty much every single aspect of the project. In the modeling bit I had to collect props from other projects, prepare the layout for the different shots and model all we didn’t have already. In this case grass, tarmac, zippers, “wind sock”, bottles, etc. Texturing and Shading: for the new models, and tweaks over some of the characters’ textures to improve their look over past projects. Look Development: I took the lead part of defining the overall look of the ad, prepared the light setups for all the exterior shots and supervised the comps at all time to be sure we kept the tone and uniformity I had planned initially. Lighting and Rendering: Lighting setups for the exterior shots as well as supervising the interior ones (not on this Reel). Composition: I prepared the precomps for the Nuke operator for all the shots, as I said before, defined the global look and supervised the final product. R&D and Python scripting: I wrote a set of tools (mainly for UVs, Lighting and Rendering) to help our operators when they needed it. Lead: apart from all I’ve just said, preparing WIPs for the client and attending meetings were also part of my role on this project. Modeling: o Characters: modeler of “Dave” and the penguin. o Backgrounds: prepared a big set of tiles, plates, wallpapers, furniture, etc. o Props: modeled almost all the props of the ad. Texturing and Shading: textures and shaders for the whole project. Lighting R&D and Look Development: although lighting wasn’t part of my role, I helped to create the final lighting setup and environmental textures (for reflections and refractions). FX: using the same technique I developed working on Mr Muffin (03) I prepared a set of Photoshop actions to get a similar effect on the water drops, felt clouds and ice. Modeling: o Backgrounds: I modeled some of the elements of the room and remodeled others done by a junior artist, like the table, walls, etc. o Props: different parts of some machines, the jars, eyes, Texturing and Shading: I did a few textures (mainly some tweaks to the ones done by the junior artist) and all the shaders for the background and props Look Development: although there were some rough sketches showing the position of some key elements, I did the general research to define the final look of this part of the intro. Lighting and Rendering: only responsible for lighting and rendering the 12 shots of the Laboratory. FX: o Particles: different effects, like sparkles, bubbles, etc. using PFlow. o Other effects: electric waves, thunderbolts, etc. o Cloth simulation: for the bed sheets (I was more proud a few years ago than what I am now… but well… it’s part of the learning process :-) Composition: did the final composition of the 12 shots using After Effects. 2 José María Andrés Martín – Lighting TD / Generalist 07 08 09 “Autostadt” Client: Autostadt (2009) 3DS MAX (VRay) / Photoshop “Niggles and Narks” Client: O2 (2010) Softimage (Mental Ray) / Photoshop / Mudbox “Buzz! Hoollywood” Client: SCEE (2007) 3DS MAX (VRay) / Photoshop / Vue / After Effects Demo Reel Breakdown Modeling: o Backgrounds: I modeled the huge tower with cars inside, some buildings (a huge brick one similar to an old factory, the Hilton hotel and some tweaks to others) and modeled and defined the look of the exteriors (included the R&D for the grass, different scatters (leaves and hedges), etc.) o Props: pizzas, ice cream, salad… pretty much all the edible stuff (they know I love food!), kitchen props, oven, etc. Texturing and Shading: textures and shaders for the park (hedges, grass, trees, etc.), car tower (I did a shader to assign random pre-chosen colors to the cars) and all the food and kitchen elements from the restaurant shots. I also did the textures for all the secondary characters (the ones filling the park, but very unfortunately not visible on this Reel… feel free to ask for the full video), including a Photoshop action to quickly generate hair textures for them using as a base a foreground color and some freehand paths. Lighting and Rendering: another of my duties on this very intense project (we had to deliver almost 90 shots, over 2 minutes and a half of video, in a bit longer than 2 months! And almost every shot had a different background!!! Anyway I can’t complaint. It was one of the most enjoyable projects I’ve done at Nexus :-) was lighting and rendering all the restaurant shots, car tower and exteriors. Modeling: o Backgrounds: I did the layout for the backgrounds in some shots (the one with the blobby yellowy guy under the tree and the one with the house, where that weird 4 legged creature with cap stops) and modeled some of the elements that contained, like the dandelions, mushrooms and other plants, barber pole, bridge, river, trees, etc. Texturing and Shading: textured two characters (the fatty yellow guy drinking coffee and a quite cool double headed snake not featured in this Reel, completely covered with displaced scales. I can provide the animation as well in case you would like to see it) and lots of background components, like trees, mushrooms, bridge, etc. Lighting and Rendering: did the lighting and rendering of the two sequences mentioned in the Modeling/Backgrounds section. Modeling: o Backgrounds: I did the backgrounds of all this black and white sequence using VUE 6 xStream, as VRay couldn’t handle at that time that amount of geometry and transparency maps. Also prepared a volumetric sky, quite visible in the shot where the train comes towards the camera. Some parts where modeled in MAX (like the tracks) and merged later in the composition. o Props: the train was bought in Turbosquid, but modified by me to match the look of the Buzz! Intros. Also modeled backplate and other elements of the studio where they are, not visible in this Reel (again, feel free to ask for these animations in case you would be interested to check this information :) Texturing and Shading: tweak of some textures for the train and remake of all its shaders. Also I did the textures and shaders for the studio where they are recording that western. Lighting and Rendering: all the shots of this sequence. Rigging and FX: train’s wheels rig o Particles: I did the train smoke using “Afterburn” and PFlow. R&D: for the effect of reel getting stuck and posterior melting under the heat of the projector lamp (only half of it visible in this Reel) Composition: of the whole sequence using After Effects. 3 José María Andrés Martín – Lighting TD / Generalist Demo Reel Breakdown Texturing and Shading: I was given 1 month to prepare the textures delivered by EA for all the characters of this shot (around 130). These textures where completely separate (body, shirt, trousers, shoes, etc. for diffuse, normal and specular) so I spent a few days preparing a quite specific pipeline that would let me finish my work on time. This pipeline consisted of a generic shader which controlled different submaterials (metal, skin, fabric and leather) using an RGBA map, and a set of Photoshop actions and console commands to quickly merge, blend, prepare and export all these textures. Lighting and Rendering: once the textures and shaders where ready I still had time to do the shot where the city is seen from far. 10 “Sims 3” Client: EA (2009) 3DS MAX (VRay) / Photoshop Modeling: o Characters: I did the reshape of the original Lemming. o Background and Props: modeled the rocks, tower and wooden structure as well tweaked some of the props the Lemmings have. Texturing and Shading: did some textures (like the main column) and the upres of the textures provided by SONY and prepared new shaders for everything. Lighting, Rendering and Composition: I did the lighting setup and render, and once all the layers where rendered I used Photoshop to finish this cover. 11 “Lemmings (PS2 cover)” Client: SCEE (2006) 3DS MAX (VRay) / Photoshop Texturing and Shading: responsible for the shot featuring Robin Van Persie, having to texture him as well as prepare all the shaders for the character. Lighting and Rendering: preparation for the stadium lighting and all the passes the Nuke operators demanded. R&D: due to the movement of the camera I setup a lighting rig to get the rims continuously in the best positions. Hair: another interesting part of this job was having to do the hair for the player. I usually don’t do this, but I can say I enjoyed the task :) Composition: prepared a reference precomp for the Nuke operators. 12 13 “Super Sunday 10/11” Client: Sky Sports (2010) Softimage (Mental Ray) / Photoshop / Mudbox / Nuke “Black Beetle” Client: VW (2011) Softimage (Mental Ray) / Photoshop / Nuke Lighting and Rendering: I did the lighting setup of this 40 frames shot. The interesting part was having even more passes than frames!!! Crazy!!! I’m explaining why in the “R&D” section. R&D: I did the R&D part to establish a way to get decent motion blur when there were lots of little bug legs moving frenetically. At the end, due to the problems Mental Ray has with complex shaders and 3D motion blur and DOF, I opted for the old trick of rendering with not blur of DOF the shot, and camera project it over the geometry of the same scene using a simple Constant shader. Then we finally managed to get good times and the effects we wanted although the setup was a bit crazy. Composition: I did the final composition of the shot, previous to the final color correction in Flame. 4 José María Andrés Martín – Lighting TD / Generalist Demo Reel Breakdown Since 2004 I have been trying to work on a personal project at least once a year. These are some of the best ones. Although they are not animations and I’m not 100% happy with none of them I consider important to show you a bit of what inside of my brain :) They have been awarded and published in quite prestigious magazines and books (included Exposé). In a way, they are my artistic escape. 14 “Personal projects” (2004 - 2010) 3DS MAX (VRay) / Photoshop /ZBrush / Mudbox 5
