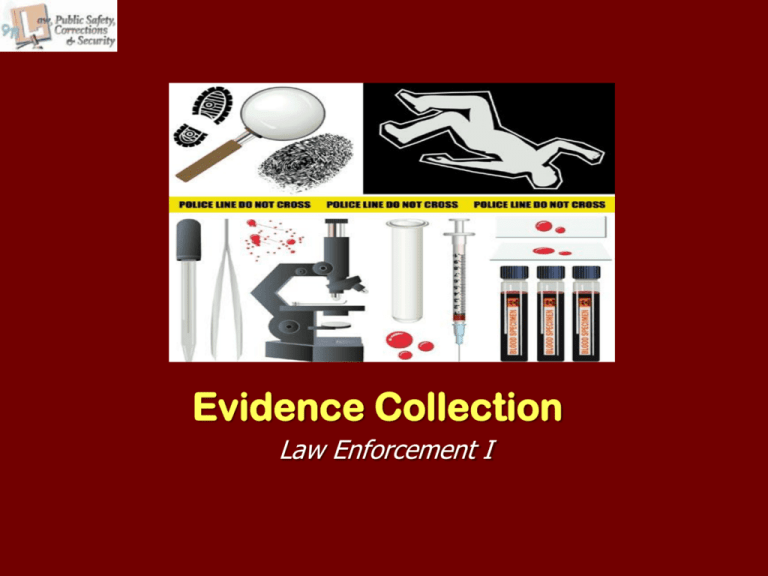
Evidence Collection
Law Enforcement I
Copyright and Terms of Service
Copyright © Texas Education Agency, 2011. These materials are copyrighted © and trademarked ™ as
the property of the Texas Education Agency (TEA) and may not be reproduced without the express
written permission of TEA, except under the following conditions:
1) Texas public school districts, charter schools, and Education Service Centers may reproduce and use
copies of the Materials and Related Materials for the districts’ and schools’ educational use without
obtaining permission from TEA.
2) Residents of the state of Texas may reproduce and use copies of the Materials and Related Materials
for individual personal use only, without obtaining written permission of TEA.
3) Any portion reproduced must be reproduced in its entirety and remain unedited, unaltered and
unchanged in any way.
4) No monetary charge can be made for the reproduced materials or any document containing them;
however, a reasonable charge to cover only the cost of reproduction and distribution may be charged.
Private entities or persons located in Texas that are not Texas public school districts, Texas Education
Service Centers, or Texas charter schools or any entity, whether public or private, educational or noneducational, located outside the state of Texas MUST obtain written approval from TEA and will be
required to enter into a license agreement that may involve the payment of a licensing fee or a royalty.
Contact TEA Copyrights with any questions you may have.
Copyright © Texas Education Agency 2012. All rights reserved.
Images and other multimedia content used with permission.
2
Key Terms
Transient evidence –
evidence which will
lose its evidentiary
value if not preserved
and protected
(NIJ, 2009)
Trace evidence –
physical evidence that
results from the
transfer of small
quantities of material
(NIJ, 2009)
Copyright © Texas Education Agency 2012. All rights reserved.
Images and other multimedia content used with permission.
3
Key Terms (continued)
Physical evidence –
any object that can establish that a crime
has been committed, or that can link a
crime to its victim or perpetrator
Chain of Custody – the process which
reports transactions of evidence from
person to person, starting with its
acquisition by a law enforcement agency
Copyright © Texas Education Agency 2012. All rights reserved.
Images and other multimedia content used with permission.
4
Key Terms (continued)
Crime Scene Search – a planned and
coordinated, legal search of a crime scene to
recognize, preserve, and collect physical
evidence that is related to the crime under
investigation
Crime Scene Sketch – a drawing which
represents the crime scene and serves to
supplement photography by providing accurate
information concerning the distance between
various points in the scene (TCLOESE, 2008)
Copyright © Texas Education Agency 2012. All rights reserved.
Images and other multimedia content used with permission.
5
Key Terms (continued)
Evidence – anything
that helps establish
the facts related to a
crime
(TCLOESE, 2008)
Property – something
that is owned
Types of property
–
–
–
–
Lost and found
Seized
Stolen
Recovered
Copyright © Texas Education Agency 2012. All rights reserved.
Images and other multimedia content used with permission.
6
Recording the Scene:
Sketching
Help reconstruct the crime scene
Record the exact locations and spatial relationships of
pieces of evidence and surroundings of the crime scene
Three types of sketches are
– Field sketch
– Final report diagram
– Courtroom presentation
Must use an accurate measuring device and measure
accurately
Establish permanent reference points
Copyright © Texas Education Agency 2012. All rights reserved.
Images and other multimedia content used with permission.
7
Recording the Scene:
Sketching (continued)
Two types of surveying methods
Triangulation – measurements are made
from two or more fixed reference points to
intersect at the location of the object or
item of evidence
Rectangular Coordinates – measurements of
objects or items of evidence are located
using two perpendicular lines at right angles
Copyright © Texas Education Agency 2012. All rights reserved.
Images and other multimedia content used with permission.
8
Recording the Scene:
Sketching (continued)
The title block of the
sketch contains
–
–
–
–
Case number
Offense location
Date of the offense
Name of the person
diagramming the scene
– North directional indicator
– The words “not to scale”
Copyright © Texas Education Agency 2012. All rights reserved.
Images and other multimedia content used with permission.
9
Recording the Scene:
Sketching (continued)
Four methods used to sketch a crime
scene area
–
–
–
–
Schematic Sketch (aka Flat Sketch)
Perspective Sketch (aka 3-D)
Projection Sketch (aka cross projection)
Detailed Sketch
Copyright © Texas Education Agency 2012. All rights reserved.
Images and other multimedia content used with permission.
10
Recording the Scene:
Photographing
Photographic ID card
– The first photograph taken on each and every
series of pictures
– Contains the following information
Case number
Location where the photos were taken
Time the photos were taken
Name and ID number of the person taking the
photos
Copyright © Texas Education Agency 2012. All rights reserved.
Images and other multimedia content used with permission.
11
Recording the Scene:
Photographing (continued)
Objects
– Not to be moved until they are photographed from all
necessary angels, unless the crime involves an injured
person
– Photographed when they are discovered, to show
their position and location in the entire scene
Close-ups should be taken to record the details
of objects; a ruler or other measuring scale may
be inserted near the object and included as a
point of reference
The crime scene should include the area in
which the crime took place and all adjacent
areas
Copyright © Texas Education Agency 2012. All rights reserved.
Images and other multimedia content used with permission.
12
Recording the Scene:
Photographing (continued)
Overview photographs of the entire
scene and surrounding area,
including points of exit and entry,
must be taken from various angles
Close-up photographs depicting
injuries or weapons lying near the
body must be taken
The surface beneath the body
should be photographed after the
body has been removed from the
scene
Copyright © Texas Education Agency 2012. All rights reserved.
Images and other multimedia content used with permission.
13
Recording the Scene:
Note-taking
Must be constant and precise throughout the
investigation
Detailed descriptions aid the investigator’s
memory
Document in detail
– Scene
– Evidence
Location
Time collected
By whom
Copyright © Texas Education Agency 2012. All rights reserved.
Images and other multimedia content used with permission.
14
Crime Scene Search Methods
Prior to starting a crime scene search, the
following must be completed:
–
–
–
–
–
Determine a starting point
Establish a headquarters or command post
Brief your searchers
Discuss and establish the speed of the searchers
Assign an area of responsibility to each person in the
search group
– Maintain communication among all searchers
– Re-check the search area by exchanging searchers
from one area to another
Copyright © Texas Education Agency 2012. All rights reserved.
Images and other multimedia content used with permission.
15
Crime Scene Search Methods
(continued)
When determining which search method
to use, consider the following:
– The size and type of the area to be covered
– The personnel and equipment needed
– The degree of thoroughness required
depending upon the type of crime committed,
the type of evidence to be collected, and the
purpose of the search
Copyright © Texas Education Agency 2012. All rights reserved.
Images and other multimedia content used with permission.
16
Crime Scene Search Methods
(continued)
Types
Zone
Outward Spiral
Inward Spiral
Point-to-Point
Strip Search –
Parallel (Line)
Area
Spiral
Grid
Strip or Line
Copyright © Texas Education Agency 2012. All rights reserved.
Images and other multimedia content used with permission.
Quadrant or Zone
17
Types of Physical Evidence
Bodily fluids
Blood
Hairs and fibers
Fingerprints
Footwear impressions
Tool marks
Firearms
Documents
Any other item linking a suspect to a crime
Copyright © Texas Education Agency 2012. All rights reserved.
Images and other multimedia content used with permission.
18
Collecting Evidence:
Trace Evidence
Gunshot
residue (GSR)
Paint residue
Glass
Chemicals
Illicit drugs
Copyright © Texas Education Agency 2012. All rights reserved.
Images and other multimedia content used with permission.
19
Collecting Evidence:
Trace Evidence (continued)
Equipment used to collect
–
–
–
–
–
Tweezers
Plastic containers with lids
A filtered vacuum device
Knife
A biohazard kit
Disposable latex gloves
Booties
Face mask
Gown
Biohazard waste bag
Copyright © Texas Education Agency 2012. All rights reserved.
Images and other multimedia content used with permission.
20
Collecting Evidence:
Trace Evidence (continued)
Technicians
– Discover it in
Bedding
Clothing
Towels
Couch cushions
Other items
– Shake out the items in a sterile room, onto a large,
white slab covered with paper
Copyright © Texas Education Agency 2012. All rights reserved.
Images and other multimedia content used with permission.
21
Collecting Evidence:
Bodily Fluids
Types of bodily fluids
–
–
–
–
Blood
Semen
Saliva
Vomit
To identify and
collect, use
–
–
–
–
–
–
–
–
–
Smear slides
Scalpel
Tweezers
Scissors
Sterile cloth squares
UV light
Protective eyewear
Luminol
Blood collection kit
Copyright © Texas Education Agency 2012. All rights reserved.
Images and other multimedia content used with permission.
22
Collecting Evidence:
Blood
Crime
Scene Investigator (CSI)
– Collects bodily fluid samples
– Performs DNA analysis
– Compares results to the suspect’s
– Scrapes under victims’ nails for skin
Patterns
can reveal
– The type of weapon used
– Multiple blows
– “Cast-off pattern”
Copyright © Texas Education Agency 2012. All rights reserved.
Images and other multimedia content used with permission.
23
Collecting Evidence:
Hair and Fibers
To
collect, use
In
a rape case with a live victim
–
–
–
–
–
–
–
–
Combs
Tweezers
Containers
A filtered vacuum device
Accompanies the victim to the hospital
Obtains any hairs or fibers found
Seals the evidence in separate containers
Transports it all to the lab
Copyright © Texas Education Agency 2012. All rights reserved.
Images and other multimedia content used with permission.
24
Collecting Evidence:
Fingerprints
A crime lab can use fingerprints to identify the victim or to identify,
or rule out, a suspect
Types of prints
– Visible
– Molded
– Latent
Tools for recovering fingerprints
include
Brushes
Powders
Tape
Chemicals
Lift cards
Magnifying glasses
Super glue
Copyright © Texas Education Agency 2012. All rights reserved.
Images and other multimedia content used with permission.
25
Collecting Evidence: Footwear
Impressions and Tool Marks
A
footwear impression in mud or a tool mark on
a window frame is an example of a threedimensional impression
If it is not possible to submit the entire object
containing the impression to the crime lab, an
officer/CSI makes a casting at the scene
Copyright © Texas Education Agency 2012. All rights reserved.
Images and other multimedia content used with permission.
26
Collecting Evidence:
Firearms/Weapons
Types
of firearms/weapons evidence
includes:
Knives
Guns
Bullet holes
Cartridge casings
Copyright © Texas Education Agency 2012. All rights reserved.
Images and other multimedia content used with permission.
27
Collecting Evidence:
Firearms/Weapons (continued)
Forensic
scientists can
– Recover serial numbers
– Match bullets and casings to
• The firing weapon
• Evidence from other crime scenes
– Bullets
– Casings
• Bullet
hole analysis
– Cut out a portion of the wall or frame
– Do not dig bullets out of the victim or other objects
– Can determine where and from what height the bullet was
fired
– Position of the victim when it was fired
– A laser trajectory kit is used
Copyright © Texas Education Agency 2012. All rights reserved.
Images and other multimedia content used with permission.
28
Collecting Evidence:
Documents
Types
–
–
–
–
of documents
Diaries
Suicide notes
Phone books
Electronic documents
Answering machines
Caller ID units
– Any other written, typed, or
photocopied evidence
Copyright © Texas Education Agency 2012. All rights reserved.
Images and other multimedia content used with permission.
29
Collecting Evidence:
Documents (continued)
Documents
lab
– Reconstructs a destroyed or burned document
– Determines if a document has been altered
Technicians
– Analyze documents for forgery
– Determine handwriting matches
– Identify the type of machine used
Rule out a machine found at the scene
Determine the compatibility or incompatibility with a
machine found in a suspect's possession
Copyright © Texas Education Agency 2012. All rights reserved.
Images and other multimedia content used with permission.
30
Proper Packaging of Evidence
Consideration in handling evidence
– Preserve its value for the owner
– Mark the evidence for identification in court
Collect and store it in a way that preserves its integrity
for forensic comparison and analysis
– Handle it in a manner which is not consistent with the normal
handling of that type of item (i.e. do not grab a firearm by
the grip)
– Package the item to preserve it for processing and
presentation
– The purpose of proper packaging of physical evidence is to
prevent breaking, spoiling, loss, destruction, and
contamination between pieces of evidence
Package each item of evidence separately
Copyright © Texas Education Agency 2012. All rights reserved.
Images and other multimedia content used with permission.
31
Proper Packaging of Evidence
(continued)
Standard Packaging Requirements
– All property except narcotics and dangerous drugs
shall be packaged in an appropriately sized
container or plastic bag
– Knives that
do not fold closed should be placed in sharps tubes
fold closed should be secured with tape so that the blade
does not open, and then it should be placed in plastic
– Once property is sealed in a plastic bag, cover all
sealed ends with red evidence tape
– After the evidence tape is properly applied, date
and initial both sides of the tape on each piece
Copyright © Texas Education Agency 2012. All rights reserved.
Images and other multimedia content used with permission.
32
Proper Packaging of Evidence
(continued)
A packaging container or red evidence tag
contains the following information
–
–
–
–
–
Case number
Offense
Location of the offense
Date of the offense
Description of the evidence including any model or
serial numbers
Place properly packaged evidence and
transmittal in evidence lockers for safe storage
Copyright © Texas Education Agency 2012. All rights reserved.
Images and other multimedia content used with permission.
33
Proper Packaging of Evidence
(continued)
Biological Fluids Requirements
– Wet evidence must be air dried prior to packaging;
this is to prevent rot and mildew of the evidence
– Evidence with bodily fluids needs to be packaged in
paper after it has dried
– Liquid, sexual assault kits, or whole blood must be
refrigerated as soon as possible
Copyright © Texas Education Agency 2012. All rights reserved.
Images and other multimedia content used with permission.
34
Proper Packaging of Evidence
(continued)
Firearms Requirements
– When dealing with firearms as evidence, the following
information must be noted and/or sketched:
The physical appearance of the weapon before it is moved
The position of the bolt, slide, or chamber
The position of the hammer and/or safety
The position of the cylinder and the position of the fired or
unfired cartridges within the cylinder
– “Securing” the weapon may not mean unloading the weapon;
you may have to use a zip tie to keep the gun from moving
from its collected state
– Never place any objects into the barrel of the weapon
– Package it in plastic
– Package the ammunition separately
Copyright © Texas Education Agency 2012. All rights reserved.
Images and other multimedia content used with permission.
35
Proper Packaging of Evidence
(continued)
Narcotics and Dangerous Drugs Requirements
– Package all narcotics and dangerous drugs separately
– Package drug paraphernalia separately
– Weigh each type of drug in its entirety, including the
packaging
– Conduct a presumptive test on the substance, and include the
results in the officer’s report
– Package narcotics and other drugs in paper envelopes
– Seal both ends of the envelope with evidence tape
– Initial and date the evidence tape on both ends
– After narcotics/drugs are packaged
Weigh them again in the completed packaging
Write the gross weight on the outside of the package
– Place a completed property tag on the package
Copyright © Texas Education Agency 2012. All rights reserved.
Images and other multimedia content used with permission.
36
Proper Packaging of Evidence
(continued)
Cash
– Count it in the presence of a supervisor
– Initial it (the booking officer and the supervisor)
– For cash in excess of $1,000, the sergeant shall be
contacted and witness the count and initial, date
the property form, and specify any additional
security procedures to be used
Copyright © Texas Education Agency 2012. All rights reserved.
Images and other multimedia content used with permission.
37
Chain of Custody
Must maintain a document that includes
exactly what happened to the evidence from
the time it was found to the time it is
presented in court
Accounts for the following information
– Who found the item
– Where it was found
– Who took custody, collected, marked, and
packaged the item
– Where the item is stored
Copyright © Texas Education Agency 2012. All rights reserved.
Images and other multimedia content used with permission.
38
Chain of Custody (continued)
Bears the name, initials, or mark of every
person who came into contact with all items of
evidence
Evidence Transmittal Sheet
– Documents the chain of custody for the listed items
of evidence
– Includes a list of the items of evidence that is
numbered consecutively
– Continues the consecutive number onto more than
one sheet if needed
Copyright © Texas Education Agency 2012. All rights reserved.
Images and other multimedia content used with permission.
39
Protecting the Crime Scene
The first officer to arrive at the scene of a
crime must
– Preserve and protect the area
– Establish a perimeter to encase the crime scene
Additional personnel will be needed for proper
perimeter security
Copyright © Texas Education Agency 2012. All rights reserved.
Images and other multimedia content used with permission.
40
Protecting the Crime Scene
(continued)
After a perimeter is established, no one will enter the
scene except
–
–
–
–
–
Crime scene personnel
Investigator in charge
Medical Examiner
Medical personnel, if needed
Those authorized by the crime scene unit or the personnel in
charge
Station officers at the entry and exit of the crime
scene who will
– Be responsible for keeping a Crime Scene Entry Log
– Record everyone that enters or exits the crime scene
Copyright © Texas Education Agency 2012. All rights reserved.
Images and other multimedia content used with permission.
41
Lift and Preserve Developed
Latent Prints (from a mock crime scene)
Processing Prints
– Put on protective clothing and gloves
– Handle the piece of evidence by the edges or otherwise as needed to avoid
damaging the latent prints
– Place the object on a clean, flat surface with the suspected location of the
latent print accessible
– Dip the brush lightly into the powder (just the tips)
– Tap the brush on the powder container to remove any excess powder
– Use a light, circular motion to gently sweep the brush over the area to be
processed while allowing the bristles to barely contact the surface
– Continue to brush powder over the designated area until the latent prints begin
to develop
– Concentrate on that area as the location of the latent print becomes clear
– Repeat steps 4–6 if necessary
Stop dusting once the print is clearly developed
Take a photo of the processed print
Copyright © Texas Education Agency 2012. All rights reserved.
Images and other multimedia content used with permission.
42
Lift and Preserve Developed
Latent Prints (from a mock crime scene)
(continued)
Lifting Prints
– Put on protective clothing and gloves
– Find the free end of a roll of tape
– Fold the end of the tape several times to make a “tab” to hold (this does not
have to be neat)
– Pull out 2–3 inches of tape
– Avoid contact with the sticky side of the tape while holding the roll in one hand
and the “tab” in the other
– Choose the print you want to lift
– Starting with the “tab” end, place the tape a few inches from the print and
slide your finger across the tape to smooth it over the print while making sure
all of the bubbles are gone
– Peel the tape gently from the surface being processed
– Begin at the end closest to the roll, place the latent print card against the roll
of tape, and gently smooth the tape onto the card until the “tab” is reached
– Tear the tape off carefully at the end of the latent print card and repeat steps
2–8 as needed
Copyright © Texas Education Agency 2012. All rights reserved.
Images and other multimedia content used with permission.
43
DNA
DNA
– The fundamental building block for an individual’s entire
genetic makeup; it is a component of virtually every cell in the
human body
– Different for each person, except identical twins; this difference
will either link or eliminate a suspect based on comparison
Common types
–
–
–
–
–
Blood
Saliva
Skin cells
Semen or vaginal secretions
Hair
Copyright © Texas Education Agency 2012. All rights reserved.
Images and other multimedia content used with permission.
44
DNA (continued)
Collection
– Wear gloves and change them often
– Use disposable instruments or clean the instruments thoroughly before
and after handling each sample
– Avoid touching the area where you believe the DNA may exist
– Avoid talking, sneezing, and/or coughing over the evidence
– Avoid touching your face, nose, and/or mouth when collecting and
packaging evidence
– Air dry evidence thoroughly before packaging
– If the sample is dry, moisten the swab with sterile, distilled water
– Put the evidence into new paper bags or envelopes; do not package it
in plastic
– Do not use staples
Copyright © Texas Education Agency 2012. All rights reserved.
Images and other multimedia content used with permission.
45
DNA (continued)
Contamination can easily occur when one
source of DNA gets mixed with another
Transport and Storage
–
–
–
–
Keep the sample dry and at room temperature
Secure the evidence in paper bags or envelopes
Seal and label the envelopes
Transport in a manner that the location found and
the proper chain of custody are visible
– Avoid direct sunlight and warm conditions
Copyright © Texas Education Agency 2012. All rights reserved.
Images and other multimedia content used with permission.
46
Resources
Bertino, Anthony J. Forensic Science; Fundamentals and
Investigations. Mason, OH: South-western Cengage Learning,
2009.
Arlington Police Academy
Texas Commission on Law Enforcement Standards and Education
(TCLEOSE) http://www.tcleose.state.tx.us/
www.ncjrs.gov/txtfiles1/nij/bc000614.txt
http://www.crime-scene-investigator.net
http://www2.fbi.gov/hq/lab/fsc/backissu/july2000/deedric4.htm
http://www.nij.gov/topics/law-enforcement/investigations/crimescene/guides/crime-scene-glossary.htm
Search the Internet for the following:
– CSI how stuff works
– Laboratory 81 dusting and lifting
Copyright © Texas Education Agency 2012. All rights reserved.
Images and other multimedia content used with permission.
47

