Pipe Roundness Measurement Technology
advertisement
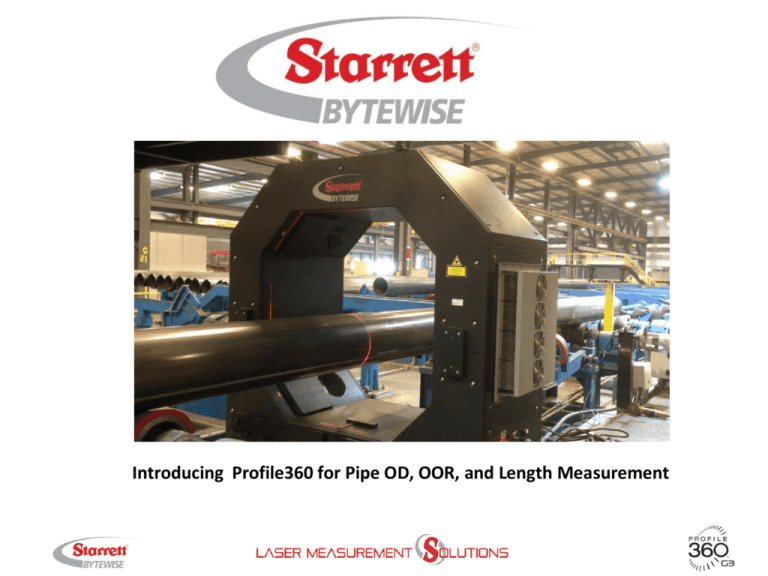
Introducing Profile360 for Pipe OD, OOR, and Length Measurement Size and Range Min OD 5” (125mm) Max OD 24” (600mm) Frequency 11/second Uses Profile360-600 automatically measures pipe Diameter and Out of Round for pipe from 5” up to 24” OD at two locations - in-line before cutting, and in final inspection. The system in final inspection produces an automated dimensional inspection report – an audit trail of the “as produced” quality for each pipe showing the maximum, minimum, and average OD and OOR for both pipe ends and body. The in-line system can be used to fine-tune roll-tooling set-ups during a diameter change. During production this system alarms whenever any parameter approaches the allowable limit so that an operator can intervene before a quality fault occurs. Technical Highlights Profile360-600 automatically measures Diameter and Out of Round for pipe from 5” up to 24” OD in-line before cutting, and in final inspection. Profile360 utilizes non-contacting CrossCheck Line-Laser Sensor Technology with no moving parts to deliver the highest system reliability. The system is sealed and temperature controlled for tough environments. A single measurement cycle instantaneously acquires about 5,000 data points in-plane for a 24” pipe and can report up to 180 diameter values, one per degree. For final inspection the software displays maximum, minimum, and average OD and OOR for each pipe end and the body. Length measurement is optional. We can interface to your weigh system to display and record the weight. Profile360 has sealed laser apertures and sealed sensor windows so that no dirt gets inside. Air circulation fans assure uniform temperature inside. The air blow-off manifold delivers air pulses to keep the glass surfaces clean. Registration Fixture The Registration Fixture is used to perform automatic sensor alignment checking using patented software algorithms. It clips on to the frame very easily. The checking routine is run automatically from the software. The whole process takes only a minute or two. Master Gauges Master Gauges are used to verify the diameter accuracy. Temperature Control A Closed-Loop Temperature Control System keeps the internal temperature constant in all environments. This reduces thermal drift in the measurement and assures the longest possible laser diode life. Wiring Details Interconnection wiring is simple, with cables for power and data. A digital read-out displays the internal temperature. Line-Laser Sensor Measurement Principle The CCD Detector Digitizes Profile for Output to PC controller. The Laser Diode projects a line across the profile which is reflected onto the detector. Profile360 utilizes CrossCheck™ Line-Laser Sensors, developed and optimized by Starrett-Bytewise to achieve the range and accuracy required for ERW pipe mills. Sensors are mounted on a precision space-frame and aligned via patented software techniques. Data sets from each sensor are internally stitched together into a global coordinate system using another patented algorithm. Measurement System Configuration Unlike oscillating measurement systems, Profile360 has no moving parts – no slides, motors, controllers, or encoders that require maintenance and calibration and will eventually fail. Profile360 is inherently reliable due to its simple design. The system is sealed and temperature controlled to assure a constant internal temperature. This results in a greatly reduced thermal drift for the system and assures a long laser diode life, even in tough environments. Field Of View Profile360 is available in FOV 25mm, 50mm, 75mm, 100, and 150mm FOV, now introducing 600mm Pipe Measurement Display Measure Save Design Edit Design Sample Client : Sample P.O. Number: Pipe Number : Registration Size : 15490 Spec & Grade : Units: 225577 Close All Software 500 x 12.6 API 5L & X-52M English Metric Overall Measurements Description Weight Length F-end thickness T-end thickness Specification 1975 16.0 8.20 8.20 LCL 1950 15.2 8.00 8.00 UCL 2000 16.8 8.50 8.50 Measured 1988 16.2 8.10 8.10 Units kg m mm mm Section Measurements Diameter Specification Positon 25 mm 50 mm 500 mm 925 mm 5000 mm 25 mm 50 mm 323.85 Location F-end Body T-end Diameter Specifications LCL UCL 322.22 325.48 322.22 325.48 321.41 326.29 321.41 326.29 321.41 326.29 322.22 325.48 322.22 325.48 Min 323.06 319.84 324.59 324.59 324.56 325.09 324.64 Status measurement started! Received 399 profiles with average spacing 47.42mm and average velocity 458.89 mm/s Final Measurement at 16.1m Final Length is 16.2m Out of Round Measured Max 325.09 324.84 326.54 325.45 325.42 325.15 325.09 Overall 324.36 322.35 325.58 325.02 324.99 325.12 324.87 Allowable Tolerance 4.85 4.85 6.48 6.48 6.48 4.85 4.85 Circumference Measured Measured Units 5.08 4.32 3.05 2.79 2.79 5.36 2.79 40.25 39.85 40.25 40.18 40.18 40.19 40.16 mm mm mm mm mm mm mm Diameter Visualization 5,000 data points are matched to the perfect circle template and deviations are rendered as red error vectors. Introduced in 2002 and available in these configurations Profile360 wasn’t invented yesterday – it has a 12-year history. About 380 units are in service in these industries: • Rubber Auto Seal Extrusion • PVC Window Extrusion • Roll-Formed Metal Profiles • Drawn Wire Profiles • Ceramic Catalytic Converter Substrate Extrusion • Tire Tread Extrusion • Wood-Plastic Composite Extrusion Our Organization Headquarters and Technical Center – Columbus Georgia, USA European Sales and Service – Trelleborg, Sweden China Sales and Service – ShangHai, WeiHai, TianJin Independent Sales Representatives: Central America Brazil Czech Republic Turkey India South Africa Thailand Indonesia/Malaysia Japan Korea Contact Jim Williams Sales Director Profile360 Worldwide Starrett-Bytewise Measurement Systems Mobile: +1.404.915.7516 Skype: jim_c_williams jwilliams@starrett.com www.starrett.com/bytewise Please follow us on LinkedIn: www.linkedin.com/company/starrett-bytewise-measurement-systems and visit our YouTube Channel: www.starrett.com/laser-inspection-videos
