More Free-body Diagrams
advertisement
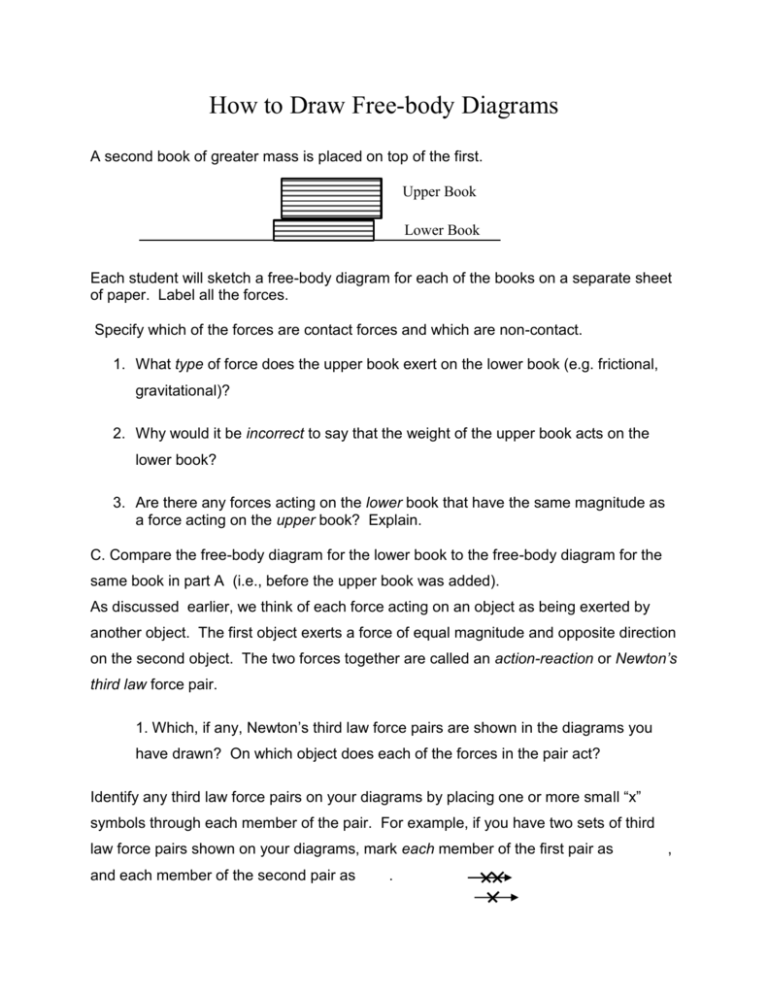
How to Draw Free-body Diagrams A second book of greater mass is placed on top of the first. Upper Book Lower Book Each student will sketch a free-body diagram for each of the books on a separate sheet of paper. Label all the forces. Specify which of the forces are contact forces and which are non-contact. 1. What type of force does the upper book exert on the lower book (e.g. frictional, gravitational)? 2. Why would it be incorrect to say that the weight of the upper book acts on the lower book? 3. Are there any forces acting on the lower book that have the same magnitude as a force acting on the upper book? Explain. C. Compare the free-body diagram for the lower book to the free-body diagram for the same book in part A (i.e., before the upper book was added). As discussed earlier, we think of each force acting on an object as being exerted by another object. The first object exerts a force of equal magnitude and opposite direction on the second object. The two forces together are called an action-reaction or Newton’s third law force pair. 1. Which, if any, Newton’s third law force pairs are shown in the diagrams you have drawn? On which object does each of the forces in the pair act? Identify any third law force pairs on your diagrams by placing one or more small “x” symbols through each member of the pair. For example, if you have two sets of third law force pairs shown on your diagrams, mark each member of the first pair as and each member of the second pair as . , Example of Free-body Diagram 1. Draw a box indicating the relevant object separate from all other objects. Draw the object in the correct orientation and include any appropriate surfaces. 2. Identify all forces acting on the object and draw them as vectors on the object. 3. Clearly label the each force vector. 4. The relative lengths of the vectors should represent the relative magnitudes of the forces. 5. Indicate the net force on the object by drawing a vector near, but not on, the object. (Use a different color pen if possible.) 6. Draw a box indicating the relevant object separate from all other objects. Draw the object in the correct orientation and include any appropriate surfaces. 7. Identify all forces acting on the object and draw them as vectors on the object. 8. Clearly label the each force vector. 9. The relative lengths of the vectors should represent the relative magnitudes of the forces. 10. Indicate the net force on the object by drawing a vector near, but not on, the object. (Use a different color pen if possible.) Using the rules above, let us look at a few situations: 1. A crate is lifted upward at constant speed by a cable. Use the instructions and example draw a free body diagram for each of the samples below. 1. A sled slides down a hill with increasing velocity. Do not neglect friction. 2. A quarterback throws a football. Draw the diagram when it is in the air. (Ignore air resistance.) 3. The same football while the quarterback is throwing it horizontally. 4. A box in the back of a truck while the truck accelerates to the right. Draw the diagram for the box assuming it doesn't fall off the truck. 5. The space shuttle as it clears the launch pad. (Do not neglect air resistance).
