Installation of Fedora: Version 7
advertisement

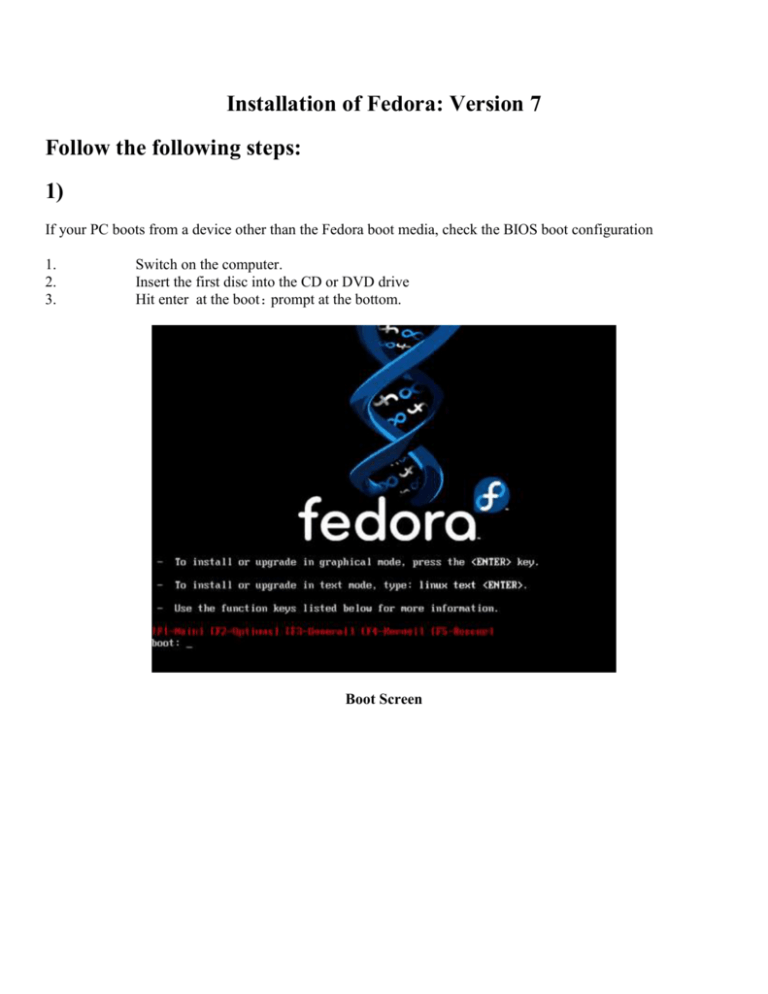
Installation of Fedora: Version 7 Follow the following steps: 1) If your PC boots from a device other than the Fedora boot media, check the BIOS boot configuration 1. 2. 3. Switch on the computer. Insert the first disc into the CD or DVD drive Hit enter at the boot: prompt at the bottom. Boot Screen 2) Media Test Screen Select OK to test the disc, or select Skip to proceed with the installation without testing the disc. 3) Language Selection Screen Select ‘English’ Select ‘OK’ 4) Keyboard Configuration Screen Select ‘us’ Select ‘OK’ 5) We are using default installation method: using CD. On Welcome screen Select Next to continue. Welcome Screen 6) Choose Install Fedora Core. Then select next Upgrade Examine Screen 7) Now Partitioning Options Screen will appear Fedora creates and uses several partitions on the available hard drives. You may customize both the partitions, and how the drives on your system are managed. For this installation let’s use customized partitioning. Partitioning Options Screen From the “Partitioning Options Screen”, select Create custom layout and select Next to proceed. Suppose if you want to create your own partitions then select ‘Review and modify partitioning layout’, for further steps go to the end of the document. 8) Keep the default selection as it is Then select ‘Next’ Boot Loader Configuration Screen 9) keep the default selection as it is and select ‘Next’ Network Configuration Screen 10) Time Zone Selection Screen Select a time zone using the map. Or select a time zone using the list, select the name of the city nearest to your location. Select System clock uses UTC then click ‘Next’. 11) Enter your choice of a root password (at least six characters long) into the Root Password field. Type the same password into the Confirm field to ensure it is set correctly. Set Root Password Screen Select Next to proceed. 12) By default, the Fedora installation process loads a selection of software that is suitable for a desktop system. Select Customize now. Select Next to proceed. Task Selection Screen 13) Package Group Selection Screen To view the package groups for a category, select the category from the list on the left. The list on the right displays the package groups for the currently selected category. To specify a package group for installation, select the check box next to the group. The box at the bottom of the screen displays the details of the package group that is currently highlighted. To change which optional packages within a selected group will be installed, select the Optional Packages button under the description of the group. Then use the check box next to an individual package name to change its selection. Package Group Details Dialog After you choose the desired packages, select Next to proceed. 14) About to Install Screen Click Next to begin the installation. Welcome Screen Select Forward to start the Setup Agent. The following screen displays the overall licensing terms for Fedora. License Agreement Screen Select Yes and then select Forward. Firewall Screen Disable the firewall and click Forward to continue. SELinux Screen Set the SELinux mode to Enforcing and click Forward to continue. Manually set the date and time for your system on this screen. The initial display enables you to set the date and time of your system manually. Date and Time Screen, Local Clock Select the Network Time Protocol tab to configure your system to use NTP servers instead. To configure your system to use network time servers, select the Enable Network Time Protocol option. This option disables the settings on the Date and Time tab and enables the other settings on this screen. Date and Time Screen, Network Time Set the time or NTP and click Forward to continue. System User Screen Enter a user name and your full name, and then enter your chosen password. Type your password once more in the Confirm Password box to ensure that it is correct. Then select ‘Forward’ to proceed. Sound Card Screen Select Finish to proceed to the login screen. Your Fedora system is now ready for use. Installation with customized partitions: Check "Disk Partitioning" in the Partitioning Options Screen If you check to enable "Review and Modify Partitioning Layout", you can create your own partitions. When you select this option, it runs "Disk Druid" application to create the partitions. A Fedora system has at least three partitions: A /boot partition A / partition A swap partition Disk Druid displays the following actions in the installation program: New Select this option to add a partition or LVM physical volume to the disk. In the Add partition dialog, choose a mount point and a partition type. If you have more than one disk on the system, choose which disks the partition may inhabit. Indicate a size in megabytes for the partition. You may also choose from three options for sizing your partition: Fixed size Use a fixed size as close to your entry as possible. Fill all space up to Grow the partition to a maximum size of your choice. Fill to maximum allowable size Grow the partition until it fills the remainder of the selected disks. After you enter the details for your partition, select OK to continue. Edit Select this option to edit an existing partition, LVM volume group, or an LVM physical volume that is not yet part of a volume group. To change the size of a LVM physical volume partition, first remove it from any volume groups. Edit a partition to change its size, mount point, or file system type. Use this function to: correct a mistake in setting up your partitions migrate Linux partitions if you are upgrading or reinstalling Fedora provide a mount point for non-Linux partitions such as those used on some Windows operating systems If you need to make drastic changes to your partition configuration, you may want to delete partitions and start again. If your disk contains data that you need to keep, back it up before you edit any partitions. If you edit the size of a partition, you may lose all data on it. If your system contains many separate partitions for system and user data, it is easier to upgrade your system. The installation program allows you to erase or retain data on specific partitions. If your user data is on a separate /home partition, you can retain that data while erasing system partitions such as /boot. Delete Select this option to erase an existing partition or LVM physical volume. To delete an LVM physical volume, first delete any volume groups of which that physical volume is a member. If you make a mistake, use the Reset option to abandon all the changes you have made. Reset Select this option to force Disk Druid to abandon all changes made to disk partitions. RAID Select this option to set up software RAID on your Fedora system. Create a software RAID partition Choose this option to add a partition for software RAID. This option is the only choice available if your disk contains no software RAID partitions. Create a RAID device Choose this option to construct a RAID device from two or more existing software RAID partitions. This option is available if two or more software RAID partitions have been configured. Clone a drive to create a RAID device Choose this option to set up a RAID mirror of an existing disk. This option is available if two or more disks are attached to the system. LVM Select this option to set up LVM on your Fedora system. First create at least one partition or software RAID device as an LVM physical volume, using the New dialog. To assign one or more physical volumes to a volume group, first name the volume group. Then select the physical volumes to be used in the volume group. Finally, configure logical volumes on any volume groups using the Add, Edit and Delete options. After you finish setting up and reviewing your partition configuration, select Next to continue the installation process. --END--


