Enhance a Presentation
advertisement

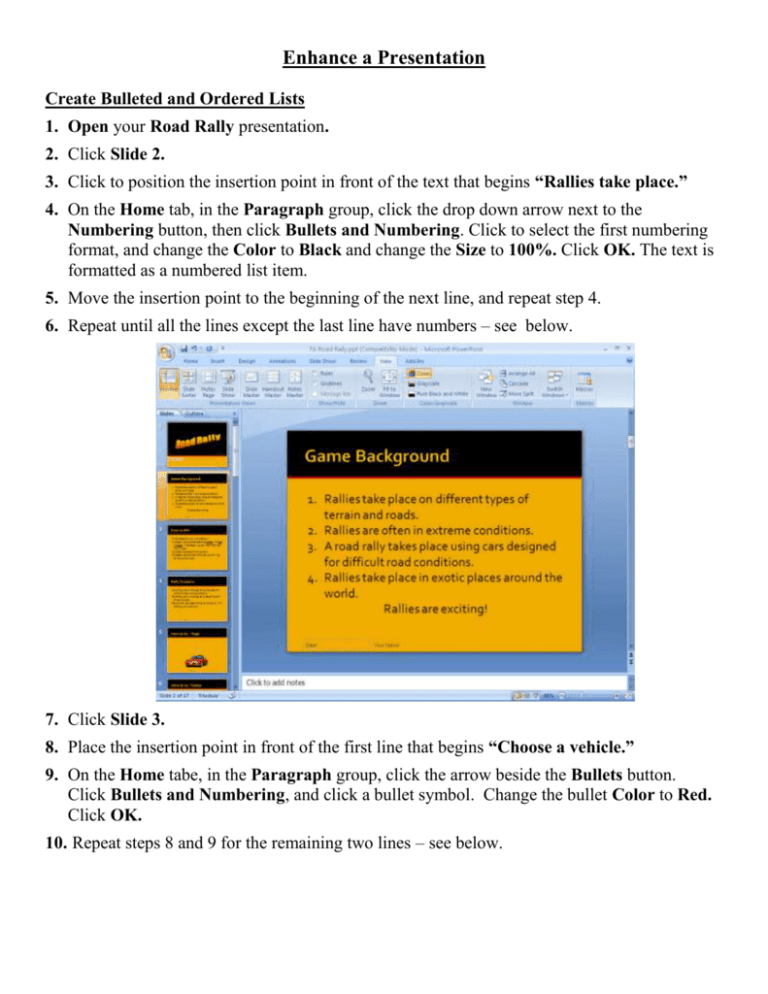
Enhance a Presentation Create Bulleted and Ordered Lists 1. Open your Road Rally presentation. 2. Click Slide 2. 3. Click to position the insertion point in front of the text that begins “Rallies take place.” 4. On the Home tab, in the Paragraph group, click the drop down arrow next to the Numbering button, then click Bullets and Numbering. Click to select the first numbering format, and change the Color to Black and change the Size to 100%. Click OK. The text is formatted as a numbered list item. 5. Move the insertion point to the beginning of the next line, and repeat step 4. 6. Repeat until all the lines except the last line have numbers – see below. 7. Click Slide 3. 8. Place the insertion point in front of the first line that begins “Choose a vehicle.” 9. On the Home tabe, in the Paragraph group, click the arrow beside the Bullets button. Click Bullets and Numbering, and click a bullet symbol. Change the bullet Color to Red. Click OK. 10. Repeat steps 8 and 9 for the remaining two lines – see below. 11. Add bullets to Slides 4, 9, 11, 13, and 16. 12. Save your presentation. Insert a Table 1. Click Slide 5. 2. Locate and click the Insert Table icon in the Click to Add Text placeholder. 3. In the Insert Table box type 3 for the columns and type 2 for the rows. Click OK. 4. Enter the information into the table as shown below. 5. Select the text in the table. Change the Font Size to 24 and the Font Color to Black. Click the Align Center button. 6. Click the border of the table to select the table. 7. On the Table Tools Layout tab, in the Alignment group, click the Center Vertically button. 8. On the Table Tools Design tab, in the Table Styles group, click the More button to display the Table Styles Gallery. 9. Click the Red thumbnail in the first row. 10. Select the table you created in Slide 5. 11. On the Home tab, in the Clipboard group, click the Copy button. 12. Click Slide 6 and click the placeholder border to select is a shown below. 13. Paste the table into Slide 6. 14. Paste the same table into Slide 7. 15. Enter the information into both tables as shown below. 16. Save your work. Create a Graph 1. In your Road Rally presentation click Slide 15. 2. On the Insert tab, in the Illustrations group, click the Insert Chart button. Click the first thumbnail in the Column chart type group and click OK. 3. Drag the date range border to include the range A1:C4. 4. Select the text in cells D1 through D5, and right-click the data. Click Clear Contents. Delete the data in cells A5 through C5. 5. Key the information into the spreadsheet as shown below. 6. AutoFit the width of the cells by placing your mouse pointer on the divider line between the column headings and double-clicking. 7. Minimize the spreadsheet window. 8. On the Chart Tools Design tab, in the Data group, click the Switch Row/Column button. Close the spreadsheet window. 9. On the Chart Tools Design tab, in the Chart Styles group, click the More button to display the Chart Styles gallery. Click Style 42. 10. Your finished slide should look like below. 11. Save and close your work. Apply Transitions and Animation 1. Click Slide 1. 2. On the Animations tab, in the Transition to This Slide group, click the More button. 3. Locate the Wipes category, and point to several transition effects to see a preview. Click the Wipe Down transition effect in the first row in the Wipes category. 4. On the Ribbon, click the Apply to All button. Click Slide Show. 5. Press Enter to advance to the next slide, and press Esc to end the slide show. 6. Click the Animations tab, if necessary. Click Slide 17, and click to select the flag graphic. 7. On the Animations tab, in the Animations group, click the Custom Animation button to display the Custom Animation pane. 8. Click the Add Effect button, and click the arrow beside Entrance. 9. Click Slide 1, then select the Road Rally placeholder, and apply the Diamond Entrance effect. Apply an animation effect to the subtitle. 10.Close the Custom Animation pane. Note: Each object on a slide can be animated. Use animations to emphasize and draw attention. Be careful not to use too many animations. Add Sound and Graphics 1. Click Slide 16. 2. On the Insert tab, in the Media Clips group, click the arrow on the Sound button. Click Sound from Clip Organizer. 3. In the Clip Art task pane, key applause in the Search for text box, then click Go. 4. Put your mouse over the first clip in the Clip Art pane, and notice the ScreenTip, Claps Cheers. Click the arrow beside the button, and choose Preview/Properties. Click the Close button. 5. Click Claps Cheers button to insert it into the slide. 6. When prompted with the question How do you want the sound to start in the slide show? Click Automatically. 7. A sound icon is displayed on the slide. Drag the sound icon to the lower-left corner of the slide. 8. Click Slide 6. 9. On the Insert tab, in the Illustrations group, click the Picture button. Browse to the Data File titled 7D Vehicle Choice2. 10. Click the file to select it, and click the Insert button. 11. Click the image, and drag the lower-right handle downward to make the image larger. 12. Drag the image to center the car under the table. 13. Click Slide 7. 14. On the Insert tab in the Illustrations group, click the Picture button. 15. Insert the Data File titled 7E Vehicle Choice3. 16. Click the image, and drag the lower-right handle downward to make the image larger. Close the Clip Art task pane. 17. Click the image and center it under the table. 18. Go to the end of the presentation, and insert a new slide. On the Home tab, in the Slides group, click the New Slide drop-down arrow. Choose the Title Only layout. 19. Key Thank You! in the title placeholder. Drag the placeholder to center it vertically and horizontally on the slide. 20. Format the placeholder text. Choose your font, font size and font color. You can also change the fill and outline color of the placeholder as well as apply special effects such as shadow and glow attributes. 21. Add clip art to the slide, and apply animation to each object on the slide. 22. Save your work. Prepare for the Presentation 1. In your Road Rally presentation, click Slide 3. 2. Click the Speaker Notes area below the slide, and key the text shown below: 3. Add the speaker note below to Slide 8. 4. Click Slide 17. You are going to delete this slide because you have decided you no longer need it. 5. Press Delete. Press CTRL + Z to undo the deletion. You decided to keep the slide. 6. Click Slide 1. 7. On the Review tab, in the Proofing group, click the Spelling button. 8. As the Spelling check goes through your presentation, make any necessary corrections when prompted. 9. Save your work. Print Handouts and Speaker Notes 1. Click the Microsoft Office Button, and choose Print to display printing options. Click Print to open the Print dialog box. 2. Under Print what, click the drop-down arrow, then choose Handouts – see below. 3. In the Handouts area, next to Slides per page, click the arrow, then choose 3. 4. Click the Preview button. Note how your page will look in Preview layout – see below. 5. Close the Close Print Preview button. 6. To print your speaker notes, click the Microsoft Office Button, and choose Print from the Print menu. 7. Next to Print what, click the arrow, then choose Notes Pages. 8. Under Print Range, click Slides. 9. In the box next to Slides, type 3,8 to print the slides on which you added speaker notes. Do not click 10. Click the Preview button. Note how slide 4 will print with speaker notes – see below 11. Close the Close Print Preview button. 12. Save your work. Publish as a Web Page 1. Click the Microsoft Office Button and then choose Save As. The Save as dialog box displays. 2. Next to File name, key Your Name Road Rally Web Page. 3. In the Save as type box, click the arrow, and choose Single File Web page. 4. Click the Change Title button, and change the title to Your Name Road Rally. 5. Click the Publish button to open the Publish as Web Page dialog box. 6. Select the Complete presentation option, and deselect the Display speaker notes check box. 7. Click to select the Open published Web page in browser check box. 8. Click the Web Options button to open the Web Options dialog box. Then click the General tab, and select the Add slide navigation controls control box. 9. Click the drop-down arrow for the Colors text box, and select Presentation colors (text color). 10. Deselect the Show slide animation while browsing check box. Then select the Resize graphics to fit browser window check box. 11. Click OK to close the Web Options dialog box, and click the Publish button to save the Web page and to close the Publish as Web Page dialog box. Your presentation opens as show below. 12. In the lower-right corner, click the Slide Show button. View your presentation. 13. To end the show, press Esc. Close Internet Explorer and exit PowerPoint.


