Test Corrections - AnneReganWiki
advertisement
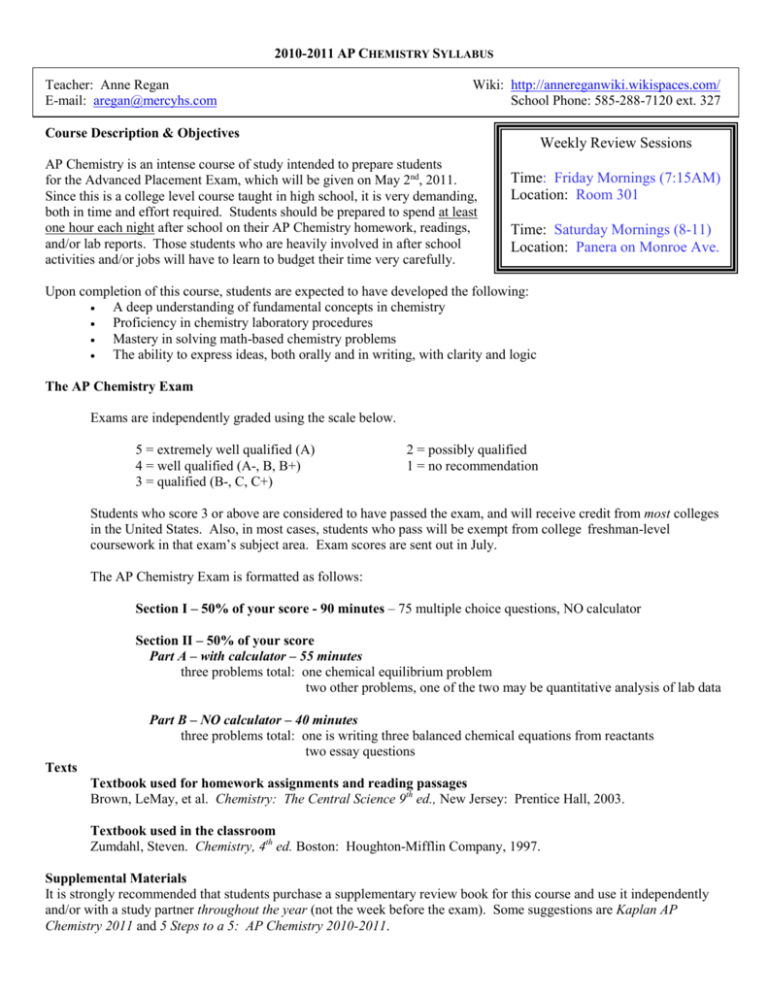
2010-2011 AP CHEMISTRY SYLLABUS Teacher: Anne Regan E-mail: aregan@mercyhs.com Wiki: http://annereganwiki.wikispaces.com/ School Phone: 585-288-7120 ext. 327 Course Description & Objectives Weekly Review Sessions AP Chemistry is an intense course of study intended to prepare students for the Advanced Placement Exam, which will be given on May 2nd, 2011. Since this is a college level course taught in high school, it is very demanding, both in time and effort required. Students should be prepared to spend at least one hour each night after school on their AP Chemistry homework, readings, and/or lab reports. Those students who are heavily involved in after school activities and/or jobs will have to learn to budget their time very carefully. Time: Friday Mornings (7:15AM) Location: Room 301 Time: Saturday Mornings (8-11) Location: Panera on Monroe Ave. Upon completion of this course, students are expected to have developed the following: A deep understanding of fundamental concepts in chemistry Proficiency in chemistry laboratory procedures Mastery in solving math-based chemistry problems The ability to express ideas, both orally and in writing, with clarity and logic The AP Chemistry Exam Exams are independently graded using the scale below. 5 = extremely well qualified (A) 4 = well qualified (A-, B, B+) 3 = qualified (B-, C, C+) 2 = possibly qualified 1 = no recommendation Students who score 3 or above are considered to have passed the exam, and will receive credit from most colleges in the United States. Also, in most cases, students who pass will be exempt from college freshman-level coursework in that exam’s subject area. Exam scores are sent out in July. The AP Chemistry Exam is formatted as follows: Section I – 50% of your score - 90 minutes – 75 multiple choice questions, NO calculator Section II – 50% of your score Part A – with calculator – 55 minutes three problems total: one chemical equilibrium problem two other problems, one of the two may be quantitative analysis of lab data Part B – NO calculator – 40 minutes three problems total: one is writing three balanced chemical equations from reactants two essay questions Texts Textbook used for homework assignments and reading passages Brown, LeMay, et al. Chemistry: The Central Science 9th ed., New Jersey: Prentice Hall, 2003. Textbook used in the classroom Zumdahl, Steven. Chemistry, 4th ed. Boston: Houghton-Mifflin Company, 1997. Supplemental Materials It is strongly recommended that students purchase a supplementary review book for this course and use it independently and/or with a study partner throughout the year (not the week before the exam). Some suggestions are Kaplan AP Chemistry 2011 and 5 Steps to a 5: AP Chemistry 2010-2011. Expectations of Students Students are expected to come to class fully prepared and on time, which includes bringing a graphing calculator, class binder with notes and reference tables, loose leaf paper, and pens/pencils every day. On days during which lab activities will be carried out, students are expected to bring their Lab Binders as well. Assignments must be the student’s own work and submitted on or before the due date. Actively participating in class and asking questions will help students be successful in this course. Absences If a student is absent from class, she is responsible for making up the material that was covered in class. This can be done by contacting a classmate or by seeing me outside of regular class time. Grading Policy Each quarterly grade will be weighted as follows: 50% Tests 25% Lab Reports* 15% 10% Quizzes Homework* Tests will be administered on the Friday after a unit of study is completed. Tests will consist of former AP Exam questions and be administered to simulate the time constraints of the AP Exam. If a student misses a test, she must arrange to make it up before or after school within 3 days of returning to school. Lab activities will be conducted every week. Satisfactory reports must be written and submitted for all the lab activities performed by the student within one week of conducting the activity. If a student is absent on the day of a lab, she must arrange with me to make up the lab within one week of returning to school. Quizzes will be given on Fridays during which tests are not administered. Homework will be assigned daily. Students are expected to do all of the readings and homework assignments. *Late work will not be accepted. Test Corrections If a student does not pass a test, she is expected to attend a review session to review the test in addition to submitting test corrections. A maximum of ¼ credit for each corrected answer will be given. In order to receive credit, the following criteria must be met: Define all vocabulary words in question Write a proof for the correct answer (state what law/theory/concept applies) Explain why the initial answer was chosen and why it is incorrect Show any mathematical calculations which help derive the correct answer Submitted within one week after the exam is passed back Lab Binder Because colleges may request to see evidence of student participation in laboratory activities, each student is required to keep a lab binder as documentation of laboratory experiences. Students will hand in individual lab reports, get them back, and then update their Lab Binders accordingly. These will be checked periodically to make sure that students are maintaining their Lab Binders. The Lab Binder should be compiled as follows: 1. Table of Contents 2. Laboratory Safety Guidelines 3. Lab Handouts & Formal Lab Reports (see Lab Binder handouts for format) Name: _________________________________ AP Chemistry 2010-2011 Lab Binder . TABLE OF CONTENTS Pages I. Common Laboratory Equipment 2-3 II. Laboratory Safety 4-5 III. Lab Report Format 6 IV. Lab Reports Date ___________ Title of Lab Pages ___________ _____________________________________________________________ ___________ ___________ _____________________________________________________________ ___________ ___________ _____________________________________________________________ ___________ ___________ _____________________________________________________________ ___________ ___________ _____________________________________________________________ ___________ ___________ _____________________________________________________________ ___________ ___________ _____________________________________________________________ ___________ Date Title of Lab Pages ___________ _____________________________________________________________ ___________ ___________ _____________________________________________________________ ___________ ___________ _____________________________________________________________ ___________ ___________ _____________________________________________________________ ___________ ___________ _____________________________________________________________ ___________ ___________ _____________________________________________________________ ___________ ___________ _____________________________________________________________ ___________ ___________ _____________________________________________________________ ___________ ___________ _____________________________________________________________ ___________ ___________ _____________________________________________________________ ___________ ___________ _____________________________________________________________ ___________ ___________ _____________________________________________________________ ___________ Date Title of Lab Pages ___________ _____________________________________________________________ ___________ ___________ _____________________________________________________________ ___________ ___________ _____________________________________________________________ ___________ ___________ _____________________________________________________________ ___________ ___________ _____________________________________________________________ ___________ ___________ _____________________________________________________________ ___________ ___________ _____________________________________________________________ ___________ ___________ _____________________________________________________________ ___________ ___________ _____________________________________________________________ ___________ ___________ _____________________________________________________________ ___________ ___________ _____________________________________________________________ ___________ ___________ _____________________________________________________________ ___________ Common Laboratory Equipment watch glass mortar and pestle crucible and cover evaporating dish pneumatic trough beaker safety goggles Florence flask wide-mouth collecting bottle plastic wash bottle dropper pipet funnel Erlenmeyer flask rubber stoppers glass rod w/ nichrome wire (for flame testing) ring stand test tube holder clay triangle rubber tubing crucible tongs metal spatula ceramic square test tube brush triangular file Beaker: glass or plastic; common sizestongs are 50-mL, 100-mL, 250-mL, 400crucible mL; glass beakers may be heated. Buret: glass; common sizes are 25-mL and 50-mL; used to measure volumes of solutions during titrations. Ceramic square: used under hot apparatus or glassware. Clamps: the following types of clams may be fastened to support apparatus: buret/test-tube clamp, clamp holder, double buret clamp, ring clamp, 3-pronged clamp. Clay triangle: wire frame with porcelain supports; used to support a crucible. Condenser: glass; used in distillation procedures. Crucible and cover: porcelain; used to heat small amounts of solid substances at high temperatures. Crucible tongs: iron or nickel, used to pick up and hold small items. Dropper pipet: glass tip with rubber bulb; used to transfer small volumes of liquid. Erlenmeyer flask: glass, common sizes are 100-mL and 250-mL; may be heated, used in titrations. wire gauze Bunsen burner tripod Evaporating dish: porcelain; used to contain small volumes of liquid being evaporated. Florence flask: glass, common sizes are 125-mL, 250-mL, 500-mL; used in making and storing solutions. Forceps: metal; used to hold or pick up small objects. Funnel: glass or plastic, common size holds 12.5-cm diameter filter paper; used during filtrations. Gas burner: metal; connected to a gas supply with rubber tubing; used to heat chemicals (dry or in solution) in beakers, test tubes, or crucibles. Gas collecting tube: glass, marked in mL intervals; used to measure gas volumes. Glass rod with nichrome wire: used in flame tests. Graduated cylinder: glass or plastic, common sizes are 10-mL, 50-mL, 100mL; used to measure approximate volumes; must not be heated. Graduated pipet: glass, common sizes are 10-mL, 25-mL; used to measure solution volumes; less accurate than a volumetric pipet. Common Laboratory Equipment test tube rack test tubes stirring rod Buret/test tube clamp volumetric pipet graduated cylinder clamp holder thermometer pinch clamp 3-prong clamp forceps condenser rubber policeman gas collecting tube pipet bulb graduated pipet double buret clamp ring clamp Mortar and pestle: porcelain, may be used to grind crystals and lumpy chemicals to a powder Pipet bulb: rubber, used in filling a pipet with a solution Plastic wash bottle: flexible plastic, squeeze sides to dispense water Platform balance: also known as a triple beam balance Pneumatic trough: galvanized container with shelf, used in experiments where a gas is collected Ringstand: metal rod fixed upright in a heavy metal base; has many uses as a support Rubber stoppers: several sizes Rubber tubing: used to connect apparatus so as to transfer liquids or gases Safety goggles: plastic; must be worn at all times while working in the laboratory Screw clamp, pinch clamp: metal, used to block off rubber tubing Spatula, scoopula: metal, used to transfer solid chemicals; the scoopula has a larger capacity screw clamp platform balance (triple beam) Stirring rod and rubber policeman: glass with rubber sleeve; used to stir, assist in pouring liquids, and for removing precipitates from a container Test tube brush: bristles with wire handle, used to scrub small diameter glassware Test tube holder: spring metal, used to hold test tubes or glass tubing Test tube rack: wood or plastic, holds test tubes in a vertical position Test tubes: glass, common sizes – small (13x100mm), medium (20x150mm), large (25x200mm), may be heated Thermometer: volatile liquid in glass; common range is -10˚C to 110˚C Volumetric pipet: glass, common sizes are 10mL, 25mL; used to measure solution volumes accurately, must not be heated Watch glass: glass, used to cover an evaporating dish or beaker Wide-mouth bottle: glass, used with pneumatic trough Wire gauze: used to spread the heat of a burner flame Laboratory Safety Rules Before you enter the lab: 1. Wear appropriate clothing. No shorts, open-toed shoes, loose clothing. Clothing can get damaged or stained. 2. Do not wear contact lenses. Chemicals can get trapped between the contact and the eye. 3. Tie back long hair because it is a fire hazard. 4. Do not wear valuable jewelry. It can corrode and chemicals can get trapped between jewelry and skin. 5. Be familiar with lab safety equipment and procedures for that day’s experiment. 6. Leave all food and drink outside of the lab room, including gum. Once you enter the lab: 1. Put on safety glasses and lab apron. 2. Keep a neat work area. Keep books and calculators out of the way. 3. Horseplay will not be tolerated. You will be excused from the laboratory and will receive a grade of zero for the experiment. 4. Be aware. Look for lab techniques that are unsafe and let fellow students know. If it looks like something is going to fall or catch fire, try to prevent it. Most accidents can be avoided. 5. Wash hands after handling chemicals. 6. Work in the hood when using chemicals with strong odors or strongly fuming materials. NEVER inhale odors. If you are instructed to smell, use the wafting method. 7. Use a low speaking voice. Do not make loud, distracting noises. 8. When you assemble an experimental set-up, make sure it is secure. 9. All chemicals should be clearly labeled. If you store a chemical in a container, make sure it contains: a. Name of individual who made the solution. b. Date it was made. c. What it is and the concentration (molarity) * If there is no label, do not use it and report this to the instructor. 10. Disposal of chemicals: Follow instructions for disposal of chemicals. If instructed to dispose of chemicals in the sink, make sure there is nothing clogging the sink. Before you leave the lab: 1. Clean your work area. You should always clean the table with a wet paper towel. 2. Wash your hands with soap and water. Laboratory Safety Rules NEVER 1. 2. 3. 4. 5. 6. 7. Put any glassware in your mouth. Insert glass tubing into anything without hand protection and lubrication. Heat glassware without instruction to do so. Put hot glassware on your work bench without a ceramic block. Touch equipment if you have not been instructed to do so. Heat anything in a closed container. Use chipped or cracked glassware. If heated, it can burst. When there are accidents: 1. Report fires, accidents, or injuries to the instructor immediately. 2. Clean up mess at once. - You can clean up your spills. - Instructor will clean up broken glass. - Fill out broken glass form. 3. The best treatment for burns or chemical spillage is to immediately flush area with cool water. 4. If you get something in your eyes, use the eye wash station. If someone else in the lab is blinded, guide them to the eye wash station and help them flush out their eyes. 5. If there is extensive chemical spillage on skin or clothing, use the safety shower. 6. If you develop any symptoms, report them to the instructor. If you have asthma or any allergies that may be troublesome, let your instructor know. 7. FIRES: - Know where extinguishers are and how to use them - If extensive, leave the area. - If clothing catches on fire, do any of the following: 1. Get under safety shower 2. Wrap victim in fire blanket 3. Roll on floor to extinguish fire Be Careful with: 1. Acetone, ether, iso-octane, benzene, or any alcohol around open flames. (Why? These are volatile organic compounds which can easily catch fire.) 2. Heating per–, –ic, and –ate salts. 3. Diluting acids (AAAW!) – Always Add Acid to Water while stirring. (The dissociation of strong acids is an exothermic process, so a lot of heat can be released when concentrated acids are diluted. If you add water to acid, you form an extremely concentrated solution of acid initially. So much heat is released that the solution may boil very violently, splashing concentrated acid out of the container! If you add acid to water, the solution that forms is very dilute and the small amount of heat released is not enough to vaporize and spatter it.) 4. Spills with KOH or NaOH – clean up immediately and do not get on skin. (Bases can cause chemical burns on skin.) 5. Chlorine, fluorine, bromine, nitric oxide, and hydrogen sulfide gases – use a hood. (Toxic gases) 6. C-N linkages (cyanides, cyanates, nitrites, cyano-) – use a hood. Formal Lab Report Format If possible, lab reports are to be typed so that students have an electronic copy of their work and printed out for inclusion in the Lab Binder. These may be double-sided to save paper. If typing is not an option, students should hand-write the reports on composition notebook paper. If hand-written, use only one side of the paper. The following sections should be included in every lab report: Title (centered) Date (centered) Name (centered) I. Objective(s): In your own words, describe the purpose of the lab. Use complete sentences. II. Concept(s): What concepts (theories, laws, etc.) are being illustrated in the lab? Use complete sentences. III. Pre-Lab Questions: Often, there will be questions to answer before carrying out the lab activity. When this is the case, the answers to the questions should be numbered and answered in complete sentences. IV. Procedure: The procedure will generally be given to you and you may write “see lab handout”. If the procedure is not given to you, make sure to be as detailed as possible and number the steps. V. Data: Usually, a data table will be provided in the lab handout and you can record your data directly in the lab handout and write “see lab handout”. Sometimes, you will be expected to construct your own data table. If the latter is the case, include data that is qualitative (observations) and/or quantitative (measurements) in this section. Measurements must include proper units and significant figures. Graphs and data tables may either be hand-written or computer-generated. VI. Analysis: Analysis questions will be included in each lab. These must be numbered and answered in complete sentences. Any calculations MUST be shown. Calculations should be handwritten. VII. Discussion & Conclusion This section should include a recap of what concepts, theories, and/or laws were illustrated in the lab activity. It should also include an explanation of your results and include sources of error – what went wrong and WHY? Reflect on what you learned from this lab activity. Use complete sentences. Place any lab handouts before the corresponding lab report. All pages in the lab handout and report should be numbered. Place the page number at the center and bottom of the page and circle it. The first page of the very first lab report handout should be numbered as page 7. All subsequent pages are to be one higher than the previous page.
