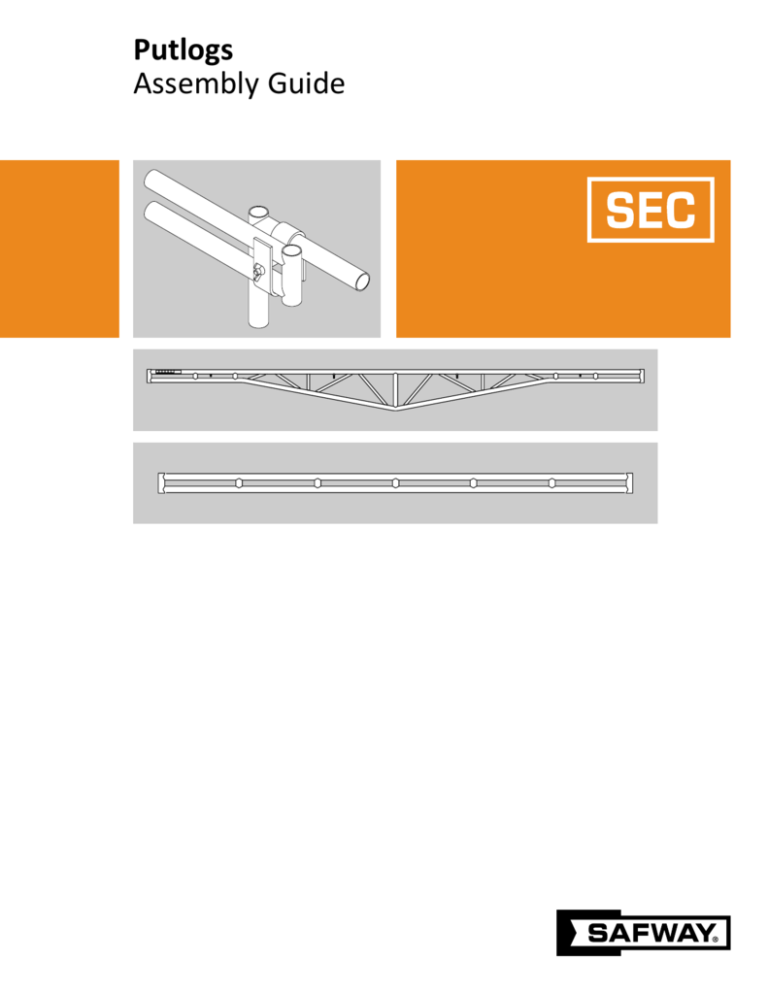
Putlogs
Assembly Guide
2
Since 1936, Safway® brand scaffold has been the industry standard. From
Systems™ to Sectional, Tube & Clamp to SafMax®, Motorized access to
QuikDeck™, Safway has a full line of products designed to work for any project.
Table of Contents
Components Allowable Loading Assembly Instructions
Hanger Assembly Details Bracing Methods Putlog Applications
Supporting Work Platforms Spanning Frame Row to Frame Row at the Top of Scaffold Towers Intermediate Tower Bracing Cantilevered Putlogs Supporting Work Platforms Supporting Work Platforms Spanning Frame Row to Frame Row at Intermediate Levels Spanning to a Structure Supporting Frames Over an Opening Putlogs for Suspended Platforms Components Bracing for Suspended ! WARNING
This document is intended to serve as a basis
for proper application of Safway® putlogs.
Use by unqualified persons may result in
DEATH, SERIOUS PERSONAL INJURY OR PROPERTY
DAMAGE.
ALL SCAFFOLDS SHALL BE ERECTED, DISMANTLED,
MODIFIED, REPAIRED, INSPECTED AND MAINTAINED
UNDER THE SUPERVISION OF A COMPETENT
PERSON. a COMPETENT PERSON SHALL TRAIN ALL
PERSONS ENGAGED IN ERECTING OR DISMANTLING
SCAFFOLDS.
This document is subject to periodic revision
and updating. Before designing a scaffold, refer
to this document on safway.com/literature to
be sure you are using the most current revision.
Contact Safway for all scaffold loading not
covered in this document.
THIS DOCUMENT IS NOT TO BE REPRODUCED IN
PART OR IN WHOLE.
! WARNING
Information contained in this document
is based upon the load-carrying capacity
of the individual components. The total
loads (component weight, plank weight, live
load, material load, wind load, etc.) to be
imposed on the complete assembly must be
considered. ALL loads on individual members
are transmitted to other components and
ultimately to the ground. Compensation for
these cumulative vertical and horizontal
loads must be provided for each individual
scaffold application.
All drawings in this guide are for illustrative purposes only. This guide
is intended for general information purposes only. Because of the
many variables which affect the performance of the product line,
some of the information in this brochure may not apply. For specific
applications, contact Safway.
©2010 Safway Services, LLC. All rights reserved.
Note: All scaffolds shall be erected, modified and dismantled only under
the supervision of a Competent Person. Erection, use, maintenance and
disassembly must conform to current manufacturer's instructions as well
as all federal, state, provincial and local regulations. Copies of complete
Safety Guidelines for these and other products are available on
safway.com/safety or from your local Safway branch without charge.
3
4
5
6
7
8
8
9
10
10
11
11
Components
3
Putlog Components
Part No.Description
PH1
Putlog Hanger
PH2
Hanger
PH3
Guardrail Post Socket
PH4
Guardrail Post Socket
PH5
Putlog Diagonal Knee Brace, with clamps
CRA19
Rigid Clamps
CSA19
Swivel Clamps
P8
Putlog, 8'
P12
Putlog, 12'
P16
Deep Truss, 16'
P22
Deep Truss, 22'
PS42
Putlog Spreader, 42"
PS5
Putlog Spreader, 5'
PH1
Parallel to frame
horizontal
Weight
3.7 lbs.
5.6 lbs.
2.3 lbs.
5.6 lbs.
15.4 lbs.
2.75 lbs.
3.5 lbs.
30.9 lbs.
45.7 lbs.
70.8 lbs.
96.3 lbs.
21.7 lbs.
24 lbs.
PH2PH3PH4
CRA19 CSA19
Any angle to
frame horizontal
PH5
P16 / P22
Short flange
Long
flange
Used to join
tubes at
right angles
Used to join tubes for
bracing only – NOT to be
used to support putlogs
(Hanger Assembly, pg. 5).
P8 / P12
PS42 / PS5
Used when scaffolds are placed
on putlogs over clear spans
©2010 Safway Services, LLC. All rights reserved.
4
Allowable Loading
Allowable Loading: 8' Putlog (P8)
Putlog Spacing
5' 0"
6' 0"
7' 0"
8' 0"
Maximum Allowable Load
SpanUniform
Concentrated*Maximum Allowable Total Load**
4'
3325 lbs.
1662 lbs.
166.2 lbs./ft².
138.5 lbs./ft².
118.8 lbs./ft².
103.9 lbs./ft².
5'
2660 lbs.
1330 lbs.
106.4 lbs./ft².
88.6 lbs./ft².
76 lbs./ft².
66.5 lbs./ft².
6'
2217 lbs.
1108 lbs.
73.9 lbs./ft².
61.6 lbs./ft².
52.8 lbs./ft².
46.2 lbs./ft².
7'
1900 lbs.
950 lbs.
54.2 lbs./ft².
45.2 lbs./ft².
38.7 lbs./ft².
33.9 lbs./ft².
10' 0"
83.1 lbs./ft².
53.2 lbs./ft².
37 lbs./ft².
27.1 lbs./ft².
Allowable Loading: 12' Putlog (P12)
Putlog Spacing
5' 0"
6' 0"
7' 0"
8' 0"
Maximum Allowable Load
SpanUniform
Concentrated*Maximum Allowable Total Load**
7'
2143 lbs.
1072 lbs.
61.2 lbs./ft².
51 lbs./ft².
43.7 lbs./ft².
38.3 lbs./ft².
1875 lbs.
938 lbs.
46.9 lbs./ft².
39.1 lbs./ft².
33.5 lbs./ft².
29.3 lbs./ft².
8'
1667 lbs.
834 lbs.
37 lbs./ft².
30.9 lbs./ft².
26.5 lbs./ft².
23.2 lbs./ft².
9'
1500 lbs.
750 lbs.
30 lbs./ft².
25 lbs./ft².
21.4 lbs./ft².
18.8 lbs./ft².
10'
1364 lbs.
682 lbs.
24.8 lbs./ft².
20.7 lbs./ft².
17.7 lbs./ft².
15.5 lbs./ft².
11'
10' 0"
30.6 lbs./ft².
23.4 lbs./ft².
18.5 lbs./ft².
15 lbs./ft².
12.4 lbs./ft².
Allowable Loading: 16' Deep Truss (P16)
Putlog Spacing
5' 0"
6' 0"
7' 0"
8' 0"
Maximum Allowable Load
SpanUniform
Concentrated*Maximum Allowable Total Load**
10'
3725 lbs.
1862 lbs.
74.5 lbs./ft².
62.1 lbs./ft².
53.2 lbs./ft².
46.6 lbs./ft².
11'
3350 lbs.
1675 lbs.
60.9 lbs./ft².
50.7 lbs./ft².
43.5 lbs./ft².
38.1 lbs./ft².
12'
3040 lbs.
1520 lbs.
50.7 lbs./ft².
42.2 lbs./ft².
36.2 lbs./ft².
31.7 lbs./ft².
13'
2775 lbs.
1388 lbs.
42.7 lbs./ft².
35.6 lbs./ft².
30.5 lbs./ft².
26.7 lbs./ft².
2500 lbs.
1250 lbs.
35.7 lbs./ft².
29.7 lbs./ft².
25.5 lbs./ft².
22.3 lbs./ft².
14'
2250 lbs.
1125 lbs.
30 lbs./ft².
25 lbs./ft².
21.5 lbs./ft².
18.8 lbs./ft².
15'
10' 0"
37.2 lbs./ft².
30.5 lbs./ft².
25.3 lbs./ft².
21.3 lbs./ft².
17.8 lbs./ft².
15 lbs./ft².
Allowable Loading: 22' Deep Truss (P22)
Putlog Spacing
5' 0"
6' 0"
7' 0"
8' 0"
Maximum Allowable Load
SpanUniform
Concentrated*Maximum Allowable Total Load**
2438 lbs.
1219 lbs.
30.5 lbs./ft².
25.4 lbs./ft².
21.8 lbs./ft².
19 lbs./ft².
16'
17'
2206 lbs.
1103 lbs.
26 lbs./ft².
21.6 lbs./ft².
18.5 lbs./ft².
16.2 lbs./ft².
2000 lbs.
1000 lbs.
22.2 lbs./ft².
18.5 lbs./ft².
15.9 lbs./ft².
13.9 lbs./ft².
18'
1816 lbs.
908 lbs.
19.1 lbs./ft².
15.9 lbs./ft².
13.7 lbs./ft².
11.9 lbs./ft².
19'
20'
1650 lbs.
825 lbs.
16.5 lbs./ft².
13.8 lbs./ft².
11.8 lbs./ft².
10.3 lbs./ft².
1500 lbs.
750 lbs.
14.3 lbs./ft².
11.9 lbs./ft².
10.2 lbs./ft².
8.9 lbs./ft².
21'
10' 0"
15.2 lbs./ft².
13 lbs./ft².
11.1 lbs./ft².
9.6 lbs./ft².
8.3 lbs./ft².
7.1 lbs./ft².
Loads listed on this page are only valid when putlogs are installed with horizontal and lateral bracing as detailed in the following
pages. Contact the Safway Engineering Department for loading conditions not covered in the table.
*At center of span
**Note: Total load includes live load and all dead loads (decking, etc.).
©2010 Safway Services, LLC. All rights reserved.
Assembly Instructions
5
Hanger Assembly Details
! WARNING
DO NOT INSTALL PUTLOGS ON HANGERS
WITHOUT THE U-BOLT AND WING NUTS
INSTALLED AND TIGHTENED. FAILURE TO
DO SO MAY RESULT IN DEATH, SERIOUS
PERSONAL INJURY OR PROPERTY DAMAGE.
The PH1 hanger can only be used when
the putlog is oriented parallel to the frame
horizontal.
The PH2 can be used at angles from 0°–90° to
the frame horizontal.
Putlogs shall extend a minimum of 6" beyond
the frame leg.
Putlog
PH1Hanger
Frame Horizontal
Frame Leg
6"
Minimum
Figure 1 – PH1 Hanger Assembly
0° – 90°
Frame Horizontal
Putlog
PH2Hanger
Frame Leg
6" Minimum
Figure 2 – PH2 Hanger Assembly
©2010 Safway Services, LLC. All rights reserved.
6
Assembly Instructions
Bracing Methods
Note: The following putlog bracing
techniques shall be followed when putlogs
are used to support a work deck.
Putlogs installed same
side of frame legs
Lateral Bracing
Cross Braces
Putlogs installed same
side of frame legs
Install putlogs on same side of frame legs
to assure cross braces will fit (Fig. 3).
Continuous
ST__SG Tubing
Install Safway® cross braces horizontally
between putlogs, using the studs provided
on the putlogs. Secure the cross braces
with nuts/wing nuts. Cross braces shall
be placed in end bays and every third bay
between (Fig. 3).
Install continuous Safway® ST__SG tubing.
Clamp to bottom of vertical member of all
putlogs, at center of span, with Safway®
CRA19 clamps as shown (Fig. 3).
Putlog (typical)
Figure 3 – Lateral Bracing of P16 & P22 Putlogs (Plan View)
Alternate Lateral Bracing
Install Safway® ST__SG tubing with
CSA19 clamps on the first and last putlog
in a putlog run and every third bay in
between as shown. Clamp near the center
of the putlog span and run the bracing
diagonally to the next interior frame line.
Clamp to the frame within 6 inches of a
horizontal frame member (Fig. 4).
ST__SG Tubing
Continuous
ST__SG Tubing
Putlog (typical)
Install continuous Safway® ST__SG tubing.
Clamp to bottom of vertical member of all
putlogs, at center of span, with Safway®
CRA19 clamps as shown (Fig. 4).
Knee Bracing
Install PH5 putlog knee brace as close as
possible to a 45° angle (Fig. 5).
Figure 4 – Alternate Lateral Bracing of P16 & P22 Putlogs (Plan View)
Locate the knee brace within 6 inches of
a horizontal member of the supporting
scaffold frame. Knee braces are required
when spans are 10 feet or greater (Fig. 5).
Knee Brace
6" Max from
Horizontal Frame
Figure 5 – Knee Bracing (Front Elevation)
©2010 Safway Services, LLC. All rights reserved.
Continuous
ST_SG Tubing
Putlog Applications
7
Supporting Work Platforms Spanning from Frame Row to Frame Row at the Top of Scaffold Towers
! WARNING
NEVER USE CSA19 SWIVEL CLAMPS TO aTTACH PUTLOGS
THAT SUPPORT WORK PLATFORMS.
Attach putlogs at each frame line using either the PH1
or PH2 putlog hanger.
■■ Do not use CSA19 swivel clamps for putlog
vertical support. CSA19 swivel clamps
may only be used for knee bracing.
■■ Extend each putlog a minimum of 6 inches
beyond the attachment hanger.
■■ Do not use a CP (frame coupling
pin) to attach putlogs.
■■
■■
■■
■■
Install lateral bracing and knee bracing
(Bracing Methods, pg. 6).
Install knee braces for intermediate putlogs
at each end at every third frame line.
Use PH3 guardrail post sockets with paralleltype putlogs and PH4 guardrail post sockets
with deep truss putlogs. This requires the
use of the GGRP male guardrail post.
Vertical distance between horizontal braces
should not exceed 4 times the frame width.
Putlogs attached by Putlog
Hangers for Platform
Vertical Distance
not to exceed
4 times the
frame width
Fig. 7
Putlogs for Bracing
Knee Braces for Intermediate Putlogs
Knee Braces every third frame line
Frame
Width
Figure 6 – Supporting Work Platforms that Span from Frame Row to Frame Row at the Top of Scaffold Towers
CRA19 Rigid Right Angle Clamp
Putlog for bracing towers (no platform)
Figure 7 – Putlog Application (closeup)
©2010 Safway Services, LLC. All rights reserved.
8
Putlog Applications
Intermediate Tower Bracing
Putlogs may be used for intermediate tower bracing
on large stationary scaffolds. CRA19 rigid right angle
clamps are recommended in lieu of PH1 or PH2 hangers
to attach the putlog to the frame for immediate tower
bracing where the putlogs will not be supporting loads
from a work platform. The clamp must be installed
immediately above and rest on a frame horizontal
member.
Overhang
6" Minimum
Fig. 10
CRA19
Putlogs must be knee braced for lateral stability (Fig. 6).
Cantilevered Putlogs Supporting Work
Platforms
The minimum support and bracing requirements
to cantilever putlogs supporting work platforms
located anywhere in a scaffold tower are as
follows:
1. Putlog must extend a minimum of 6" beyond
the outer frame leg (Fig. 8).
2. Attach putlog to outer frame leg with CRA19
clamp and to inner leg with putlog hanger
(PH1 or PH2). Do not substitute (Fig. 8).
3. Frames must be secured to coupling pins (CP)
with rivet & hairpins (RHP), pigtail pins (PTP)
or bolts (Fig. 8).
4. Install a stand-off (butt tube) against the
structure at each putlog (Fig. 8).
5. Install a tension/compression (push/pull) tie to
the structure at each frame one lift below the
putlog. Tie shall be located near a horizontal
frame member (Fig. 8).
6. Install a horizontal tube (ST__SG) to the
cantilevered end of the putlog with CRA19
clamp (Figs. 8, 10).
7. Install a horizontal tube (ST__SG) just above
the top of the frame below with CRA19 clamp
(Figs. 8, 9).
8. Install knee brace tube to the horizontal tubes
with CRA19 clamps (Figs. 8–10).
9. Do not exceed 500 lbs. live load (workers and
material) on the cantilevered putlog. Contact
a qualified engineer if a higher load rating is
needed.
RHP / PTP /
bolts
Fig. 9
Rigid
Stand-off
Knee Brace
PH1 / PH2
Tension/
compression tie
Figure 8 – Cantilevered Putlogs
ST__SG Horizontal brace
Knee Brace with
CRA19 clamp
Figure 9 – Attaching to Frame Leg
ST__SG Horizontal brace
Knee Brace with
CRA19 clamp
Figure 10 – Attaching to Putlog
©2010 Safway Services, LLC. All rights reserved.
Putlog Applications
9
Supporting Working Platforms Spanning Frame Row to Frame Row at Intermediate Levels
It is recommended that appropriate PH1 or PH2 hangers
be used to support putlogs used for work platforms at
intermediate levels.
! WARNING
NEVER USE CSA19 SWIVEL CLAMPS TO aTTACH
PUTLOGS THAT SUPPORT WORK PLATFORMS.
CRA19 rigid right angle clamps may also be used; however,
make sure that the putlog end reactions do not exceed the
clamp capacity (750 lbs. on painted surfaces; 1000 lbs. on
galvanized surfaces). The CRA19 clamps must be installed
immediately above a frame horizontal member to prevent
slippage. 40 ft. lbs. clamp torque required.
P16 and P22 putlogs must be knee braced and laterally braced
(Bracing Methods, pg. 6).
! WARNING
Putlog supported work platforms may
require that guardrail systems be installed.
Follow Safway Sectional Scaffold Safety
Guidelines as well as federal, state,
Provincial, and local requirements for
installation and use of guardrails and
toeboards.
Structure
Figs. 12, 13
Knee Braces every frame line
Figure 11 – Working Platforms
Lower Level Platform Putlog
Lower Level Platform Putlog
PH1
CRA19 Rigid Angle Clamp
Above Horizontal Member
Putlog Hanger
Horizontal Member
Figure 12 – Preferred Putlog Attachment
Figure 13 – Alternate Putlog Attachment
©2010 Safway Services, LLC. All rights reserved.
10
Putlog Applications
Spanning to a Structure
Do not attach putlogs directly on scaffold base
plates or screw jacks. Putlogs must be attached
to scaffold frames using putlog hangers, Safway®
clamps, or as specified by Safway Engineering, and
must be laterally braced (Bracing Methods, pg. 6).
If putlogs are used as a tie to stabilize a scaffold
tower, the putlog support frame on the structure
must be secured from movement (Fig. 14).
Stand-off to prevent
movement
PH1 / PH2 Hanger
Knee Brace required
PH1 / PH2 Hanger
Tie
Building
Figure 14 – Spanning a Structure
Supporting Frames Over an Opening
In those instances where putlogs are used to
support frames spanning an opening, a PS5
putlog spreader is used to support the scaffold
frames above the putlog and align them with
other frames in the scaffold run. The PS5
contains a “saddle” at each end which rests on
putlogs for support and has coupling pins to
place the next frame above.
Install putlogs on the outside of the scaffold
frames so that coupling pins in PS5 line up
with the scaffold frames. When PS5s are
used, additional lateral bracing is not required
(Bracing Methods, pg. 6). However, knee braces
are still required.
PS5
Putlog Spreader
Putlog
Figure 15 – Supporting Frames Over an Opening
©2010 Safway Services, LLC. All rights reserved.
Putlogs for Suspended Platforms
11
Components
Part No.Description
PH6
Single Putlog Suspension Hanger
PH7
Double Putlog Suspension Hanger
BCA
Adjustable Beam Clamp
Weight
5.8 lbs.
8.0 lbs.
14.2 lbs.
PH6PH7BCA
Bracing for Suspended
Install Safway® ST__SG tubing with CSA19
clamps for horizontal diagonals or Safway®
cross braces horizontally between each pair of
putlogs (Fig. 16).
Install continuous Safway® ST__SG tubing.
Clamp to bottom of vertical member of all
putlogs, at center of span, with Safway®
CRA19 clamps (Fig. 16).
! WARNING
DO NOT INSTALL PUTLOGS ON HANGERS
WITHOUT THE BOLT AND LOCK NUT
INSTALLED AND TIGHTENED. FAILURE TO
DO SO MAY RESULT IN DEATH, SERIOUS
PERSONAL INJURY OR PROPERTY DAMAGE.
! WARNING
Each person erecting or dismantling
this scaffold must wear a properly
attached fall arrest device. Inspect
all equipment prior to installation.
Do not exceed allowable loading on
putlogs (Allowable Loading, pg. 4).
Perimeter of scaffold and all openings require
guardrails and toeboards. Use standard
Safway® guardrail components (Fig. 17).
Putlog (typical)
Note: Putlogs may require an additional
support at mid-span for specific applications.
Contact the Safway Engineering Department
for recommended procedures in these cases.
CSA19
Continuous ST__SG
Tubing (CRA19)
Figure 16 – Bracing (Plan View)
Adjustable Beam Clamp
Thimble
(3) Twin Base Clips
Install per manufactuer's
recommendations
Wire Rope
Diameter, as specified
Guardrails / Toeboards
(3) Twin Base Clips
Install per manufactuer's
recommendations
Continuous ST__SG Tubing
Thimble
Turnbuckle
Putlog Hanger
Figure 17 – Bracing (Front Elevation)
©2010 Safway Services, LLC. All rights reserved.
Since 1936, Safway® brand scaffold has been
the industry standard. From Systems™ to
Sectional, Tube & Clamp to SafMax®, Motorized
access to QuikDeck™, Safway has a full line of
products designed to work for any project.
Safway Services, LLC
Corporate Headquarters
N19 W24200 Riverwood Drive
Waukesha, WI 53188
Toll free: (800) 558-4772
Telephone: (262) 523-6500
For a list of branch locations in the
United States and Canada, visit our
website at www.safway.com
©2010 Safway Services, LLC. All rights reserved.
ORN 113 Rev. C 6/10

