VCU108 Evaluation Kit Quick Start Guide (XTP400)
advertisement
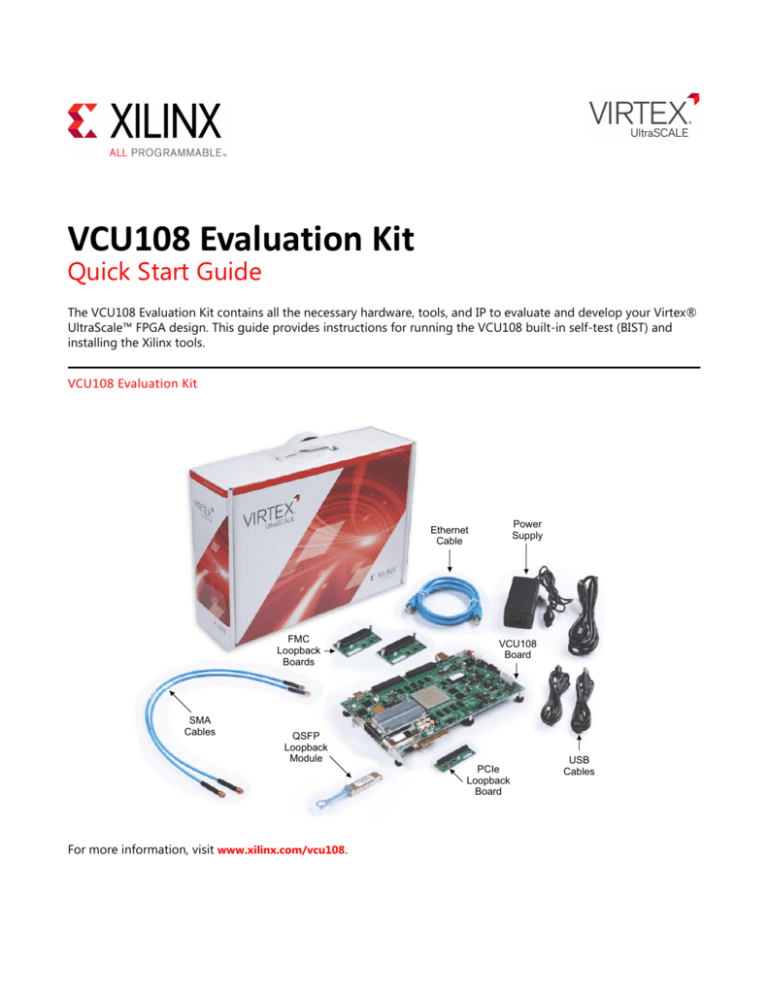
VCU108 Evaluation Kit
Quick Start Guide
The VCU108 Evaluation Kit contains all the necessary hardware, tools, and IP to evaluate and develop your Virtex®
UltraScale™ FPGA design. This guide provides instructions for running the VCU108 built-in self-test (BIST) and
installing the Xilinx tools.
VCU108 Evaluation Kit
X-Ref Target - Figure 1-1
3RZHU
6XSSO\
(WKHUQHW
&DEOH
)0&
/RRSEDFN
%RDUGV
60$
&DEOHV
9&8
%RDUG
46)3
/RRSEDFN
0RGXOH
3&,H
/RRSEDFN
%RDUG
For more information, visit www.xilinx.com/vcu108.
86%
&DEOHV
Built-In Self-Test (BIST) Instructions
VCU108 Evaluation Kit
The built-in self-test FPGA
configuration file is stored
in the onboard BPI flash
memory.
6:
'6
*3,2/('V
'6
6:
6:
3XVKEXWWRQV
STEP 1: Set Configuration Switches
X-Ref Target - Figure 1-2
Set the configuration mode DIP switch (SW16) so that the BIST file is loaded at
power-up from the BPI flash memory as shown below:
Switch
Setting*
SW16-1
0
SW16-2
0
SW16-3
0
SW16-4
1
SW16-5
0
Purpose
Configuration file storage location:
00=1st, 01=2nd, 10=3rd, and 11=4th
FPGA configuration mode:
010=Load from BPI flash
101=JTAG configuration
* 1=ON, 0=OFF
'6
STEP 2: Connect Power to the Board
'6
21
Connect the 6-pin power supply plug to J15, and power up the board using the
SW1 switch.
LED DS3 ON indicates that the power system is good.
DONE LED DS34 ON indicates that the Virtex UltraScale FPGA is configured
successfully.
X-Ref Target - Figure 1-3
2
X-Ref Target - Figure 1-4
*3,2/('V
STEP 3: Run the Built-In Self-Test
The BIST consists of a set of pass/fail tests. On power-up, the Clock, DDR, BRAM,
flash memory, and I2C tests are run without user input.
A passing test is indicated when the corresponding GPIO LED for each test is ON.
See the following table for the LED that corresponds to each test.
The DIP and PB tests require user interaction as described in the following section.
The blinking LED indicates which test is waiting for user input.
Self-Test Assignments for GPIO LEDs
GPIO LEDs
X-Ref Target - Figure 1-5
7
6
5
4
3
2
1
0
Clock
DDR
BRAM
Flash
I2C
DIP
PB
NA
The DIP switch test checks DIP switch SW12 operation. To complete the test, push
all four switches to the ON position.
A passing test is indicated when GPIO LED 2 is ON.
X-Ref Target - Figure 1-6
The PB test checks pushbutton operation.
To complete the test, push the N, W, S, and E pushbuttons in any order. Then push
the center button.
A passing test is indicated when GPIO LED 1 is ON.
X-Ref Target - Figure 1-7
To run the built-in self-test again, press SW4 (PROG).
For information on testing FMC, PCIe, CFP2, and QSFP board interfaces, visit www.xilinx.com/kits/vcu108bit.
3
Install Xilinx Tools and Redeem the License Voucher
A Vivado® Design Suite: Design Edition voucher code is included with this VCU108 Evaluation Kit. This Vivado
license is node-locked and device-locked to the XCVU095 device.
STEP 4: Redeem the Vivado Tools License Voucher
To redeem the Vivado Tools voucher code, go to www.xilinx.com/getlicense and enter the voucher code shown
below. This will put the licenses into your account. You can then generate the license file, which will be emailed to
you. For additional assistance redeeming your voucher, go to www.xilinx.com/kits/voucher.
Note: This code can only be used once and must be redeemed within one year of purchase.
X-Ref Target - Figure 1-8
,PSRUWDQW
,PSRUWDQW
STEP 5: Install the Vivado Design Suite
a.
To install the Vivado Design Suite, go to www.xilinx.com/download to select and download the latest version
of Vivado tools for your operating system.
b. The Vivado installation flow will open the Vivado License Manager. 1. Under the Get License heading,
select Load License. 2. Click Copy License. 3. In the Select License File dialog box, click
Browse. 4. Navigate to the License file that you received from Xilinx. 5. Select the file and click Open.
c. If you need assistance, review the Vivado installation guide at www.xilinx.com/kits/vivadoinstall.
Next Steps
Learn More
To learn more, visit www.xilinx.com/kits/vcu108-nextsteps for an extensive collection of resources, including
tutorials, instructional videos, detailed reference design guides, schematics, hardware user guides, and other
reference designs to move you from the evaluation and learning phase to developing your own product.
Support
For support options related to this product, see the Xilinx support website at www.xilinx.com/support.
Warranty
For the product warranty, go to www.xilinx.com/kits/warranty.
© Copyright 2014–2016 Xilinx, Inc. Xilinx, the Xilinx logo, Artix, ISE, Kintex, Spartan, Virtex, Vivado, Zynq, and other designated brands
included herein are trademarks of Xilinx in the United States and other countries. All other trademarks are the property of their respective
owners.
4
XTP400 (v1.2) January 19, 2016

