SIMnet® Online Projects Best Practices
advertisement

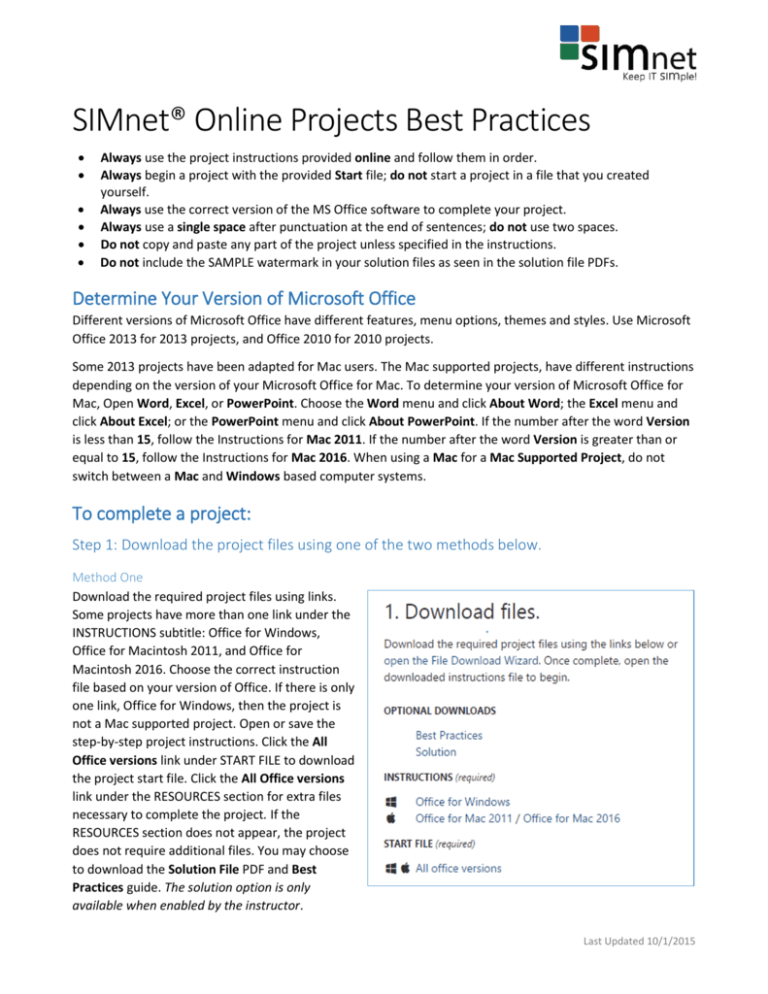
SIMnet® Online Projects Best Practices Always use the project instructions provided online and follow them in order. Always begin a project with the provided Start file; do not start a project in a file that you created yourself. Always use the correct version of the MS Office software to complete your project. Always use a single space after punctuation at the end of sentences; do not use two spaces. Do not copy and paste any part of the project unless specified in the instructions. Do not include the SAMPLE watermark in your solution files as seen in the solution file PDFs. Determine Your Version of Microsoft Office Different versions of Microsoft Office have different features, menu options, themes and styles. Use Microsoft Office 2013 for 2013 projects, and Office 2010 for 2010 projects. Some 2013 projects have been adapted for Mac users. The Mac supported projects, have different instructions depending on the version of your Microsoft Office for Mac. To determine your version of Microsoft Office for Mac, Open Word, Excel, or PowerPoint. Choose the Word menu and click About Word; the Excel menu and click About Excel; or the PowerPoint menu and click About PowerPoint. If the number after the word Version is less than 15, follow the Instructions for Mac 2011. If the number after the word Version is greater than or equal to 15, follow the Instructions for Mac 2016. When using a Mac for a Mac Supported Project, do not switch between a Mac and Windows based computer systems. To complete a project: Step 1: Download the project files using one of the two methods below. Method One Download the required project files using links. Some projects have more than one link under the INSTRUCTIONS subtitle: Office for Windows, Office for Macintosh 2011, and Office for Macintosh 2016. Choose the correct instruction file based on your version of Office. If there is only one link, Office for Windows, then the project is not a Mac supported project. Open or save the step-by-step project instructions. Click the All Office versions link under START FILE to download the project start file. Click the All Office versions link under the RESOURCES section for extra files necessary to complete the project. If the RESOURCES section does not appear, the project does not require additional files. You may choose to download the Solution File PDF and Best Practices guide. The solution option is only available when enabled by the instructor. Last Updated 10/1/2015 Method Two Download the required project files using the Download Wizard. Click the open the File Download Wizard link to open the wizard. The project Start File will download automatically. In the Download Wizard window, click the Download Instruction File button for step-by-step project instructions. For Mac supported projects, Macintosh users will see radio buttons to select the correct version of Office for Mac. Select the correct version of Office for Mac before clicking Download Instruction File. Click the Download Resource Bundle button for extra files necessary to complete the project. If the Download Resource Bundle does not appear, then the project does not require additional files. You may choose to download the Solution File PDF and Best Practices guide or Skip downloading the rest of the files. The solution option is only available when enabled by the instructor.Then CLOSE the Download Wizard. Your start file will automatically be renamed to include your name. If directed by your instructor, change the filename and save it. Do all your work in this file and only this file! Step 2: Complete the project Open your downloaded files. Follow the Instructions to edit your Start File. Use any Resources as instructed. Complete all instructions carefully! Step 3: Upload & Save the project. Once you have finished your project, you need to upload & save it to SIMnet. Click the Upload my file button, select your file, and click Open. This will replace any file that was previously uploaded for this project. The Submit Uploaded File wizard will let you grade your file immediately by clicking Yes, submit the file. You can also use the Upload & Save feature to save your work online, to retrieve later. Click No, I’m not ready. Once you’ve uploaded your file, download it again from the Current File section. Step 4: Submit your project for grading. If you selected No, I’m not ready. In step 3, click the Grade my file button to submit your project for grading. After your project has been graded, look for the eye icon for results that are available. Click the Attempt link to view past results. Last Updated 10/1/2015 Downloading Start Files (Edge 20+, Chrome 18+, IE 9+, Firefox 12+, Safari 5+) From the Project page, click the All Office versions link under the START FILE section. Edge 1. The file will be saved to the Downloads folder automatically. 2. Click View downloads button in the download bar, and then click the file name to open it. 3. Click Enable Editing in the Security Warning bar if present. Chrome 1. The file will be saved to the Downloads folder automatically. 2. Click the file name in the Download bar at the bottom of the browser window to open it. 3. Click Enable Editing in the Security Warning bar if present. Internet Explorer 4. Click the Save button in the Do you want to open or save... download bar at the bottom of the browser window. The file will be saved to the Downloads folder on your computer. 5. Click View downloads button in the download bar, and then click the file name to open it. 6. Click Enable Editing in the Security Warning bar if present. Firefox 1. Select Save File radio button in the Opening... dialog. The file will be saved to the Downloads folder on your computer. 2. Click the Download arrow at the top of the browser window, and then click the file name to open it. 3. Click Enable Editing in the Security Warning bar if present. Safari 1. The file will be saved to the Downloads folder automatically. 2. Click the Show Downloads button at the top of the browser window and then click the file name to open it. 3. Click Enable Editing in the Security Warning bar if present. Extracting Resources.zip Folders 1. 2. 3. 4. 5. 6. From the project page, click the All Office versions link under RESOURCES section. Navigate to the Downloads folder on your computer. Right-click the folder that you just downloaded and choose Extract All... from the menu. The Extract Compressed (Zipped) Folders window opens. Make sure that the Show extracted files when complete check box is selected. If you want to save your extracted files in a different folder, click on the Browse button and select a new folder. 7. Click the Extract button to extract the files in the folder. For additional information, click the the SIMnet Instant Help. in the upper right corner of the SIMnet window to open Last Updated 10/1/2015
