The DC Power Supply has a green LED that dims or goes out when
advertisement
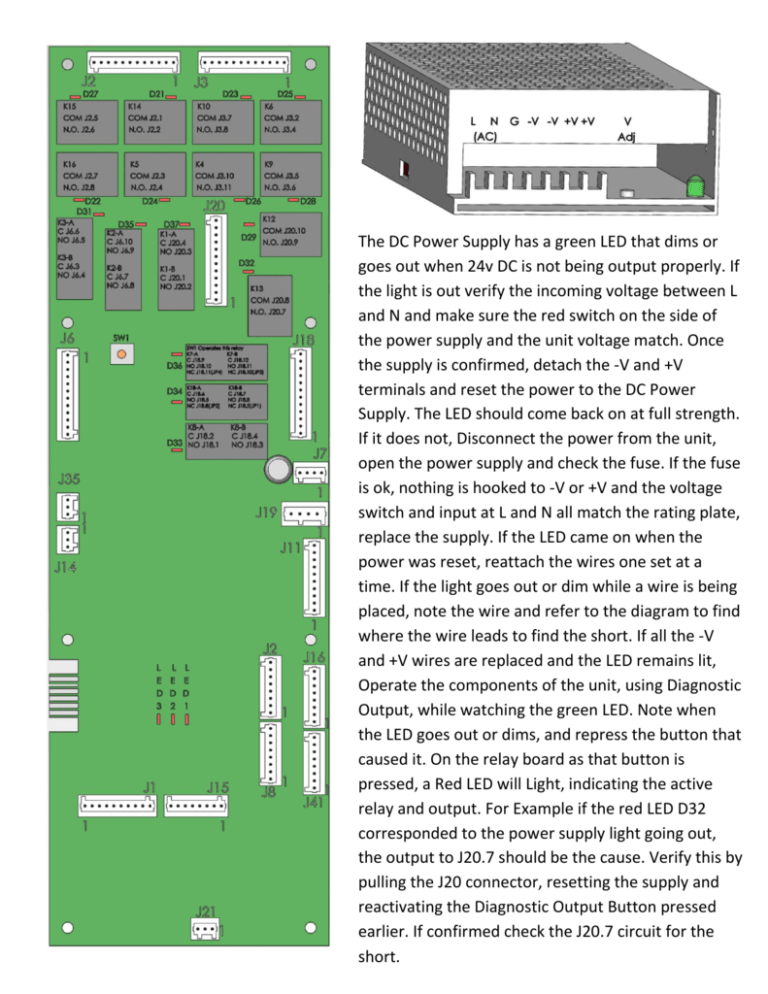
The DC Power Supply has a green LED that dims or goes out when 24v DC is not being output properly. If the light is out verify the incoming voltage between L and N and make sure the red switch on the side of the power supply and the unit voltage match. Once the supply is confirmed, detach the -V and +V terminals and reset the power to the DC Power Supply. The LED should come back on at full strength. If it does not, Disconnect the power from the unit, open the power supply and check the fuse. If the fuse is ok, nothing is hooked to -V or +V and the voltage switch and input at L and N all match the rating plate, replace the supply. If the LED came on when the power was reset, reattach the wires one set at a time. If the light goes out or dim while a wire is being placed, note the wire and refer to the diagram to find where the wire leads to find the short. If all the -V and +V wires are replaced and the LED remains lit, Operate the components of the unit, using Diagnostic Output, while watching the green LED. Note when the LED goes out or dims, and repress the button that caused it. On the relay board as that button is pressed, a Red LED will Light, indicating the active relay and output. For Example if the red LED D32 corresponded to the power supply light going out, the output to J20.7 should be the cause. Verify this by pulling the J20 connector, resetting the supply and reactivating the Diagnostic Output Button pressed earlier. If confirmed check the J20.7 circuit for the short.
