Product Specifications
External View
■ Top View
New Technolog y
2250 mm
Saki's unique "Planar CT" technology generates
high-precision inspection data.
BF-X3
Resolution
12 to 29 μm (factory configurable)
PCB Size
50 x 100 to 460 x 510 mm
(1.97 x 3.94 to 18.11 x 20.08 in.)
PCB Thickness
0.5 to 4.0 mm (0.02 to 0.16 in.)
PCB Warp
+/- 2 mm (0.08 in.)
Component Height
Top: 40 mm (1.57 in.)
Bottom: 40 mm (1.57 in.)
Inspection Categories • Surface Mount Device
Non-wetting, Head-in-Pillow (HiP), fillet
defect, lifted Lead, lifted component,
excessive/insufficient solder, missing
component, flipped component, tombstone,
misplaced component, bridge, void, pad
shape, foreign material, coplanarity.
• IGBT Device
Solder void
Our "Planar CT" (PCT) technology analyzes the internal
structures of planar objects. The detector moves parallel
with the planar object, capturing images from various
directions, thereby enabling quick and accurate generation
of the tomogram of the planar object. This unique parallel
■ Front View
movement permits repeated correction of the reflected
Model Name
images to create a high-resolution image, utilizing less
2308 mm
1880 mm
1460 mm
images.
1820 mm
3D Capture Speed
(Planar CT)*
Approx. 5 sec./FOV
Detector
Flat panel, 14-bit, 3M pixel
X-ray Tube
130 kV, 16 W, Close X-ray Source
X-ray Leakage
0.5 μSV/h or less
Conveyor Method
Flat Belt Transfer
Conveyor Height
880 to 920 mm (34.65 to 36.22 in.)
Width Adjustment
Automatic
Operating System
Windows 7 English Version
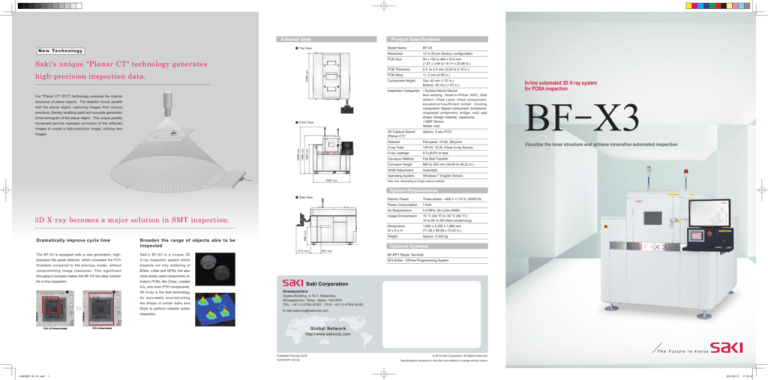
In-line automated 3D X-ray system
for PCBA inspection
BF-X3
Visualize the inner structure and achieve innovative automated inspection
* May vary, depending on image capture settings
System Requirements
■ Side View
Dramatically improve cycle time
900 mm
3D X-ray becomes a major solution in SMT inspection.
Broaden the range of objects able to be
inspected
The BF-X3 is equipped with a new generation, high-
Saki's BF-X3 is a unique 3D
precision flat panel detector, which increases the FOV
X-ray inspection system which
threefold compared to the previous model, without
inspects not only soldering of
compromising image resolution. This significant
BGAs, LGAs and QFNs, but also
throughput increase makes the BF-X3 the ideal solution
most widely used components on
for in-line inspection.
today's PCBs, like Chips, Leaded
ICs, and even PTH components.
3D X-ray is the best technology
for accurately reconstructing
the shape of solder balls and
fillets to perform reliable solder
inspection.
Electric Power
Three-phase
400 V +/-10 %, 50/60 Hz
Power Consumption
7 kVA
Air Requirement
0.5 MPa, 60 L/min (ANR)
Usage Environment
15 °C (59 °F) to 30 °C (86 °F) /
15 to 80 % RH (Non-condensing)
Dimensions
WxDxH
1,820 x 2,250 x 1,880 mm
(71.65 x 88.58 x 74.02 in.)
Weight
Approx. 5,300 kg
Optional Systems
(714 mm)
487 mm
BF-RP1 Repair Terminal
BF2-Editor Off-line Programming System
株式会社サキコーポレーション
Saki
Corporation
E-mail:sakicorp@sakicorp.com
Headquarters
Ogawa Building, 4-14-7, Nakanobu,
Shinagawa-ku,
Tokyo, Japan, 142-0053
本社
TEL:
+81-3-5788-6280
FAX: +81-3-5788-6295
〒142-0053
Global Network
http://www.sakicorp.com
E-mail:sakicorp@sakicorp.com
東京都品川区中延4-14-7 小川ビル
TEL:03-5788-6280 FAX:03-5788-6295
西日本営業所 Global Network
〒651-0087 http://www.sakicorp.com
兵庫県神戸市中央区御幸通4-2‐20 三宮中央ビル7階
TEL:078-291-5210 FAX:078-291-5220
Published February 2015
SJ341DCF1-03.3E
SJ341DCF1-03.3E.indd
1
© 2015 Saki Corporation. All Rights Reserved.
Specifications contained in this flyer are subject to change without notice.
2015/02/12
17:58:47
Technology
In-line automated 3D X-ray system for PCBA inspection
BF- X3
Automated high-resolution 3D measurement technology
Hardware
Reliable hardware design
The BF-X3 uses high-accuracy 3D data generated by the Planar CT (PCT) system to capture a wide variety of defects.
High-resolution closed X-ray tube
The automated inspection process completely separates the top and bottom side images of the board, measures components and
The BF-X3 is equipped with a 130kV closed X-ray tube. This 16W high-output tube, with its very small focal point
features, determines placement variance and warpage, and identifies and classifies the defects, such as dry joints and voids.
size, -enables the BF-X3 to acquire the best high-definition images of any machine in the market. High reliability,
combined with auto-conditioning and self-diagnostic function, ensure a long operating life of the tubes.
Measuring various defects by using high resolution CT data
The Revolution of 3D X-ray
High-Speed Inspection.
Saki employs a customized high-resolution
Closed X-ray tube, in conjunction with microfocus X-ray tubes. The 3D Planar CT measures
the size, volume, and location of defects, and
generates associated data.
Prolonged stability with the high-rigidity gantry structure
Based on these data, BF-X3 determines the
Saki developed the BF-X3's highly rigid, two-layer gantry structure, driven by linear motors and mounted on a
dimension of each component.
granite base, in order to maintain precise control of the detector and inspection object in a very high-speed and
The BF-X3 has superb capability to perform
submicron accuracy environment. This robust mechanism provides high reliability, with long-term stability, to
various inspections, such as electronic
ensure the integrity of the Planar CT high-resolution inspection results.
components, solder, voids in microscopic
Various measurement examples
pores, Head-in-Pillow (HiP), non-wetting, and
Saki revolutionizes 3D X-ray inspection, making its BF-
multi-layer solder inspection for power modules.
High safety based on European standards
X3 machine destined to become commonplace in SMT
The BF-X3 keeps X-ray emissions at a stable and safe level, and is able to start inspection quickly, due to its three
production lines.
Slice
With its Planar CT (PCT) technology, Saki Corporation
Slice
Slice
Slice
shutters located at the PCB entrance, PCB exit, and X-ray emission site. These shutters allow quick inspection
by eliminating the need to turn off the X-ray source during board transfer in, and transfer out of the machine. The
implements a new high-resolution detector, and a new
system meets rigid European (CE) standards, which require the X-ray leakage dose to be less than 0.5 µSv/h.
CT calculation method for PCBA inspection. These
improvements provide much faster throughput compared
Head in Pillow
Saki proudly introduces the BF-X3 machine, setting a
new standard for PCBA inspection.
3D
3D
with previous X-ray machine models.
Less Solders
the horizontal and vertical directions. The
High-resolution 3D data are used for all image
PCT produces high-resolution images for
acquisition, inspection, and analysis. A high-resolution
even the bottom side of the PCBA, due to
its ability to completely separate the top-
Automated high-resolution 3D measurement technology
Enables high image quality defect detection.
3D
Through Hole
Utilize automated 3D image
reconstruction to perform inspection
and analysis at the same time
Seamless 3D data
improves inspection efficiency
Planar CT (PCT) has high resolution in both
T h ree valuable strengths for any production site
3D
Void
PCT separates the top surface from the bottom side of
the PCBA, by live image transfer of the entire board.
Global Support
Worldwide service
Saki's worldwide network provides service and support to its customers of more than 7,000 AOI, SPI, and X-Ray machines.
image of each defect is displayed immediately, thereby
enabling prompt viewing and analysis, and eliminating
side and bottom-side images. The PCT also
the need for further analytical equipment.
detects PCB warpage and joints, completely,
Such precision machine control, 3D reconstruction, 3D
thereby enabling the system to automatically
inspection, and 3D viewing are all unique developments
correct for such factors, by utilizing the optimal
by Saki.
combination of imaging principles and CT
reconstruction principles. This also allows the
BF-X3 to produce a seamless 3D image of the
entire PCBA, although the original image data
Reliable hardware design
are obtained through various FOV captures.
Enables inspection without any interference
from the opposite side of the board
Superior reliability, safety, and ease of maintenance.
Achieve even greater efficiency with Saki's peripheral systems
Worldwide service
Saki provides a strong worldwide network of service and support.
Saki's BF-RP1 Repair Terminal, installed on an off-line PC, allows operators to verify defects in 3D
images. Using the mouse to select and maneuver images of any portion of the entire PCBA image,
makes it seem as if the part were being visualized in the palm of the operator's hand. Additionally, the
BF-Editor2 off-line programming software allows the user to automatically create inspection parameter
data, directly from CAD data. Saki utilized its abundant AOI experience to design the BF-X3 to
accommodate both high-mix and high-volume production environments.
SJ341DCF1-03.3E.indd
2
2015/02/12
17:58:57


