MOSS 2
advertisement
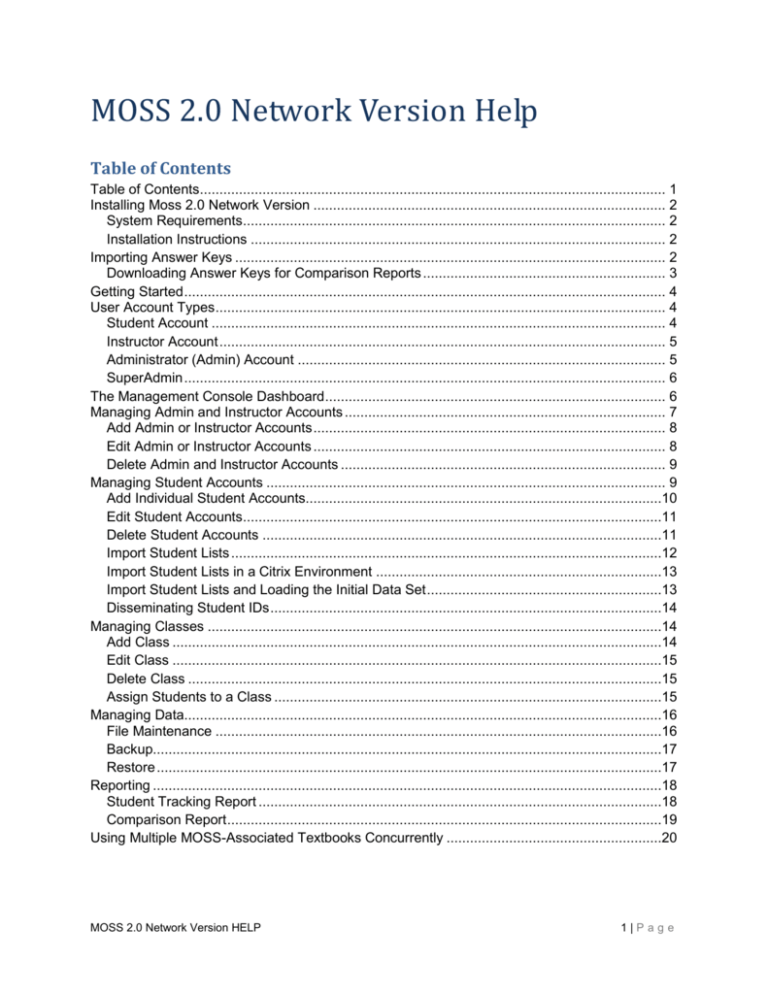
MOSS 2.0 Network Version Help Table of Contents Table of Contents....................................................................................................................... 1 Installing Moss 2.0 Network Version .......................................................................................... 2 System Requirements............................................................................................................ 2 Installation Instructions .......................................................................................................... 2 Importing Answer Keys .............................................................................................................. 2 Downloading Answer Keys for Comparison Reports .............................................................. 3 Getting Started ........................................................................................................................... 4 User Account Types ................................................................................................................... 4 Student Account .................................................................................................................... 4 Instructor Account .................................................................................................................. 5 Administrator (Admin) Account .............................................................................................. 5 SuperAdmin ........................................................................................................................... 6 The Management Console Dashboard ....................................................................................... 6 Managing Admin and Instructor Accounts .................................................................................. 7 Add Admin or Instructor Accounts .......................................................................................... 8 Edit Admin or Instructor Accounts .......................................................................................... 8 Delete Admin and Instructor Accounts ................................................................................... 9 Managing Student Accounts ...................................................................................................... 9 Add Individual Student Accounts...........................................................................................10 Edit Student Accounts...........................................................................................................11 Delete Student Accounts ......................................................................................................11 Import Student Lists ..............................................................................................................12 Import Student Lists in a Citrix Environment .........................................................................13 Import Student Lists and Loading the Initial Data Set ............................................................13 Disseminating Student IDs ....................................................................................................14 Managing Classes ....................................................................................................................14 Add Class .............................................................................................................................14 Edit Class .............................................................................................................................15 Delete Class .........................................................................................................................15 Assign Students to a Class ...................................................................................................15 Managing Data..........................................................................................................................16 File Maintenance ..................................................................................................................16 Backup..................................................................................................................................17 Restore .................................................................................................................................17 Reporting ..................................................................................................................................18 Student Tracking Report .......................................................................................................18 Comparison Report ...............................................................................................................19 Using Multiple MOSS-Associated Textbooks Concurrently .......................................................20 MOSS 2.0 Network Version HELP 1|Page Installing Moss 2.0 Network Version System Requirements The minimum server system requirements to install MOSS 2.0 network version are: Windows Server 2003 or 2008 with all applicable service packs Microsoft SQL Server 2005 or 2008 (SQL Server Express 2005 or 2008 is also supported) .NET Framework 2.0+ MDAC 2.8 SP1+ The minimum client system requirements to install MOSS 2.0 network version are: Operating System: Windows XP®, Windows Vista®, Windows 7® 800x600 display resolution 50 MB free hard disk space Installation Instructions Installation instructions are found on the ReadMe file included on the MOSS 2.0 Network CD-ROM. Importing Answer Keys NOTE: It is recommended that the Answer Keys are uploaded as part of the installation routine, as this function must be performed at the server level. Importing Answer Keys allow you to utilize the Comparison Report functionality within the program. This application MUST be run on the SQL Server machine. 1. Download Answer Keys from the appropriate Instructor Companion Site to the local computer. See the next topic, Downloading Answer Keys for Comparison Reports, for step-by-step instructions. 2. Copy the Answer_key_Import.exe from the MOSS 2.0 Network Version CD onto a hard drive. This must be done BEFORE you run the application. 3. After copying the Answer_key_Import.exe onto a hard drive, run the application. 4. Select the Answer Key location by clicking on the Choose Folder button. The folder containing the answer key file MUST have full read and write privileges for the user. 5. After specifying the SQL Server authentication and the location of the Answer Files, click on Import Answer Keys. Your Answer Keys will be imported into MOSS 2.0 Network Version HELP 2|Page the program and will now appear in the Reporting tab of the Management Console. Downloading Answer Keys for Comparison Reports Answer Key files are available for download on the Instructor Companion Site that accompanies each book: Getting Started in the Computerized Medical Office, Second Edition by Cindy Correa Medical Office Procedures, Eighth Edition by Diane Timme and Phillip Atkinson Coding Simulation for Coding by Stacey Mosay To access the Instructor Companion Sites: 1. Go to login.cengage.com/sso and log in with your Faculty user name and password. If you are a first time user, click on Create a New Faculty Account. 2. In the field Add a Title to Your Bookshelf, type the author’s last name (or book title, or ISBN) of the book you are using. 3. Select the correct book and edition, and click Continue. 4. Select the option to add the “Instructor and Student Companion Site Resources,” and click Add to My Bookshelf. 5. Once added to your Bookshelf, click on Instructor Companion Site. Under Book Resources, select Answer Key Files – Compare Reports. 6. Download to a location on your local computer. MOSS 2.0 Network Version HELP 3|Page Getting Started After installing MOSS 2.0, you may want to perform the following tasks before beginning to use the software on a consistent basis: 1. Log in as the SuperAdmin and create Admin account(s). For instructions on how to create an Admin account, refer to the section entitled Managing Admin and Instructor Accounts. Note that once you have created the appropriate Admin accounts, you most likely will never need to log in as the SuperAdmin again, unless you’re adding or deleting Admins. 2. After creating the Admin accounts, you or the appropriate Admin users can create the appropriate Instructor accounts. For instructions on how to create an Instructor account, refer to the section entitled Managing Admin and Instructor Accounts. 3. In addition, Admins may choose to Create a Class, and then Assign an Instructor to that Class. For instructions on how to create a Class and Assigning an Instructor to a Class, refer to the section entitled Managing Classes. User Account Types MOSS 2.0 has four different user account types (Security levels), each with different access rights: Student Instructor Admin SuperAdmin Users can edit their account by inputting their user name and password in the space provided and clicking on the Manage My Account button. Student Account A Student user is able to edit their Student account with the exception of the Student ID and Login ID, which will be used as a unique identifier. If a student is enrolled in more than one course utilizing MOSS, he or she will need multiple Login IDs created. Each textbook includes different exercises and Answer Keys, but all utilize the same initial data set; thus, is it critical to create multiple Login IDs, so all data stays separate. MOSS 2.0 Network Version HELP 4|Page Students can make changes to their account, including changing their password, by clicking on the Manage My Account button on the logon screen. Student accounts can be created by an Instructor, Admin or SuperAdmin user. Instructor Account Users with an Instructor account will have many capabilities, including the ability to: Create classes. Add Student accounts individually or import Student accounts from a list. o NOTE: Student accounts will not be visible to instructors on the Manage Students tab until students are assigned to a class to which that instructor is assigned. o If a student needs to be assigned to multiple classes or another Instructor, multiple IDs will need to be created for that student. Edit Student accounts. o Instructors can only edit students who are assigned to their class. Add students to their class. Deactivate Student accounts. o Instructors do not have the ability to re-activate students (see Admin Account). Remove students from their class. View and edit information on classes for which they are the assigned instructor. Run reports on students or classes for which they are the assigned instructor. Instructor accounts can be created by an Admin or SuperAdmin user. The InstructorID logon is automatically generated and is the first initial followed by last name of the instructor. In the event of multiple users with the same first and last name, the logon ID will add a number to the end of the name (i.e., JSmith, JSmith1, JSmith2, and so on). The password is initially assigned by the Admin or SuperAdmin. Instructors can change their password or make other changes to their account by typing their user name and password and then clicking on the Manage My Account button on the logon screen. Administrator (Admin) Account The Admin user will have all rights assigned to the Instructor level. In addition, users with an Admin account will also have the following capabilities: Add Instructor accounts. MOSS 2.0 Network Version HELP 5|Page Edit Instructor accounts. Delete Instructor accounts. Assign students to instructors. Re-activate Student accounts. Data management, including the ability to back up the database and restore a backed up database. Reporting, including the ability to report on all students and classes in the system. Most day to day administration of MOSS 2.0 is handled at the Admin account level. Admin accounts can only be created by the SuperAdmin user. The logon AdminID logon is automatically generated and is the first initial followed by last name of the administrator. In the event of multiple users with the same first and last name, the Login ID will add a number to the end of the name (i.e., JSmith, JSmith2, and so on). The password is initially assigned by the SuperAdmin. Administrators can change their password or make other changes to their account by clicking on the Manage My Account button on the logon screen. SuperAdmin The SuperAdmin account is the only account provided at the time of installation. The SuperAdmin user name and password can never be changed. The SuperAdmin account will have rights assigned to both the Instructor and Admin levels. In addition, the SuperAdmin will have the ability to: Add Admin accounts. Edit Admin accounts. Delete Admin accounts. The SuperAdmin account cannot be deleted. The Management Console Dashboard When a SuperAdmin, Admin, or Instructor user logs into the program, the user is taken to the Management Console dashboard. The Management Console dashboard is made up of several tabs. Each tab allows you to manage a different aspect of MOSS 2.0. The number of tabs visible to users will depend on the Security level (account type): MOSS 2.0 Network Version HELP 6|Page If logging in as the SuperAdmin, you will see six (6) tabs: Manage Admins, Manage Data, Manage Instructors, Manage Students, Manage Classes, and Reporting. If logging in as an Admin, you will see five (5) tabs: Manage Data, Manage Instructors, Manage Students, Manage Classes, and Reporting. If logging in as an Instructor, you will see four (4) tabs: Manage Data, Manage Instructors, Manage Students, Manage Classes, and Reporting. Student accounts do not provide access to the Management Console. When entering their name and password on the logon screen, students are taken directly into the MOSS 2.0 program. Managing Admin and Instructor Accounts Within MOSS 2.0 you can create, edit, delete and inactivate Admin and Instructor accounts. However, only the SuperAdmin account has the ability to alter Admin accounts. To manage an Admin or Instructor account, click on the appropriate tab (Manage Administrators or Manage Instructors) on the Management Console dashboard. In addition to adding, editing and deleting an account from the tab, you can also: MOSS 2.0 Network Version HELP 7|Page Search for an account by last name Show All accounts, this button restores the default view after performing a search View only active accounts by deselecting the Include Inactive checkbox Add Admin or Instructor Accounts After clicking on the Add button, you can create an Admin or Instructor account by completing the request information shown on the screen and clicking Save. Information requested includes: First name Last name Middle initial (MI) – this field is not required but can help to differentiate users with the same first and last names Password and re-enter password Active – de-selecting this checkbox will make the account inactive and prevent the user from accessing MOSS Notes field – allows you to enter any notes regarding the account that you may wish to retain A logon ID will automatically be created for the user. The logon ID is the user’s first initial followed by their last name. In the event of multiple users with the same first and last name, the logon ID will add a number to the end of the name (i.e., JSmith, JSmith1, JSmith2, and so on). A unique account should be created for each Admin or Instructor working in MOSS; users should not share accounts. Edit Admin or Instructor Accounts To edit an Account, highlight the desired account and click the Edit button. The user information for that account will appear on screen. You can edit the following information: First name Last name Middle initial (MI) – not required Password and re-enter password Active – de-selecting this checkbox will make the account inactive and prevent the user from accessing MOSS MOSS 2.0 Network Version HELP 8|Page Notes field – allows you to enter any notes regarding the account that you may wish to retain (not required) You cannot change a user’s Login ID or Security level (account type). Click Save to save your changes. NOTE: If an Admin or Instructor forgets his/her password, the password can be reset by using the Edit button. Delete Admin and Instructor Accounts To delete an Account, highlight the desired account and click the Delete button. A confirm window will appear on screen. Click Yes to delete the account. Managing Student Accounts Within MOSS 2.0 you can create, edit, delete and inactivate individual Student accounts. In addition, you can also import multiple students into the system. When creating multiple student accounts for a class, it is recommended that the Import Student List feature is utilized. Refer to the Import Student Lists topic for information on how to perform this task. To manage Student accounts, click on the Manage Students tab on the Management Console dashboard. In addition to adding, editing and deleting an account from the tab, you can also: Filter students by class Filter students by instructor Search for an account by last name Show All accounts, this button restores the default view after filtering the view or performing a search View only active accounts by deselecting the Include Inactive checkbox NOTE: At the Instructor Security level, student names will not appear on the Manage Students tab until students are assigned to the instructor’s Class. At the Admin and SuperAdmin Security levels, all student names in the database are present on the Manage Students tab at all times. NOTE: If a student needs to be assigned to multiple classes, the student will need a unique logon ID for each class; that is, the student will need to be set up twice in the database, with two logon IDs. MOSS 2.0 Network Version HELP 9|Page Add Individual Student Accounts After clicking on the Add Student button, you can create a single student account by completing the request information shown on the screen. Information requested includes: Class – select the class for which the student is enrolled from the dropdown menu (not required for initial student account creation, but strongly suggested) First name Last name Middle initial – this field is not required but can help to differentiate users with the same first and last names Gender – this field is not required but can help to differentiate users with the same first and last names Active – de-selecting this checkbox will make the student inactive and prevent the user from accessing MOSS Password – the default student password is moss1; the password can be reset, if desired A Login ID will automatically be created for the user. The logon ID is the user’s first initial followed by their last name. In the event of multiple users with the same first and last name, the Login ID will add a number to the end of the name (i.e., JSmith, JSmith1, JSmith2, and so on). MOSS 2.0 Network Version HELP 10 | P a g e Click Save Record to create the account. Click OK to import the initial data set and click OK again when the process is complete. Once complete, the number -1 will appear in the grayed-out Seeded field. If a student needs to be assigned to multiple classes, the student will need a unique Login ID for each class; that is, the student will need to be set up multiple times in the database. For example, if Michael Brown is in the Computers in the Medical Office course in the morning, he would use Login ID “mbrown” for that class only. For his afternoon course, Medical Office Procedures, he would use Login ID “mbrown2.” That way, the data and activities for each class stay separate. NOTE: At the Instructor Security level, student names will not appear on the Manage Students tab until students are assigned to the instructor’s Class. At the Admin and SuperAdmin Security levels, all student names in the database are present on the Manage Students tab at all times. Edit Student Accounts To edit an Account, highlight the desired account and click the Edit Student button. The user information for that account will appear on screen. You can edit the following information: Class – change the class for which the student is enrolled from the drop down menu First name Last name Middle initial – not required Gender – not required Active – de-selecting this checkbox will make the account inactive and prevent the user from accessing MOSS Password and re-enter password You cannot change a user’s Login ID. Click Save to save your changes. NOTE: If a student forgets his/her password, an Admin or Instructor can use the Edit Student button to reset the password. Delete Student Accounts To delete an Account, highlight the desired account and click the Delete Student button. A confirm window will appear on screen. Click Yes to delete the account. MOSS 2.0 Network Version HELP 11 | P a g e Import Student Lists The Import Student button will allow you to quickly import multiple students into MOSS 2.0. To import students, you must first create a simple CSV file containing the student data to be imported. The CSV file should only contain four fields: First Name Last Name User Name (this will become the user’s Login ID) Password An example file format is provided below: First Name Monica Robert Greg Amelia Last Name Prime Allison Alto Fortunato User Name mprime rallison galto afortunato Password moss1 moss1 moss1 moss1 When determining the user name (user’s Login ID), it is strongly recommended to use the student’s first initial and last name as shown in the example above. The user name you create will become the student’s Login ID, which cannot be changed once assigned. If you have two students in the system with the same first initial and last name, it is recommended that you use the first two letters of the user’s first name or the user’s first name and middle initial when creating the user’s Login ID. NOTE: “StudentX” should not be used as a User Name (such as Student1, Student2, etc). The password is case sensitive. It is recommended that you use the default password for students (moss1) when assigning passwords using a CSV file. After clicking on the Import Students button a File Open dialog box will appear with the file type set to CSV. Navigate to the CSV file you wish to import and select Open. When the import is complete click on the OK button and your student list will appear in the Manage Students tab. Once students have been imported into MOSS 2.0, it is recommended that each student is assigned to a class. Assigning students to a class allows reporting on groups of students more easily. Refer to the Managing Classes: Assign Students to a Class topic for information on how to perform this task. MOSS 2.0 Network Version HELP 12 | P a g e Import Student Lists in a Citrix Environment If you are working in a Citrix environment, follow the same instructions as above. During the student import process, you may see the following dialog box: In order for MOSS to access the CSV file on your computer and import students into the program, it is important that the responses to the two questions asked are as follows: “What access do you want to grant?” Users should select Full Access “Do you want to be asked again?” Users should select Never ask me again Import Student Lists and Loading the Initial Data Set When Student accounts are created using the Import Student List feature, the initial data set must be loaded by the student the first time the program is accessed. The student should follow these steps: 1. On the Logon screen, select: a. Login Level: Student b. Name: (enter student’s User Name) c. Password: moss1 2. Click Manage My Account. 3. On the Setup Students screen, click Save Record. MOSS 2.0 Network Version HELP 13 | P a g e 4. Click OK to import the initial data set. 5. Click OK when the process is complete. Once complete, the number -1 will appear in the grayed-out Seeded field. 6. Back on the Logon screen, click OK to enter the program. Disseminating Student IDs To make disseminating Student Login IDs as easy as possible, we recommend you make available one paper copy of the CSV file used to import the student list into MOSS 2.0 to students on the first day of class. Ask the students to record their user information and keep the information in a safe place. You may also want to inform them to log on to MOSS to change their password from the default. Students can make changes to their account by clicking on the Manage My Account button on the logon screen. NOTE: If a student forgets his/her password, an Admin or Instructor can use the Edit Student button to reset the password. Managing Classes Within MOSS 2.0 you can add, edit, delete and inactivate Classes. To manage classes, click on the Manage Classes tab on the Management Console dashboard. If you have an: Instructor account, you will only see Class Names for which you are the Assigned Instructor Admin and SuperAdmin account, you can: o Filter by instructor o Show All accounts, this button restores the default view after filtering the view Add Class After clicking on the Add Class button, you can create a class by completing the request information shown on the screen. Information includes: Class – type in the name of the class you wish to create Class PW – class password (not required) MOSS 2.0 Network Version HELP 14 | P a g e Class Active – de-selecting this checkbox will change the class from active to inactive Instructor – select the instructor’s name from the drop down list you wish to assign to this class For information on how to assign students to a class, refer to the Managing Classes: Assign Students to a Class topic. Click Save to create the class. Edit Class After clicking on the Edit Class button, you can make changes to an existing class by completing the information shown on the screen. Information includes: Class – type in the new name of the class Class PW – class password (not required) Class Active – de-selecting this checkbox will change the class from active to inactive Instructor – select the instructor’s name from the drop down list you wish to assign to this class For information on how to assign students to a class, refer to the Managing Classes: Assign Students to a Class. Click Save to create the class. Delete Class To delete a class, highlight the desired class and click the Delete Class button. A confirm window will appear on screen. Click Yes to delete the account. NOTE: Deleting a class will also “Unassign” all students currently assigned to that class. Assign Students to a Class The concept of class is a grouping of students for convenience. It allows you to report on groups of students more easily. Admins or Instructors can assign multiple students to a class quickly and easily, by clicking on the Edit Class button. You can also assign students to a class when creating a new class or when creating a new individual student account. To assign students to an existing class: MOSS 2.0 Network Version HELP 15 | P a g e Highlight the class name from the Manage Classes tab Click on the Edit Class button Highlight a student from the Unassigned Student list and click the Add to Class button. The student should appear in the Students in this Class list. If a student needs to be assigned to multiple classes, the student will need a unique Login ID for each class; that is, the student will need to be set up multiple times in the database. For example, if Michael Brown is in the Computers in the Medical Office course in the morning, he would use Login ID “mbrown” for that class only. For his afternoon course, Medical Office Procedures, he would use Login ID “mbrown2.” That way, the data and activities for each class stay separate. To search for a student, type the student’s last name into the search box and click Search. To restore the default view click View All. To remove students from a class, highlight a student from the Students in Class list and click on Remove from Class button. The student should then appear in the Unassigned Student list. NOTE: At the Instructor Security level, until students are assigned to that instructor’s class, student names will not appear on the Manage Students tab. At the Admin and SuperAdmin Security levels, all student names in the database are present on the Manage Students tab at all times. Managing Data There are three capabilities related to managing data: File Maintenance Backup Restore Admin and SuperAdmin users will see all three of these options on the Manage Data tab. For Instructor users, only File Maintenance will be visible. File Maintenance The File Maintenance function allows you to add to the core data that is loaded in the system when MOSS 2.0 is installed. Do not change the data already existing in the program, as that may negatively impact other program users. To make changes to the core data: MOSS 2.0 Network Version HELP 16 | P a g e 1. Click on File Maintenance from the Manage Data tab of MOSS. A list of all the data categories that can be changed will appear. 2. Select the category you wish to update by clicking on the name. 3. Update the desired information by placing your mouse in the data field and making any changes. 4. Click Save to save your changes. A confirmation box will appear. Click OK. 5. Click Close to return to the File Maintenance menu. Backup The Backup function allows you to create a reserve copy of all the data files in MOSS to protect against a system failure. Only Admin and SuperAdmin users are able to perform a backup. To create a backup file: 1. Click on Backup from the Manage Data tab of MOSS. 2. A window will appear requesting a name for the backup file. It is recommended to use a file name of moss_backup_xxxxxx. With the “x” representing the current month, date and last two digits of the current year. 3. Click OK to create the backup file. 4. Once the backup file has been created, you will receive a confirmation screen. Click OK to complete the backup process. Restore The Restore function allows you to restore the MOSS database to a previous point in time. All MOSS users MUST be logged off of the system in order to perform a restore. Only Admin and SuperAdmin users are able to restore the database. To restore a previous database: 1. Click on Restore from the Manage Data tab of MOSS. 2. Click YES when prompted to restore an old MOSS database backup. 3. You will be asked to choose a specific backup file from a list of available backup files. Highlight the file you wish to restore and click Restore. 4. You must enter your SuperAdmin password (your SA password for SQL Server) to complete the process. 5. After entering the password a message will appear confirming that all other users are off of the server. Click OK to continue. If users are connected to the database, it will close their connection and they will lose any work in progress. MOSS 2.0 Network Version HELP 17 | P a g e 6. When backup is complete, a confirmation message will appear. Click OK to continue. Reporting From the Reporting tab in MOSS, you can report on Students or classes. There are two different types of reports available in MOSS: Student Tracking Report Comparison Report Student Tracking Report The Student Tracking Report provides you with the time each student spends in the program, delineated by module (i.e., Patient Registration, Procedure Posting, etc). You can report on an individual student or an entire class. To run a Student Tracking report: 1. Click on the Reporting tab 2. Select the desired report type: a. Student Reporting (reports on an individual student) b. Class Reporting (reports on all students assigned to a specific class) 3. Select the Student or Class (depending on the report type you selected in step 2) from the drop down menu. 4. Click Student Tracking. A PDF report will be created with the desired information. The Student Tracking report contains the following information for each Student included in the report: Student number – StudentID First name – student’s first name Last name – student’s last name Module name – name of module completed Duration – amount of time spent in module Date – last date student accessed the module Class – class in which student is assigned MOSS 2.0 Network Version HELP 18 | P a g e Comparison Report The Comparison Report compares the student’s entries in the program against specific Answer Keys. The report is designed to be a tool for instructors to help gauge student progress and proficiency in the program; it does not grade the student’s answers. The report only provides details on student answers that do not match the answers provided in the Answer Key. The Comparison Report identifies two types of issues: “Missing entries” and “Bad entries.” Missing entries indicate an item that was not keyed into the program by the student. Bad entries indicate an item that does not match the answer provided in the Answer Key. While the intent of these entries is to show typographic errors, items that are marked Bad entries do not necessarily indicate incorrect answers. For example, if the student types “St.” and the master answer is “Street,” this entry would appear on the Comparison Report, indicating a discrepancy; however, the answer is not incorrect. A best practice to avoid these types of Bad entries would be for students to enter information exactly as it appears in the book, without abbreviation, unless shown in the book. To run a Comparison Report: 1. Click on the Reporting tab 2. Select the desired report type: a. Student Reporting (reports on an individual student) b. Class Reporting (reports on all students assigned to a specific class) 3. Select the Student or Class (depending on the report type you selected in step 2) from the drop down menu. 4. Select the Answer Key to which you would like to compare the answers a student or class (as selected it step 3) provided. 5. Click Run Comparison Report. A PDF report will be created with the desired information. The following information is provided on the report for each Student included in the report: Patient – case study patient name Identifier – identifies the part of the program where the issue occurs o Patient: Patient Information tab within Patient Registration o Insurance: Insurance tab within Patient Registration o Guarantor: Guarantor tab within Patient Registration MOSS 2.0 Network Version HELP 19 | P a g e o Visit/Appointment: Appointment Schedule o Notes: Notes section within the Patient Ledger o Claim: Procedure Posting and Insurance Billing Problem – identifies the issues as an omission or keystroke discrepancy o Bad Entry: keystroke discrepancy (the student entry is different than the answer key) o Missing Entry: the student did not type anything into the field Field – specific field within the module where problem is reported User Answer – answer the user input Master Answer – answer provided in the Answer Key Using Multiple MOSS-Associated Textbooks Concurrently MOSS 2.0 Network Version is associated with a number of different textbooks, including: Getting Started in the Computerized Medical Office, Second Edition by Cindy Correa Medical Office Procedures, Eighth Edition by Diane Timme and Phillip Atkinson Coding Simulation for Coding by Stacey Mosay Each textbook includes different exercises and Answer Keys, but all utilize the same initial data set. In the event that an individual student may be enrolled in more than one course that uses MOSS, it is important to create unique Login IDs, ensuring the integrity of data entered into the program.. If a student needs to be assigned to multiple classes, the student will need a unique Login ID for each class; that is, the student will need to be set up multiple times in the database. For example, if Michael Brown is in the Computers in the Medical Office course in the morning, he would use Login ID “mbrown” for that class only. For his afternoon course, Medical Office Procedures, he would use Login ID “mbrown2.” That way, the data and activities for each class stay separate. MOSS 2.0 Network Version HELP 20 | P a g e
