171Lab2_Tutorial
advertisement

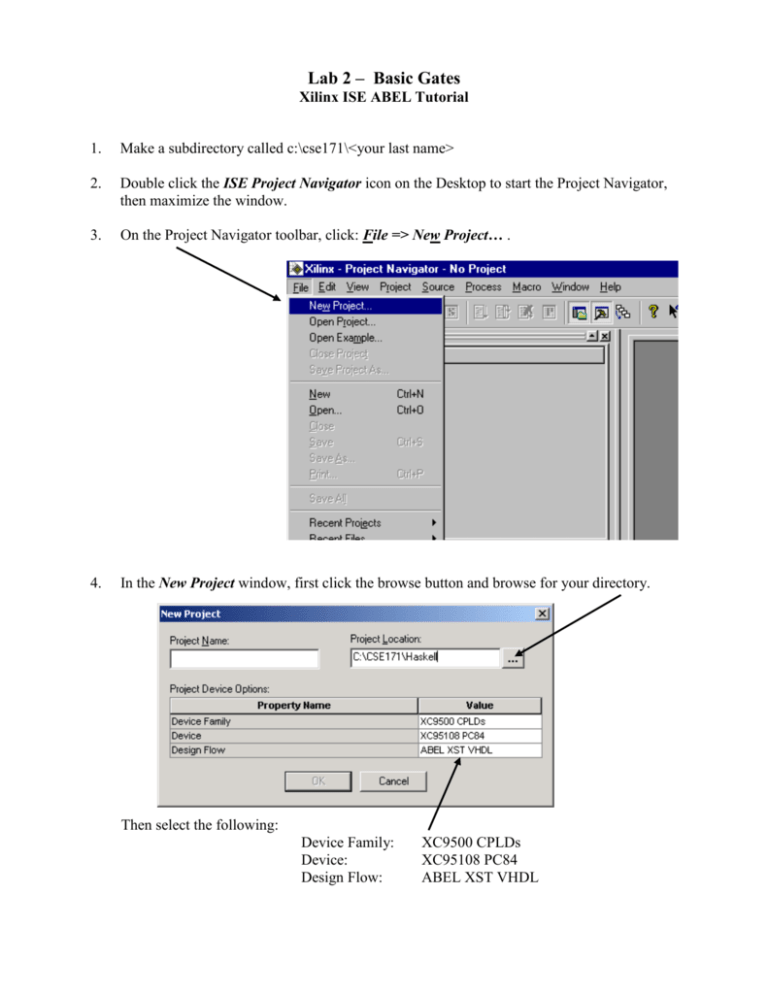
Lab 2 – Basic Gates Xilinx ISE ABEL Tutorial 1. Make a subdirectory called c:\cse171\<your last name> 2. Double click the ISE Project Navigator icon on the Desktop to start the Project Navigator, then maximize the window. 3. On the Project Navigator toolbar, click: File => New Project… . 4. In the New Project window, first click the browse button and browse for your directory. Then select the following: Device Family: Device: Design Flow: XC9500 CPLDs XC95108 PC84 ABEL XST VHDL 5. Finally, type gates for Project Name and click OK. (Notice that gates is also automatically added to the Project Location.) 6. On the Project Navigator toolbar, click: Project => New Source... . 7. Select ABEL-HDL Module and type gates in the File Name: box. Click Next. 8. In the Define ABEL-HDL Source window, type in this list of Pin Names. Click Next. 9. Click Finish. 10. This skeleton source will be created. 11. Modify the source code by adding a title with your names and date, the pin numbers, and the logic equations. Save this file. 12. Check the syntax by right-clicking Check Syntax and selecting Run. 13. Make sure that gate (gates.abl) is selected. Double click the Generate Programming File process (or right-click and select Run). 14. Make sure the printer port from the computer is connected to the PLDT-1 board and power is connected to the board. Click the + sign on Generate Programming File and double-click Configure Device (iMPACT). 15. Right-click on the image of the Xilinx chip and select Program… 16. Make sure Erase Before Programming and Verify are both checked. Click OK. 17. Following successful programming, the Programming Succeeded message is displayed. The PLDT-1 digital logic trainer board is now programmed and ready for testing. x y invx invy and nand or nor xorr xnor


