Sheep Eye Dissection
advertisement
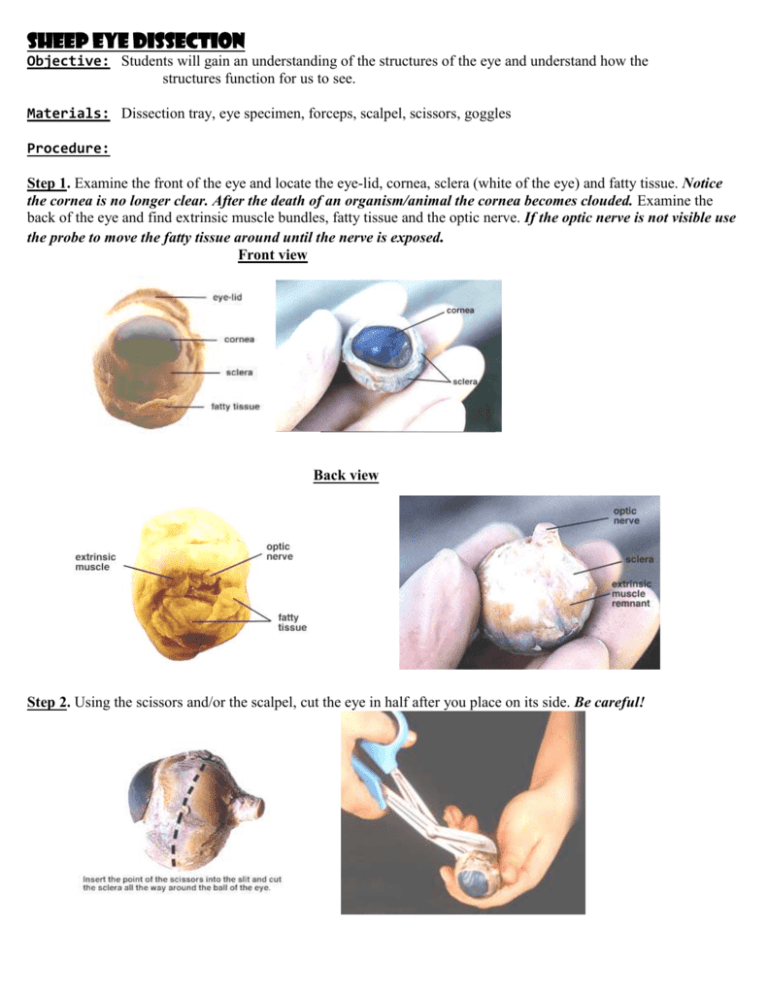
Sheep Eye Dissection Objective: Students will gain an understanding of the structures of the eye and understand how the structures function for us to see. Materials: Dissection tray, eye specimen, forceps, scalpel, scissors, goggles Procedure: Step 1. Examine the front of the eye and locate the eye-lid, cornea, sclera (white of the eye) and fatty tissue. Notice the cornea is no longer clear. After the death of an organism/animal the cornea becomes clouded. Examine the back of the eye and find extrinsic muscle bundles, fatty tissue and the optic nerve. If the optic nerve is not visible use the probe to move the fatty tissue around until the nerve is exposed. Front view Back view ` Step 2. Using the scissors and/or the scalpel, cut the eye in half after you place on its side. Be careful! Step 3. Arrange the two halves of the eye as you see in the photograph. Observe the back half: Step 4. The semi-fluid vitreous humor that fills the central cavity of the eye that helps to maintain the shape of the eye. The retina lines the back wall of the eye. Use forceps to lift and pull the retina back. Where the retina attaches is called the blind spot. Step 5. Under the retina is a shiny, reflective layer called the tapetum. This layer is found only is certain animals such as cows, sheep, cats, etc. and helps the animal see better at night because more light is reflected around inside the eye. Observe the front half: Step 6. Remove the lens. Hold the lens up to printed words. Are you able to see anything? The lens is responsible for collecting light and focusing images onto to retina. Step 7. When the lens is removed you will observe an opening. You will be looking at the pupil. Around the edges of the pupil you will be able to see the back side of the iris. The iris is the muscle around the pupil that acts “involuntary” to open and close the pupil, adjusting the amount of light entering the eye. Step 8. Now remove the iris from the inside of the eye using the forceps or your fingers.
