Upward Bound Fetal Pig Dissection Day 2
advertisement
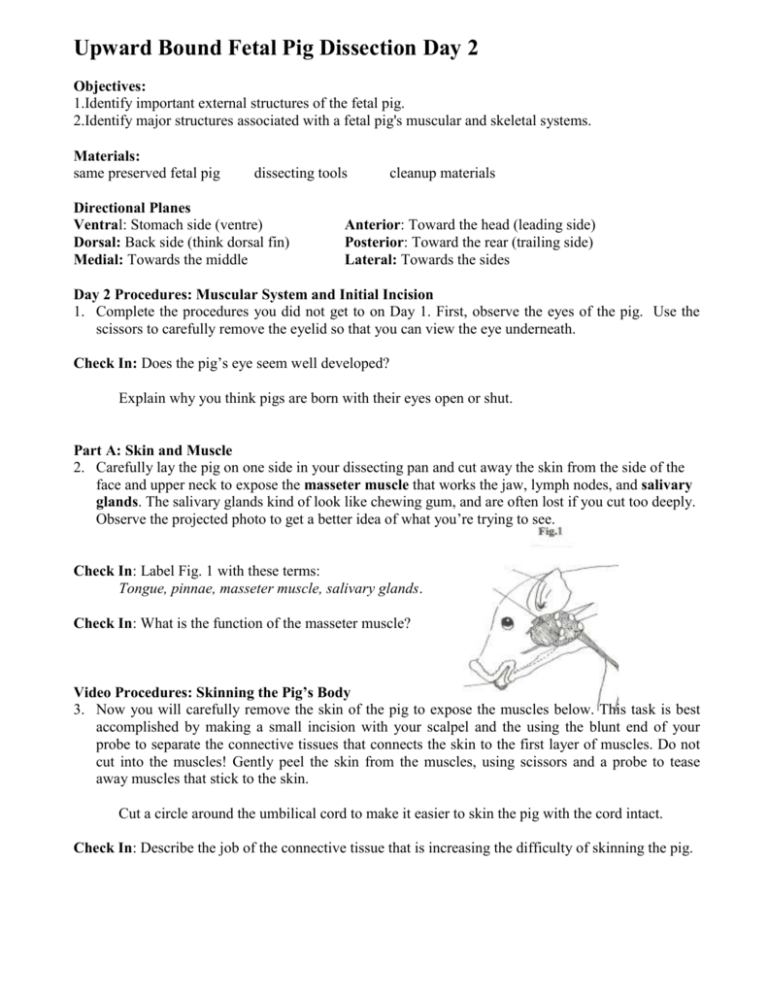
Upward Bound Fetal Pig Dissection Day 2 Objectives: 1.Identify important external structures of the fetal pig. 2.Identify major structures associated with a fetal pig's muscular and skeletal systems. Materials: same preserved fetal pig dissecting tools Directional Planes Ventral: Stomach side (ventre) Dorsal: Back side (think dorsal fin) Medial: Towards the middle cleanup materials Anterior: Toward the head (leading side) Posterior: Toward the rear (trailing side) Lateral: Towards the sides Day 2 Procedures: Muscular System and Initial Incision 1. Complete the procedures you did not get to on Day 1. First, observe the eyes of the pig. Use the scissors to carefully remove the eyelid so that you can view the eye underneath. Check In: Does the pig’s eye seem well developed? Explain why you think pigs are born with their eyes open or shut. Part A: Skin and Muscle 2. Carefully lay the pig on one side in your dissecting pan and cut away the skin from the side of the face and upper neck to expose the masseter muscle that works the jaw, lymph nodes, and salivary glands. The salivary glands kind of look like chewing gum, and are often lost if you cut too deeply. Observe the projected photo to get a better idea of what you’re trying to see. Check In: Label Fig. 1 with these terms: Tongue, pinnae, masseter muscle, salivary glands. Check In: What is the function of the masseter muscle? Video Procedures: Skinning the Pig’s Body 3. Now you will carefully remove the skin of the pig to expose the muscles below. This task is best accomplished by making a small incision with your scalpel and the using the blunt end of your probe to separate the connective tissues that connects the skin to the first layer of muscles. Do not cut into the muscles! Gently peel the skin from the muscles, using scissors and a probe to tease away muscles that stick to the skin. Cut a circle around the umbilical cord to make it easier to skin the pig with the cord intact. Check In: Describe the job of the connective tissue that is increasing the difficulty of skinning the pig. Check In: Identify each of the following muscles: □ Biceps brachii - located on the anterior surface of the humerus (arm). Action: flexes lower arm □ Biceps femoris - located on the side of the thigh, in two bundles. Action: flexes the lower leg □ External Oblique - located on the sides of the abdomen. Action: flexes body wall. □ Pectoralis Major/Minor - located in chest area. Action: adducts arm (draws it forward) Part B: The Abdominal and Thoracic Incision 4. Place the fetal pig ventral side up in the dissecting tray. 5. Tie a string securely around a front limb. Run the string under the tray, pull it tight, and tie it to the other front limb. Repeat this procedure with the hind limbs to hold the legs apart so you can examine internal structures. QuickTime™ and a TIFF (Uncompressed) decompressor are needed to see this picture. 6. Study the diagram at the left. The lines numbered 1-4 show the first set of incisions that you will make. To find the exact location for the incision marked 3, press along the thorax with your fingers to find the lower edge of the ribs. This is where you will make incision 3. 7. With scissors, make the incisions in order, beginning with 1. It will be necessary to cut through the rib cage but while doing so be sure to keep the tips of your scissors pointed upward because a deep cut will destroy the organs below. Also, remember to cut away from yourself. 8. After you have made your incisions through the body wall, you will see the peritoneum, a thin layer of tissue that lines the body cavity. If no internal organs are clearly visible you did not cut quite deep enough and the peritoneum is still in tact. Cut through the peritoneum along the incision lines. Check In: What is the function of the peritoneum? Check In: What is the function of the rib cage? CLEAN UP PROCEDURES 1. Remove the tie strings from one side of the pig. Leave them on the other side to make it easier to re-tie the pigs tomorrow. 2. Inventory and wipe all your tools down □ 2 teasing probes □ 1 eyedropper □ 2 scissors □ 1 forceps □ 1 scalpel □ 1ruler 3. Put all your clean tools in your labeled plastic case. 4. Wipe down your table and make sure everything is put away. *NOTE: All parts of the pig that were separated from the main body (i.e. bits of skin, etc.) should be put in the “pig parts bag” and thrown away. Analysis Questions 1. Write four additional questions that you now have based on your observations of today’s dissection. 2. Why is it important to hold the scissors “up” while completing your long incisions? 3. How are the pig’s feet different from your feet? 4. You worked with three of the four types of tissue today. Give examples of each type that you observed during today’s dissection. Tissue Type Example from the Pig Connective Tissue Muscle Tissue Epithelial Tissue 5. Describe one example when you and your partner worked together particularly successfully today. 6. What are three organ systems that you worked with today? Identify the organ system, the function of that organ system, and examples from today’s dissection of that organ system. Organ System System Function Examples From Today 7. Use your textbook to list three detailed facts about the digestive system. Give the page number where the fact is found. 8. How is this dissection different from how you imagined it would be?
