CCNA Discovery
Working at a Small-to-Medium Business or ISP
Lab 5.3.9 Password Recovery Procedures
Device
Host
Name
R1
GAD
Interface
IP
Address
Fast Ethernet 0/0
10.10.0.1
Subnet Mask
Enable
secret
password
Enable/VTY/
and Console
passwords
255.255.255.248
class
cisco
Objective
Gain access to a router with an unknown privileged mode (enable) password.
Background / Preparation
This lab demonstrates gaining access to a router with an unknown privileged mode (enable) password. One
point to be made here is that anyone with this procedure and access to a console port on a router can change
the password and take control of the router. That is why it is of critical importance that routers also have
physical security to prevent unauthorized access.
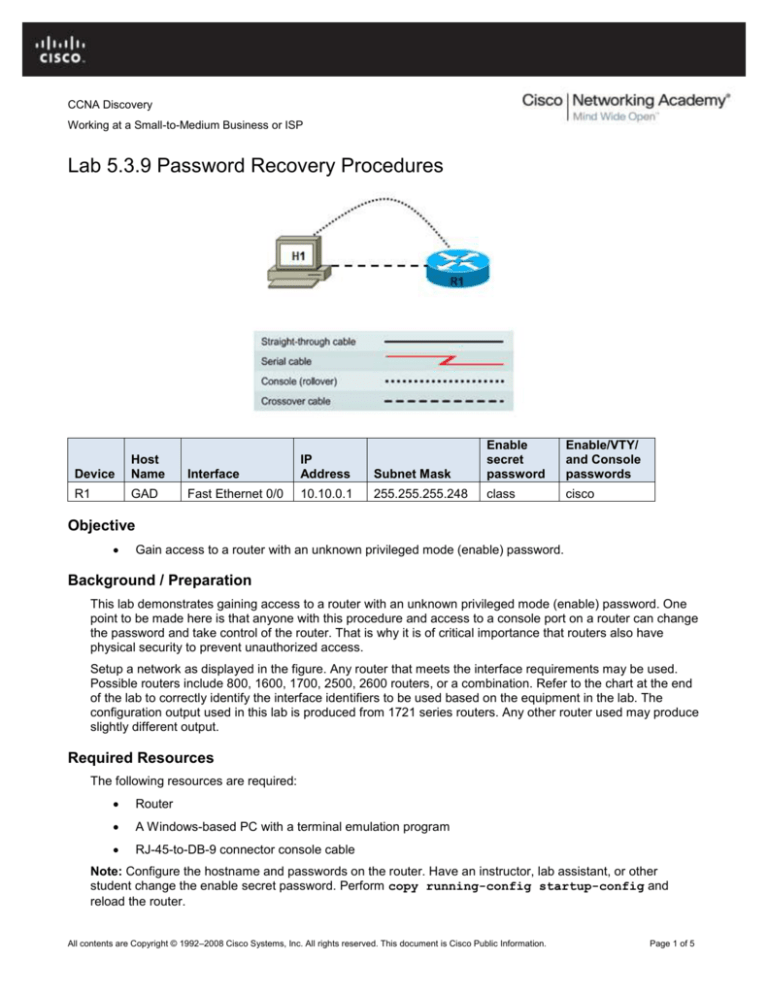
Setup a network as displayed in the figure. Any router that meets the interface requirements may be used.
Possible routers include 800, 1600, 1700, 2500, 2600 routers, or a combination. Refer to the chart at the end
of the lab to correctly identify the interface identifiers to be used based on the equipment in the lab. The
configuration output used in this lab is produced from 1721 series routers. Any other router used may produce
slightly different output.
Required Resources
The following resources are required:
Router
A Windows-based PC with a terminal emulation program
RJ-45-to-DB-9 connector console cable
Note: Configure the hostname and passwords on the router. Have an instructor, lab assistant, or other
student change the enable secret password. Perform copy running-config startup-config and
reload the router.
All contents are Copyright © 1992–2008 Cisco Systems, Inc. All rights reserved. This document is Cisco Public Information.
Page 1 of 5
CCNA Discovery
Working at a Small-to-Medium Business or ISP
Step 1: Attempt login to the router.
a. Make the necessary console connections and establish a HyperTerminal session with the router.
Attempt to logon to the router using the enable password cisco. The output should look like the
following:
Router>enable
Password:
Password:
Password:
% Bad secrets
Router>
Step 2: Document the current config-register setting
a. At the user EXEC prompt type show version.
b. Record the value displayed for configuration register ___________. For example 0x2102.
Step 3: Enter the ROM Monitor mode
a. Turn the router off, wait a few seconds and turn it back on. When the router starts displaying “System
Bootstrap, Version …” on the HyperTerminal screen, press the Ctrl key and the Break key
together. The router will boot in ROM monitor mode. Depending on the router hardware, one of
several prompts such as: "rommon 1 >" or simply “>” may show.
Step 4: Examine the ROM Monitor mode help
a. Type ? at the prompt. The output should be similar to this:
rommon 1 >?
alias
boot
break
confreg
context
dev
dir
dis
help
history
meminfo
repeat
reset
set
sysret
tftpdnld
xmodem
set and display aliases command
boot up an external process
set/show/clear the breakpoint
configuration register utility
display the context of a loaded image
list the device table
list files in file system
display instruction stream
monitor builtin command help
monitor command history
main memory information
repeat a monitor command
system reset
display the monitor variables
print out info from last system return
tftp image download
x/ymodem image download
Step 5: Verify the configuration of the switch.
a. From the ROM Monitor mode, type confreg 0x2142 to change the config-register.
rommon 2 >confreg 0x2142
Step 6: Restart Router
a. From the ROM Monitor mode, type reset or power cycle the router.
All contents are Copyright © 1992–2008 Cisco Systems, Inc. All rights reserved. This document is Cisco Public Information.
Page 2 of 5
CCNA Discovery
Working at a Small-to-Medium Business or ISP
rommon 2 >reset
b. Due to the new configuration register setting, the router will not load the configuration file. The system
prompts:
"Would you like to enter the initial configuration dialog? [yes]:"
Enter no and press Enter.
Step 7: Determine which MAC addresses that the switch has learned.
a. Now at the user mode prompt Router>, type enable and press Enter to go to the privileged mode
without a password.
b. Use the command copy startup-config running-config to restore the existing configuration.
Since the user is already in privileged EXEC no password is needed.
c.
Type configure terminal to enter the global configuration mode.
d. In the global configuration mode type enable secret class to change the secret password.
e. While still in the global configuration mode, type config-register xxxxxxx. xxxxxxx is the
original configuration register value recorded in Step 2. Press Enter.
f.
Use the Ctrl z combination to return to the privileged EXEC mode.
g. Use the copy running-config startup-config command to save the new configuration.
h. Before restarting the router, verify the new configuration setting. From the privileged EXEC prompt,
enter the show version command and press Enter.
i.
Verify that the last line of the output reads:
Configuration register is 0x2142 (will be 0x2102 at next reload).
j. Use the reload command to restart the router.
Step 8: Verify new password and configuration
a. When the router reloads the enable password should be class.
Upon completion of the previous steps, logoff by typing exit. Turn the router off.
All contents are Copyright © 1992–2008 Cisco Systems, Inc. All rights reserved. This document is Cisco Public Information.
Page 3 of 5
CCNA Discovery
Working at a Small-to-Medium Business or ISP
Erasing and reloading the router
a. Enter privileged EXEC mode by typing enable.
Router>enable
b. In privileged EXEC mode, enter the erase startup-config command.
Router#erase startup-config
The responding line prompt is:
Erasing the nvram filesystem will remove all files! Continue?
[confirm]
c.
Press Enter to confirm.
The response is:
Erase of nvram: complete
d. In privileged EXEC mode, enter the reload command.
Router(config)#reload
The responding line prompt is:
System configuration has been modified. Save? [yes/no]:
e. Type n, and then press Enter.
The responding line prompt is:
Proceed with reload? [confirm]
f.
Press Enter to confirm.
In the first line of the response is:
Reload requested by console.
After the router has reloaded the line prompt is:
Would you like to enter the initial configuration dialog? [yes/no]:
g. Type n, and then press Enter.
The responding line prompt is:
Press RETURN to get started!
h. Press Enter.
The router is ready for the assigned lab to be performed.
All contents are Copyright © 1992–2008 Cisco Systems, Inc. All rights reserved. This document is Cisco Public Information.
Page 4 of 5
CCNA Discovery
Working at a Small-to-Medium Business or ISP
Router Interface Summary Table
Router Interface Summary
Router
Model
Ethernet Interface
#1
Ethernet Interface
#2
Serial Interface
#1
Serial Interface
#2
800 (806)
Ethernet 0 (E0)
Ethernet 1 (E1)
1600
Ethernet 0 (E0)
Ethernet 1 (E1)
Serial 0 (S0)
Serial 1 (S1)
1700
Fast Ethernet 0
(FA0)
Fast Ethernet 1
(FA1)
Serial 0 (S0)
Serial 1 (S1)
1800
Fast Ethernet 0/0
(FA0/0)
Fast Ethernet 0/1
(FA0/1)
Serial 0/0/0
(S0/0/0)
Serial 0/0/1
(S0/0/1)
2500
Ethernet 0 (E0)
Ethernet 1 (E1)
Serial 0 (S0)
Serial 1 (S1)
2600
Fast Ethernet 0/0
(FA0/0)
Fast Ethernet 0/1
(FA0/1)
Serial 0/0 (S0/0)
Serial 0/1 (S0/1)
Note: To find out exactly how the router is configured, look at the interfaces. The interface
identifies the type of router and how many interfaces the router has. There is no way to effectively
list all combinations of configurations for each router class. What is provided are the identifiers for
the possible combinations of interfaces in the device. This interface chart does not include any
other type of interface, even though a specific router may contain one. An example of this might be
an ISDN BRI interface. The information in parenthesis is the legal abbreviation that can be used in
Cisco IOS commands to represent the interface.
All contents are Copyright © 1992–2008 Cisco Systems, Inc. All rights reserved. This document is Cisco Public Information.
Page 5 of 5


