15787 SUNFIRE GUIDE
5/22/03
12:17 PM
Page 1
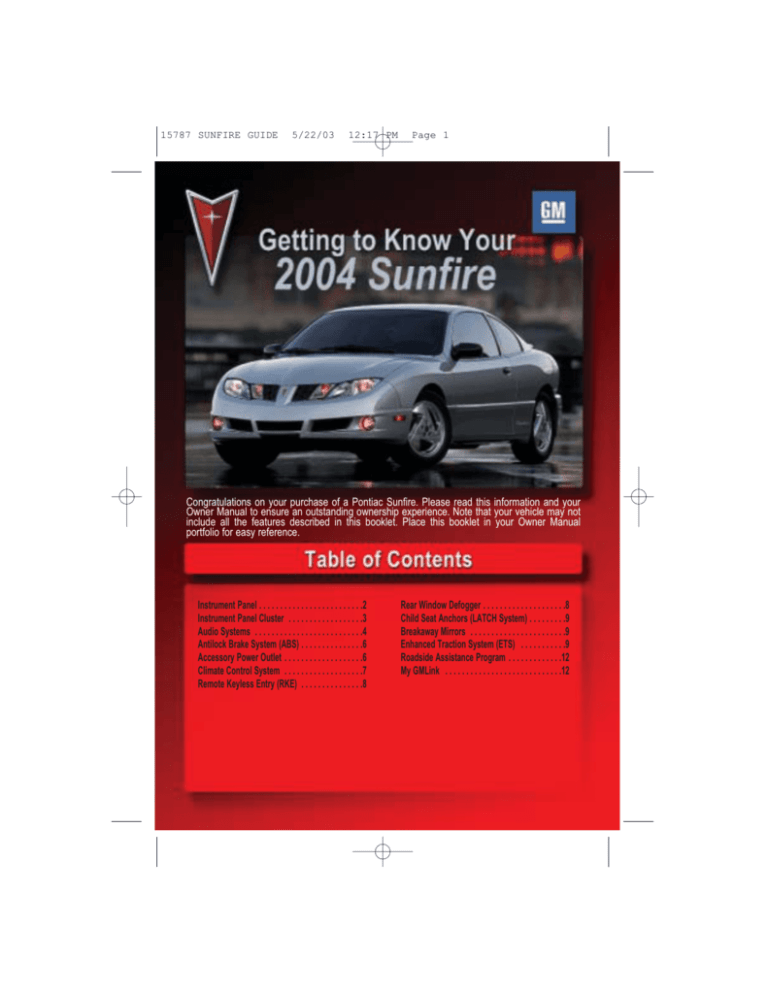
Congratulations on your purchase of a Pontiac Sunfire. Please read this information and your
Owner Manual to ensure an outstanding ownership experience. Note that your vehicle may not
include all the features described in this booklet. Place this booklet in your Owner Manual
portfolio for easy reference.
Instrument Panel . . . . . . . . . . . . . . . . . . . . . . . . .2
Instrument Panel Cluster . . . . . . . . . . . . . . . . . .3
Audio Systems . . . . . . . . . . . . . . . . . . . . . . . . . .4
Antilock Brake System (ABS) . . . . . . . . . . . . . . .6
Accessory Power Outlet . . . . . . . . . . . . . . . . . . .6
Climate Control System . . . . . . . . . . . . . . . . . . .7
Remote Keyless Entry (RKE) . . . . . . . . . . . . . . .8
Rear Window Defogger . . . . . . . . . . . . . . . . . . . .8
Child Seat Anchors (LATCH System) . . . . . . . . .9
Breakaway Mirrors . . . . . . . . . . . . . . . . . . . . . . .9
Enhanced Traction System (ETS) . . . . . . . . . . .9
Roadside Assistance Program . . . . . . . . . . . . .12
My GMLink . . . . . . . . . . . . . . . . . . . . . . . . . . . .12
M. Hood Release Lever
N. Cupholder
O. Parking Brake Lever
P. Shift Lever
Q. Accessory Power Outlet
12:17 PM
See Section 3 of your Owner Manual.
G. Ignition Switch
H. Windshield Wiper/Washer Controls
I. Audio System
J. Climate Controls and Rear
Window Defogger
K. Fuse Panel
L. Remote Trunk Release Button
2
5/22/03
A. Fog Lamp Button
B. Instrument Panel Brightness
Control
C. Enhanced Traction System Switch
D. Turn Signal/Multifunction Lever
E. Instrument Panel Cluster
F. Hazard Warning Flashers Switch
Instrument Panel
15787 SUNFIRE GUIDE
Page 2
Getting to Know Your Sunfire
B
See Section 3 of your Owner Manual.
D
12:17 PM
IMPORTANT: The instrument panel
cluster is designed to let you know
about many important aspects of
your vehicle’s operation. It is important to read your Owner Manual and
become familiar with the information
being relayed to you by the lights,
gauges and indicators, and what
action can be taken to ensure safety
and to prevent damage.
C
5/22/03
Your vehicle’s instrument panel is
equipped with this cluster or one very
similar to it. The instrument panel
cluster includes these key features:
A. Engine Coolant Temperature
Gauge
B. Tachometer
C. Speedometer
D. Fuel Gauge
A
Instrument Panel Cluster
15787 SUNFIRE GUIDE
Page 3
3
15787 SUNFIRE GUIDE
4
5/22/03
12:17 PM
Page 4
Getting to Know Your Sunfire
Audio Systems
MP3 Radio System
The optional MP3 stereo system allows
you to play traditional CDs as well as
MP3 encoded discs. MP3 allows up to
50 playlists per disc and music can be
grouped in up to 50 folders. When using
MP3, the system displays the album
title, song title and artist name.
The system’s controls function like most
vehicle audio systems, while also including two MP3-specific controls:
: Press this button to go to the first
track of the previous folder.
: Press this button to go to the first
track of the next folder.
MP3 Player Tips
• Avoid using transparent discs,
as they may cause the player to load
improperly.
• Select Mode 1 when burning a
CD-ROM (only Mode 1 discs are
compatible with this system).
• Avoid mixing standard CD audio
tracks and MP3 files on one disc,
as they may not play properly when
mixed.
• If “CHECK CD” appears on the radio
display, the disc format may not be
compatible or a label may be caught
in the CD player. For more information, refer to MP3 section in your
Owner Manual.
Setting the Radio Stations
The six numbered pushbuttons on your
radio return you to your favorite stations.
You can set up to 18 stations (six AM,
six FM, and six FM2) by performing the
following steps:
• Press PWR to turn the radio on.
• Press BAND to select AM or FM.
• Tune in the desired station.
• Press and hold one of the numbered
buttons until you hear a beep.
Whenever you press that numbered
button, the station you set will return
and the equalization you selected will
also automatically be selected for that
station.
• Repeat the steps for each
pushbutton.
15787 SUNFIRE GUIDE
5/22/03
12:17 PM
Page 5
5
Retained Accessory Power (RAP)
Your vehicle is equipped with a Retained
Accessory Power (RAP) feature that
allows the radio to continue working for
up to 10 minutes once the key is turned
from RUN to OFF, or until the driver’s
door is opened.
Radio Data System (RDS)
(if equipped)
Your audio system may include a Radio
Data System (RDS), which receives
many types of information, such as traffic and emergency alerts, and identifies
stations by their format types.
RDS features are functional only if the
listener is tuned to an FM station that
broadcasts RDS information.
Press the PROG TYPE button to use
the program type interrupt feature.
When listening to a compact disc, the
last selected RDS FM station will interrupt play if that selected PTY format is
broadcast.
Press the TRAF button to receive traffic
announcements. If not, the radio will
automatically seek a station that does.
When listening to a compact disc, traffic
announcements will interrupt play.
Setting the Clock
For radios without RDS, set the clock by
pressing and holding the DOWN (for
hour) and UP (for minute) arrows.
For RDS-equipped radios, set the clock
by pressing and holding the HR and MN
buttons. AM or PM will appear on the
display. The clock symbol will appear on
the display in time-set mode.
The clock may be set with the ignition
on or off.
To set the clock to the time of an FM
station broadcasting Radio Data System
(RDS) information:
• Press and hold HR and MIN at the
same time for two seconds until
UPDATED and the clock symbol
appears on the display.
• If the time is not available from the
station, NO UPDATE will appear on
the display instead.
Speed Compensated Volume
Your audio system may include Speed
Compensated Volume (SCV). With SCV,
the audio system adjusts the volume
automatically to make up for road and
wind noise as you drive.
XM Satellite Radio
XM Satellite Radio is available for a
monthly service fee if your vehicle is
equipped with the appropriate upperlevel audio system.
See Section 3 of your Owner Manual.
15787 SUNFIRE GUIDE
6
5/22/03
12:17 PM
Page 6
Getting to Know Your Sunfire
Antilock Brake System (ABS)
(if equipped)
Your vehicle may be equipped with the
antilock brake system (ABS), an
advanced electronic system that helps
prevent skidding when severe braking is
required. ABS and standard brakes
require different braking procedures
when experiencing emergency braking
situations. Your Owner Manual provides
information on both of these procedures
in detail.
When using ABS, don’t pump the brake
pedal. Just hold the pedal down firmly
and let the system work for you. You
may feel the brakes vibrate or hear
noises when ABS is working, but this is
normal.
If the vehicle is not equipped with antilock brakes, use a “squeeze” braking
technique. This technique requires you
to push the brake pedal with steadily
increasing pressure. Using this technique gives you maximum braking while
maintaining steering control.
See Section 4 of your Owner Manual.
Accessory Power Outlet
The accessory power outlet is located
on the passenger side of the console.
When using the outlet, the electrical load
must not exceed five amps. Some nonGM accessories may not be compatible
with the outlet and could result in blown
vehicle or adapter fuses. The fuse panel
is located at the end of the instrument
panel on the driver’s side.
See Section 3 of your Owner Manual.
15787 SUNFIRE GUIDE
5/22/03
12:17 PM
Page 7
7
Climate Control System
Air Conditioning
Use the following procedures for faster
interior cooling:
1. Lower windows long enough for
interior heat to escape.
2. Select the recirculation mode.
3. Press the air conditioning button.
4. Turn the temperature control knob to
the coolest setting (blue).
5. Turn the fan control knob to the
highest speed.
Defogging and Defrosting
There are two modes to clear fog or
frost from the windshield and side windows. Use the defog mode
to clear
the windows and warm the passengers.
Use the defrost mode
to clear fog or
frost from the windshield more quickly.
To defog the side windows most efficiently, set the mode knob to the floor
setting and the fan knob to the highest
speed. Press the air conditioning button.
Aim the side outlets toward the windows
and close the center outlets to maximum
airflow to side windows.
See Section 3 of your Owner Manual.
15787 SUNFIRE GUIDE
8
5/22/03
12:17 PM
Page 8
Getting to Know Your Sunfire
Remote Keyless Entry (RKE)
If a door or the trunk is open when you
press the LOCK button, the doors will
lock, but the security system will not arm
until all doors and the trunk are closed.
Radio Station Presets
The radio station presets can be customized to each key fob by first setting
the stations and then using the key fob
to lock the doors when exiting the
vehicle.
See Section 2 of your Owner Manual.
Rear Window Defogger
If your vehicle has this feature, you can
lock and unlock your doors or unlock
your trunk from about 3 feet and up to
30 feet away using the Remote Keyless
Entry transmitter supplied with your vehicle. If at times you notice a decrease in
range, see your Owner Manual.
If a door or the trunk is open when you
press the lock button, the doors will lock,
but the security system will not arm until
all doors and the trunk are closed.
To unlock the driver’s door, press the
UNLOCK button once. The headlamps
will flash twice, the dome lamp will come
on, and the security system will disarm.
Press UNLOCK again within 5 seconds
to unlock all the doors.
The headlamps will flash twice, the
dome lamp will turn on for about 20 seconds, or until the ignition is turned on,
and the security system will disarm.
To lock all doors, press the LOCK button. If all doors and the trunk are closed,
the headlamps will flash once, the interior lamps will turn off, and the security
system will arm.
For optimum defogger effectiveness,
clear as much snow and ice as possible
from your vehicle’s rear window.
Then, with the ignition in RUN, press the
defogger button
. It may take more
than one cycle to adequately clear the
rear window. The defogger’s first cycle
will turn off after about 10 minutes,
and following cycles will last about
5 minutes.
See Section 3 of your Owner Manual.
15787 SUNFIRE GUIDE
5/22/03
12:17 PM
Page 9
9
Child Seat Anchors
(LATCH System)
Your vehicle is equipped with the Lower
Anchorages and Top Tethers for
CHildren (LATCH) system. To use the
LATCH system, a special child restraint
seat is required that has two lower
anchor straps and one upper tether
strap. To find the lower anchors, locate
the label attached to the seatback at
each anchor position. Anchors for the
top tether straps are located on the filler
panel behind the top of the seat
cushion.
Enhanced Traction System (ETS)
(with four-speed automatic only)
Vehicles equipped with the four-speed
automatic transmission include an
Enhanced Traction System (ETS) that
helps minimize wheelspin and provides
increased stability. This is especially
useful during slippery road conditions.
See Section 1 of your Owner Manual.
Breakaway Mirrors
Your vehicle is equipped with breakaway
mirrors that realign easily after minor
impacts. Should the driver’s manual
remote control lever fail to adjust the
mirror after impact, the lever can be
easily reset by following the procedures
in your Owner Manual.
See Section 2 of your Owner Manual.
Turn this system on by pressing the
ETS button, located on the left side of
the instrument panel.
When the Enhanced Traction System is
limiting wheelspin, the LOW TRAC light
will illuminate in the instrument panel.
The light may also come on when traction is reduced briefly, such as when
encountering a severe bump. The LOW
TRAC light may indicate slippery road
conditions, so adjust your driving
accordingly. When the ETS is activated,
you may feel or hear it working. This is
normal.
See Section 4 of your Owner Manual.
15787 SUNFIRE GUIDE
10
5/22/03
12:17 PM
Getting to Know Your Sunfire
Notes
Page 10
15787 SUNFIRE GUIDE
5/22/03
12:17 PM
Page 11
11
Notes
15787 SUNFIRE GUIDE
12
5/22/03
12:17 PM
Page 12
Getting to Know Your Sunfire
Roadside Assistance Program
1-800-ROADSIDE
(1-800-762-3743)
TTY Users: 1-888-889-2438
As the proud owner of a 2004 Pontiac,
you are automatically enrolled in the
Pontiac Roadside Assistance program.
The program’s toll-free number is staffed
by a team of technically trained advisors, who are available 24 hours a day,
365 days a year. The advisors can provide minor repair information over the
phone or make arrangements to tow
your vehicle to the nearest Pontiac
dealer.
We will provide the following services for
3 years/36,000 miles (60,000 km), at no
expense to you.
• Fuel delivery
• Lockout service (identification
required)
• Tow to nearest dealership for
warranty service
• Change a flat tire
• Jump starts
For prompt assistance when calling,
please provide the following information
to the advisor:
• Location of the vehicle
• Telephone number or your location
• Vehicle model, year and color
• Vehicle mileage
• Vehicle Identification Number (VIN)
• Vehicle license plate number
Pontiac reserves the right to limit services or reimbursement to an owner or
driver when, in Pontiac’s judgment, the
claims become excessive in frequency
or type of occurrence.
My GMLink
The Pontiac Owner Center at My GMLink
is a complimentary service for Pontiac
Owners, a one-stop resource to
enhance your Pontiac ownership experience. Exclusive member benefits
include online service reminders, vehicle
maintenance tips, online owner manual,
special privileges and more. Sign up
today at www.mygmlink.com
Certain restrictions, precautions and safety procedures apply to your vehicle. Please read your Owner
Manual for complete instructions. All information contained herein is based on information available at
the time of printing and is subject to change without notice. Copyright 2003 by GM Corp.
All rights reserved.
04SUNFQRG


