Using Nagios XI In Amazon EC2 Cloud
advertisement
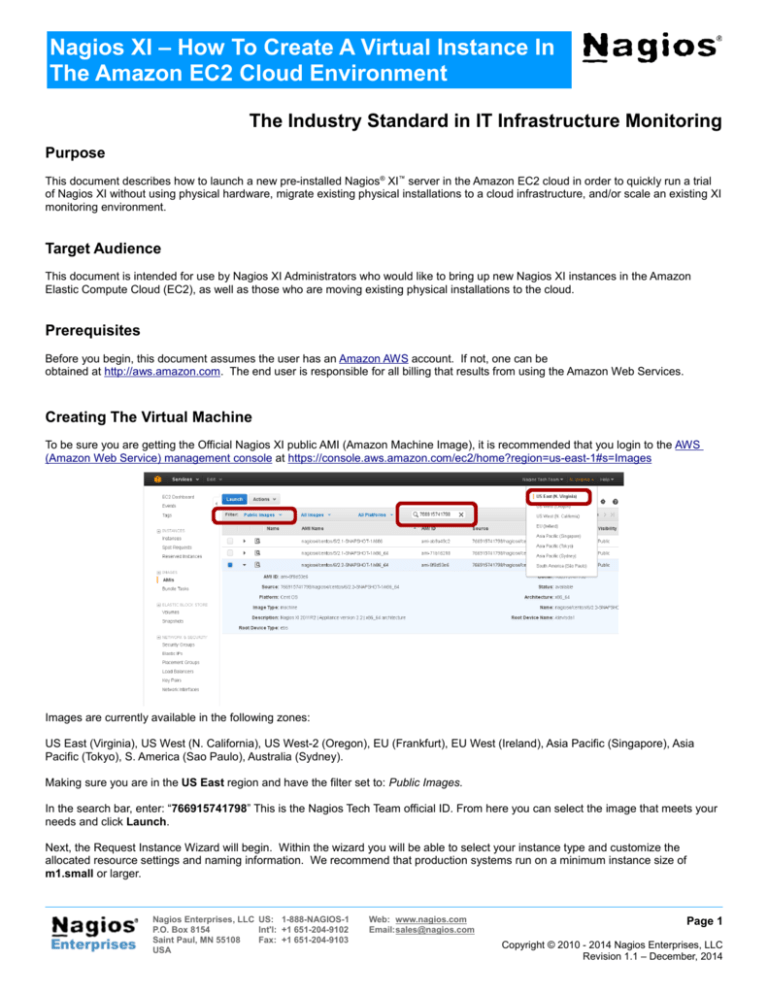
Nagios XI – How To Create A Virtual Instance In The Amazon EC2 Cloud Environment The Industry Standard in IT Infrastructure Monitoring Purpose This document describes how to launch a new pre-installed Nagios® XI™ server in the Amazon EC2 cloud in order to quickly run a trial of Nagios XI without using physical hardware, migrate existing physical installations to a cloud infrastructure, and/or scale an existing XI monitoring environment. Target Audience This document is intended for use by Nagios XI Administrators who would like to bring up new Nagios XI instances in the Amazon Elastic Compute Cloud (EC2), as well as those who are moving existing physical installations to the cloud. Prerequisites Before you begin, this document assumes the user has an Amazon AWS account. If not, one can be obtained at http://aws.amazon.com. The end user is responsible for all billing that results from using the Amazon Web Services. Creating The Virtual Machine To be sure you are getting the Official Nagios XI public AMI (Amazon Machine Image), it is recommended that you login to the AWS (Amazon Web Service) management console at https://console.aws.amazon.com/ec2/home?region=us-east-1#s=Images Images are currently available in the following zones: US East (Virginia), US West (N. California), US West-2 (Oregon), EU (Frankfurt), EU West (Ireland), Asia Pacific (Singapore), Asia Pacific (Tokyo), S. America (Sao Paulo), Australia (Sydney). Making sure you are in the US East region and have the filter set to: Public Images. In the search bar, enter: “766915741798” This is the Nagios Tech Team official ID. From here you can select the image that meets your needs and click Launch. Next, the Request Instance Wizard will begin. Within the wizard you will be able to select your instance type and customize the allocated resource settings and naming information. We recommend that production systems run on a minimum instance size of m1.small or larger. Nagios Enterprises, LLC US: 1-888-NAGIOS-1 P.O. Box 8154 Int'l: +1 651-204-9102 Saint Paul, MN 55108 Fax: +1 651-204-9103 USA Web: www.nagios.com Email:sales@nagios.com Page 1 Copyright © 2010 - 2014 Nagios Enterprises, LLC Revision 1.1 – December, 2014 Nagios XI – How To Create A Virtual Instance In The Amazon EC2 Cloud Environment The wizard will have you choose, or create a key pair. If you are creating a key pair for the first time, you will be asked to download the key before continuing. The private key will be required to SSH to your machine. Note: Root password login is disabled. Additionally you will be asked to select or create a Security Group. The Security Group should allow public access on port 22 and port 80, this may be fine for some installations, but keep in mind that some features and addons require the use of additional ports. Note: When you first start your instance the current version of Nagios XI is installed and compiled at boot. This will take at least 15 minutes before the instance will become available. The amount of time will depend on the instance size you create. Connecting To The New Instance Once the instance is running, you can complete the installation of Nagios XI through the web interface. To access Nagios XI, type in the following URL: http://<ipaddress>/nagiosxi (where <ipaddress> is the IP address of the virtual machine) Note: You can find the Public DNS address by selecting the instance and viewing the details. Once you access the login screen, you can log in as the Admin to begin using XI. The credentials are listed below. XI Admin Account: Username: Password: nagiosadmin random (this gets initialized during setup) Core Config Manager Account: Username: nagiosadmin Password: welcome (this gets reset during setup) Nagios Enterprises, LLC US: 1-888-NAGIOS-1 P.O. Box 8154 Int'l: +1 651-204-9102 Saint Paul, MN 55108 Fax: +1 651-204-9103 USA Web: www.nagios.com Email:sales@nagios.com Page 2 Copyright © 2010 - 2014 Nagios Enterprises, LLC Revision 1.1 – December, 2014 Nagios XI – How To Create A Virtual Instance In The Amazon EC2 Cloud Environment MySQL Username: Password: root nagiosxi Instructions for changing these credentials can be found on the support wiki: http://support.nagios.com/wiki You may also need to occasionally make a SSH connection to your machine. This connection must use the private key you downloaded earlier. When connecting you must use the username ec2-user NOT root. This user has full sudo access. ssh -i .ssh/mykey.pem ec2-user@[AWS_public_DNS] Note About System Credentials You are strongly advised to change these passwords immediately, as they are not secure and are shipped as the default passwords as other Nagios XI virtual machines. If you forget these passwords, we can't help recover them, so keep track of the new credentials you choose. Finishing Up If you have any questions regarding Nagios XI visit our Nagios Support Forums at: http://support.nagios.com/forum Videos, tutorials, and additional documentation for Nagios XI can be found on the new Nagios Library website: http://library.nagios.com Make sure to visit the library regularly to get the latest news and tutorials. Troubleshooting Tip: If you are having trouble with the configuration, make sure that your security group in Amazon EC2 includes information regarding Email. Outbound email may not work if the AMI doesn't have a valid DNS name, or your firewall rules don't allow outbound SMTP except through a proxy. Nagios Enterprises, LLC US: 1-888-NAGIOS-1 P.O. Box 8154 Int'l: +1 651-204-9102 Saint Paul, MN 55108 Fax: +1 651-204-9103 USA Web: www.nagios.com Email:sales@nagios.com Page 3 Copyright © 2010 - 2014 Nagios Enterprises, LLC Revision 1.1 – December, 2014
