‘
Annas Quilt
A Classic Design for Modern Quilters
By Donna di Natale
Editor: Deb Rowden
Designer: Bob Deck
Photography: Aaron T. Leimkuehler and Pat di Natale
Illustration: Lon Eric Craven
Technical Editor: Kathe Dougherty
Production assistance: Jo Ann Groves
About the Author 6
Dedication 7
Acknowledgements 7
Contents
Introduction 9
General Instructions 13
Resources 15
Projects
Anna’s Blue Ribbon Quilt 18
Forever Plaid Quilt 26
Wild Flowers Tablerunner 30
Wool Appliqué Tabletopper 34
Fall Bouquet Wool Appliqué Wallhanging 38
Templates 42
Published by:
Kansas City Star Books
1729 Grand Blvd.
Kansas City, Missouri, USA 64108
All rights reserved
Copyright © 2012 Donna di Natale and The Kansas City Star Co.
No part of this book may be reproduced, stored in a retrieval system, or
transmitted in any form or by any means, electronic, mechanical, photocopying,
recording or otherwise, without the prior consent of the publisher.
Exception: we grant permission to photocopy the patterns for personal use only.
No finished quilts or other projects featured in this book can be produced or
sold commercially without the permission of the author and publisher.
First edition, first printing
ISBN: 9781611690408
Library of Congress Control Number: 2012933477
Printed in the United States of America by Walsworth Publishing Co.,
Marceline, MO
To order copies, call StarInfo at (816) 234-4636 and say “Books.”
‘
Annas Quilt
‘
4
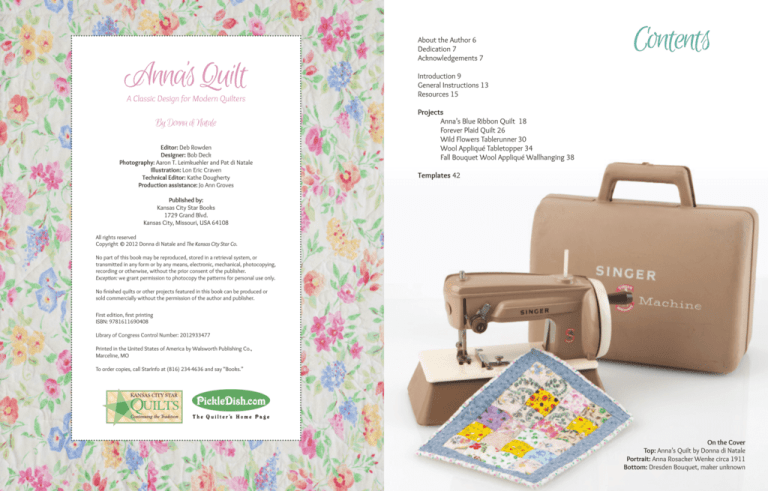
On the Cover
Top: Anna’s Quilt by Donna di Natale
Portrait: Anna Rosacker Wenke circa 1911
Bottom: Dresden Bouquet, maker unknown
Annas Quilt
5
Annas’ Blue Ribbon Quilt
Finished size 70" x 86"
Anna’s Quilt is named for my Aunt
Anna. Born in Fort Calhoun, Nebraska,
in 1891, Anna was the eldest daughter
of German immigrants Henry and Mary
Rosacker. Anna became an accomplished
seamstress as a young woman and worked
as a dressmaker at Kilpatrick’s department
store in Omaha, Nebraska.
Anna Wenke
In 1911 she married William “Will” Wenke and moved to Pender,
Nebraska, where Will worked as a cashier and later became president of
Pender State Bank. Anna and Will had three sons, Sterling, Paul and
Clark. Anna was a sophisticated and gracious hostess. I remember
visiting their home as a child and the lavish
meals that were served at family gatherings.
Anna was always immaculately dressed,
whether wearing a homemade cotton
housedress or an elegant lacy formal dress.
And, as was typical of
ladies in that era,
she always had a
pretty handkerchief
in hand or tucked
into her belt.
‘
Designed,
Annas
Quiltpieced and appliquéd by Donna di Natale; machine quilted by Lyn Heilman.
‘
18
Anna Wenke
with son
Sterling
Will Wenke
Annas Quilt
19
Following publication of the book Nebraska Quilts and
Quiltmakers a select number of the quilts, including Anna’s,
were chosen for a traveling exhibit to England as part of
the Knitting and Stitching Show at Alexander Palace in
London and at Harrogate. Geneva (Sterling’s wife) traveled
to London to attend the opening of that exhibit. In 1995
Anna’s quilt was also
included in a Nebraska
quilt exhibit at the
Municipal Art Gallery in
Shizuoka, Japan, Sister
City of Omaha.
According to family lore, Anna spent the entire
winter of 1936 in her basement sewing room
working on her Dresden Bouquet quilt. As it
turned out, this was time well spent. In 1938 she
entered the beautifully hand appliquéd and hand
quilted piece in the Omaha World Herald Orchard
& Wilhelm 1938 Quilt Show. The quilt took 1st
Place in competition and the blue ribbon is still
attached to the back of the quilt. Anna’s prize
was a wingback chair that held a prominent spot in their
living room for years to come. The quilt was lovingly stored and only displayed
on special occasions. When Anna passed away in 1970 both the chair and the
quilt were passed along to her eldest son Sterling and his family. The quilt is as
pristine today as it was when it was made.
‘
20
Annas Quilt
Nicole Wenke wearing her Great Grandmother
Anna’s wedding dress
‘
Anna’s quilt proudly displayed for special guests
Anna’s quilt is made of 100% cotton sateen and still
has a lustrous finish to it. Anna followed the pattern
instructions but changed the color of some of the
flowers. Perhaps this was her way of displaying her
independence. For my version of Anna’s quilt I chose
solid and marbled fabrics by Moda in colors that were
as close to the colors in Anna’s quilt as I could find.
One exception is the background fabric. I selected a
cream-on-cream print rather than a solid. My backing
is a lovely print that just happens to contain the same
flowers found in the quilt blocks. There is one flower
in the original quilt that I left out altogether. It is
a blue flower that appeared on the left side of the
bouquet. From the photograph I had of Anna’s quilt
I couldn’t figure out what the flower was or where
it came from so I simply omitted it. Later, after I had
discovered the pattern, I could tell more about the
flower but by that time my quilt was finished.
Annas Quilt
21
Instructions
Cream or white (appliqué blocks and borders): 5 yards
Mottled or marbled pink (alternate blocks, setting triangles and binding): 3 yards
Medium green (vines and leaves): 1 1⁄2 yards
Light blue (morning glory petals): 1⁄4 yard or 1 fat quarter
Light rose (mid flower and tulips): 1⁄4 yard or 1 fat quarter
Medium rose (outer flower): 1⁄8 yard or 1 fat quarter
Yellow (daisy petals and morning glory center): 1⁄4 yard or fat quarter
Dark blue (blue bells): 1⁄8 yard or fat quarter
Deep rose (flower center): scrap about 4" x 8"
Backing: 5 1⁄2 yards
Thread to match flower and vine fabrics
Lightweight fusible webbing
Batting: Double/full size (Hobbs Heirloom 80/20 blend)
Cutting Instructions
Mottled Pink
✿ 6 – 12 1⁄2" squares for alternate blocks
✿ 2 – 9 3⁄8" squares for corner triangles; cut
each square diagonally into 2 triangles.
Fig. 1
✿ 3 – 18 3⁄4" squares for setting triangles;
cut each square diagonally twice to make
10 triangles.
Fig. 2
‘
22
Annas Quilt
Cream/white
✿ 12 – 14” x 14” squares. These will be cut to
12 1⁄2” squares after the appliqué is finished.
✿ 2 – 11” x 72” strips and 2 – 11” x 88” for
the borders. These will be cut to length after
the quilt has been appliquéd.
Green
✿ 1 1⁄4 yards for stems and leaves
Fusing the Flower Pieces
Also see the General Instructions for tips on using
fusible webbing (page 13).
Photocopy or trace the flower templates. You will
want to make cardboard or plastic templates for the
morning glory and daisy petals and for the leaves
because of the number of pieces required. The other
shapes may be traced directly onto the fusible if you
wish. If I am cutting a large number of pieces I like to
number the shapes as I trace them. This helps keep
track of how many I’ve traced so that I don’t have
to recount them each time and I know when I have
traced the appropriate number. I usually trace a few
extra of the small pieces in case one gets lost or
something happens when I’m cutting them out.
Trace the following number of pieces onto the paper
side of the lightweight fusible webbing, allowing
1
⁄4 - 1⁄2" between pieces:
Green: 65 leaves; 14 Daisy bases
Yellow: 70 Daisy petals; 14 Morning Glory centers
Light blue: 70 Morning Glory petals
Dark Blue: 66 Bluebells
Light Rose: 15 Rose A; 12 Tulips
Medium Rose: 15 Rose B
Deep Rose: 15 Rose center
Lay the appropriate fabric face down on your ironing
board and fuse the marked webbing to the back
side of the fabric following the manufacturer’s
instructions. If you’ve ever fused webbing to the
front of the fabric you will know why I’ve put these
words in bold. Once the iron hits the fusible, there is
no turning back.
Allow the fused fabric to cool. Cut out the individual
shapes on the drawn line. I recommend using a
zipper type plastic bag or a small storage container
for each shape. Label the bag according to the
design (for example, Daisy Petals; Morning Glory
centers; etc.) and place the pieces in the bags as you
cut them out.
Make the Vines and Stems
As often happens in quilting, there are many ways to
make vines and stems. I like to cut my pieces on the
bias. They simply curve easier and smoother if cut on
the bias rather than on the straight grain. You can
raw-edge appliqué bias strips but unless you are using
batiks, the bias strips are going to fray. Sometimes
you might want fuzzy vines or stems but usually you
will want the vines and stems to be nice and smooth.
To accomplish this, make bias tape or you can follow
the simple steps below.
After fusing all the leaves onto the green fabric you
will have about 30" of fabric remaining. Cut this
fabric into 1" wide bias strips. Use these strips for
the vines. Separate the longest strips and place
these in a plastic bag marked Border Vines. You will
need to sew some of them together to make 45"
strips for the border vines.
Fold the strips in half lengthwise, wrong sides
together. Press. Sew the raw edges of the strips
together using a 1⁄4" seam. Trim the seams to 1⁄8".
Place these pieces in a bag marked Stems.
‘
Fabric and Supplies
Annas Quilt
23
Make a photocopy of the placement guide
on pages 44-47. Tape the copy to a
light box or a sunny window. One
at a time, lay each block over the
placement guide. Make sure
the center of the placement
guide lines up with the
center of your fabric
block. Tape the
fabric in place
using a
removable
tape, such as
painter’s tape, so
that it doesn’t slip
while tracing. Using a
marking pen or pencil, trace
a line just inside the left edge
of each stem and stem piece. You
may also trace the layout for the
flowers on the fabric if you want, or
simply mark their approximate location.
Be sure to use a washout marker.
First appliqué the stems onto your block. Pick a
strip that is a bit longer than the line on the fabric.
Pin the strip to the fabric with the top edge of the
strip a bit beyond the line and the raw edges of the
strip to the left of and against the marked stem
line. Sew the strips to the fabric by stitching just to
the left of the seam – about 1 thread to the left.
Remember to pull out the pins as you reach them.
The three stems at the base of the bouquet have
a finished edge on the bottom as well as the sides.
‘
24
Annas Quilt
Stop sewing a bit more than 1⁄4" from the bottom
of the line. Trim the bottom of the bias strip if
necessary. Fold the bottom end of the stem up and
press. Now fold the bias strip to the right, covering
the seam, and press.
Edge stitch all around the stems, securing the
bottom fold as you go. You do not need to
edge stitch the top of the stems where
flowers will cover them. Following the
placement guide on pages 44-47,
arrange the rest of the pieces on
your block. Be sure to remove the
paper backing from the fused
fabric. Start with the pieces
that will be overlapped
by other pieces, such
as the Morning
Glory petals and
the bottom
layer of the
Rose. Pin
or glue baste
each piece in
place. When you
are pleased with the
design, remove the pieces
that overlap another piece,
leaving the rest of the pieces
in place.
Fuse and appliqué the design pieces.
Pieces that are overlapped by another piece
should be fused and appliquéd first.
I fused and appliquéd the pieces onto my blocks in
this order:
Stems
Morning Glory
Rose
Bellflower
Tulip
Daisy petals
Daisy base
Leaves
After the design is complete and all
the pieces are fused and stitched,
press the block on the wrong side.
Being careful to keep the design
centered, square your block to 12
1
⁄2" x 12 1⁄2". The best way to do this
is with a clear 12 1⁄2" square ruler.
I highly recommend purchasing or
borrowing one to cut appliqué blocks,
especially when setting your appliqué
blocks on point.
Assemble the Blocks
Following the photo on page 18, sew
the blocks together, then add the
setting triangles and corners and sew
the rows together. Remember that all
the bouquets should be upright in
the blocks.
Appliqué the Borders
Determine the length and width of
your quilt top by measuring across
the middle. Measuring the middle will
give you a more accurate length and
width. Cut border strips according to
these measurements – 2 for the sides
and 2 for the top and bottom. Attach
the side borders first, then attach the
top and bottom borders.
I usually prefer to appliqué my borders first but
in this case I attached the borders and then
completed the appliqué. It was a bit unwieldy
because of the size, but not too bad. I appliquéd
the bottom left corner. You may want to appliqué
the bottom right corner. If you plan to use this quilt
on a bed, think about which corner will show when
a person walks into the bedroom. That is the corner
you should appliqué.
reach to approximately the center of the side and
bottom. Refer back to the instructions for attaching
the vines to the blocks (page 23). Sew the vines
along the curved line you have just traced. The vines
begin under the rose and end under the leaf so you
will not need to fold over and finish either end.
Following the border layout guide on pages 48-51,
begin in the corner and pin the rose in place.
Working out from the rose, trace the curved line
that the vine will follow. The end of the vine should
Quilt as desired and bind. Don’t forget to add
a label!
Fuse and sew the flowers on the border in the same
way you stitched the flowers in the blocks.
‘
Make the Blocks
After you have cut all the shapes, fuse them to
the blocks. Anna’s Quilt is set on point and the
blocks are appliquéd on point. Take your 14" x
14" background fabric squares and fold them in
half diagonally. Press. Open the block and fold
diagonally in the other direction and press. This
gives you the vertical and horizontal centers of
your on-point block.
Annas Quilt
25

