Initial Phone Setup
Setting Up Phones in a CME System
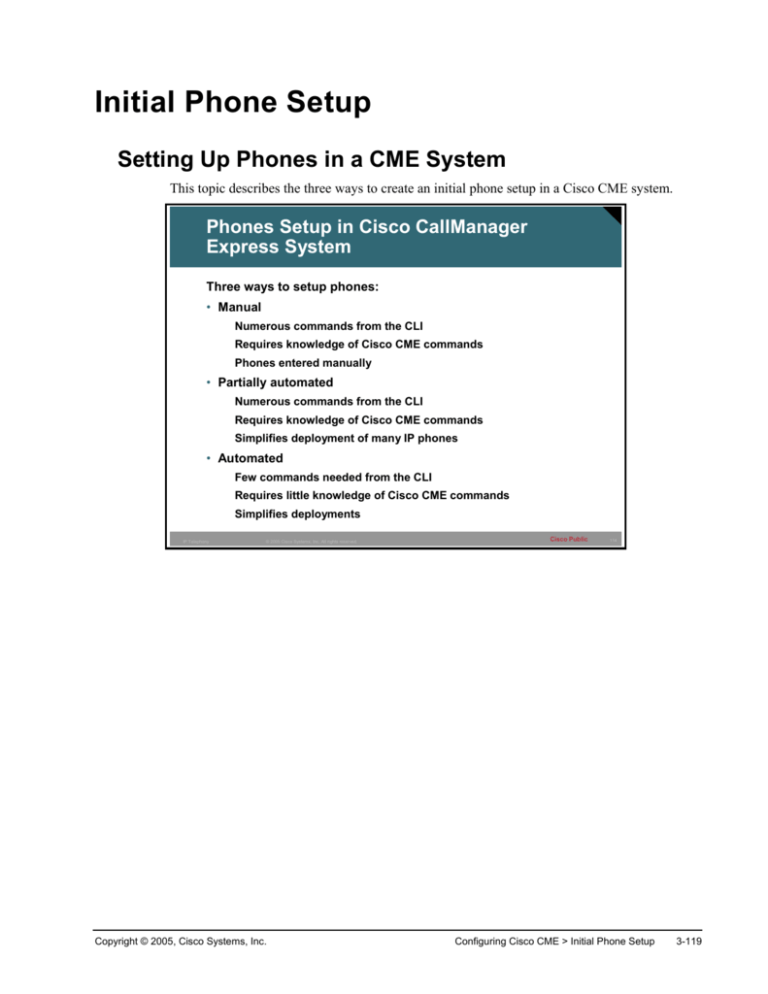
This topic describes the three ways to create an initial phone setup in a Cisco CME system.
Phones Setup in Cisco CallManager
Express System
Three ways to setup phones:
• Manual
Numerous commands from the CLI
Requires knowledge of Cisco CME commands
Phones entered manually
• Partially automated
Numerous commands from the CLI
Requires knowledge of Cisco CME commands
Simplifies deployment of many IP phones
• Automated
Few commands needed from the CLI
Requires little knowledge of Cisco CME commands
Simplifies deployments
IP Telephony
© 2005 Cisco Systems, Inc. All rights reserved.
Copyright © 2005, Cisco Systems, Inc.
Cisco Public
114
Configuring Cisco CME > Initial Phone Setup
3-119
Automated Phone Setup
This topic describes how to perform ann automated phone setup in a Cisco CME system using
the setup tool.
Automated Setup: Overview
Automated Setup
• Simple to configure
• Question and answer interface
• Good for inexperienced administrators
• Created IOS commands in the background
• Deployment and configuration are automated
• Must be no existing telephony service configuration
IP Telephony
© 2005 Cisco Systems, Inc. All rights reserved.
Cisco Public
115
The automated setup is designed for the administrator that does not have a lot of experience
with Cisco IOS and may not feel comfortable manually configuring the Cisco CME system. A
question-and-answer interface will start and all the administrator does is answer the questions
appropriately.
Note
3-120
Any existing configuration of the telephony-service in Cisco CME must be removed prior to
starting the setup.
Cisco Networking Academy Program: IP Telephony v1.0
Copyright © 2005, Cisco Systems, Inc.
Automated Setup (Cont.)
• Configure NTP prior to
running the setup utility
• Load the firmware files
into flash RAM prior to
running the setup utility
• Enter the automated
setup mode by entering
the command
“telephony-service
setup”
• A question and answer
session will start asking
for basic parameters
• CTRL + c keystroke can
be used at any time to
break out of the setup
mode
CMERouter1(config)#telephony-service setup
--- Cisco IOS Telephony Services Setup --Do you want to setup DHCP service for your IP Phones? [yes/no]: y
Configuring DHCP Pool for Cisco IOS Telephony Services :
IP network for telephony-service DHCP Pool:10.90.0.0
Subnet mask for DHCP network :255.255.255.0
TFTP Server IP address (Option 150) :10.90.0.1
Default Router for DHCP Pool :10.90.0.1
Do you want to start telephony-service setup? [yes/no]: y
Configuring Cisco IOS Telephony Services :
Enter the IP source address for Cisco IOS Telephony Services :10.90.0.1
Enter the Skinny Port for Cisco IOS Telephony Services : [2000]:2000
How many IP phones do you want to configure : [0]: 10
Do you want dual-line extensions assigned to phones? [yes/no]: y
What Language do you want on IP phones :
0 English
6 Dutch
1 French
7 Norwegian
2 German
8 Portuguese
3 Russian
9 Danish
4 Spanish
10 Swedish
5 Italian
[0]: 0
• No changes are
committed until the end
IP Telephony
© 2005 Cisco Systems, Inc. All rights reserved.
Cisco Public
116
The Cisco CME setup tool provides a question-and-answer interface that allows you to set up
an entire Cisco CME system at one time. The Cisco CME setup tool is started using the
telephony-service setup command. If you do not use the setup keyword, you can set up
phones one at a time using router CLI. The setup keyword is not stored in the router NVRAM.
When using the Cisco CME setup tool, you provide information in response to a series of
questions.
Note
If you attempt to use the setup option for a system that has a nonempty telephony-service
configuration, an error message advises you to remove the existing configuration first by
using the no telephony-service command.
Prior to running the automated setup utility please configure the Cisco CME router with
Network Time Protocol (NTP) and load the appropriate firmware files into flash RAM on the
Cisco CME router.
The actual configuration is created only when the entire dialog has been completed. You can
interrupt the process using Control-c at any point prior to the final question without having any
configuration occur.
The first question asked by the automated setup deals with DHCP and whether the Cisco CME
router is going to be providing this service. If “y” is entered the parameters of the DHCP scope
need to be entered when the setup prompts ask. The name of the scope that will be created as a
result of the setup is “ITS.”
The second section of the automated setup configures the telephony service. The setup asks if
the telephony service should be started and if “y” is selected the IP address and port that Cisco
CME runs on will need to be entered when the setup prompts. The IP address entered should be
Copyright © 2005, Cisco Systems, Inc.
Configuring Cisco CME > Initial Phone Setup
3-121
the address on the LAN that is local to the IP phones. This is the address that the phones will
use to register to. The port should in most cases be left to the default port of 2000.
The next question is how many phones you want to configure. Select no more than the licensed
amount. If a number is selected that is less than the licensed amount, more ephones can be
added later manually.
The next question asks if dual lines are desired, if “y” is selected the phones will be configured
like PBX phones, if “n” is selected the phones will be configured similar to a key switch phone.
The next question deals with the language of the phones and configures the locale that will be
used on the IP phone display. This when the configuration is committed will configure the
SCCP-dictionary.xml and the phonemodel-dictionary.xml files.
3-122
Cisco Networking Academy Program: IP Telephony v1.0
Copyright © 2005, Cisco Systems, Inc.
Automated Setup (Cont.)
• When configuration
is committed the
settings show up in
the running-config
IP Telephony
Which Call Progress tone set do you want on IP phones :
0 United States
1 France
2 Germany
3 Russia
4 Spain
5 Italy
6 Netherlands
7 Norway
8 Portugal
9 UK
10 Denmark
11 Switzerland
12 Sweden
13 Austria
14 Canada
[0]: 0
What is the first extension number you want to configure : [0]: 9000
Do you have Direct-Inward-Dial service for all your phones? [yes/no]: y
Enter the full E.164 number for the first phone :2095559000
Do you want to forward calls to a voice message service? [yes/no]: y
Enter extension or pilot number of the voice message service:9999
Call forward No Answer Timeout : [18]: 10
Do you wish to change any of the above information? [yes/no]: n
---- Setup completed config ---
© 2005 Cisco Systems, Inc. All rights reserved.
Cisco Public
117
The next part of the automated setup configures the call progress tones on the IP phones. The
call progress tones are the sounds heard by a caller. These would include things like dial tone,
busy signal, ringback and reorder signal. These call progress tones vary from country to
country and should be set according to what the users are used to hearing.
To continue the automated setup enter the Directory Number (DN) that will be the start of the
DNs that will be assigned, they will be assigned in a sequential fashion.
If Direct Inward Dial (DID) needs to be setup enter “yes” when prompted. DIDs are used when
the connection to the PSTN is able to pass the dialed number. In order for this to happen the
connection will typically be an ISDN connection. If the connections are FXO then a Private
Line Auto Ringdown (PLAR) on the analog trunk will need to be set up instead, this will have
to be done manually and is not a part of the automated setup. Setting up DIDs can be very
simple especially if there is relationship between the PSTN number and the internal DN.
(Example 209-555-9009 maps to 1009). If there is no common relationship between the PSTN
number and internal DN then manual settings will need to be made outside of the automated
setup (Example 209-555-9009 maps to 7691).
The next question asks if the calls should be forwarded to a voice message service. Assuming
that there is a voice mail system the pilot point number will need to be entered. This sets the
“forward no answer” and the “forward busy” for all of the phones created to the pilot point
number. The timeout value for the “forward no answer” will also need to be set, 18 seconds is
the default. This value is in seconds not rings as rings may vary in length up to 2 seconds.
The final question asks if any of the information that was entered needs to be changed. If “y” is
entered the setup starts over, if “n” is entered the changes are committed to the running-config.
After finishing the automated configuration the configuration has not been saved to the startup
configuration. Use the copy running-config startup-config command to save the
configuration.
Copyright © 2005, Cisco Systems, Inc.
Configuring Cisco CME > Initial Phone Setup
3-123
Automated Setup (Cont.): Results
ip dhcp pool ITS
DHCP pool created
network 10.90.0.0 255.255.255.0
default-router 10.90.0.1
Firmware available
to TFTP server
Flash is searched
and if firmware is
found it will be
loaded
option 150 ip 10.90.0.1
tftp-server flash:P00303020214.bin
tftp-server flash:P00403020214.bin
telephony-service
load 7910 P00403020214
load 7960-7940 P00303020214
Creates SEP XML
files at boot up
and load to RAM
create cnf-files
max-ephones 10
max-dn 10
Telephony-service
configuration
results
ip source-address 10.10.0.1 port 2000
voicemail 9999
auto assign 1 to 10
DID configuration
Firmware is
searched and if
MoH is found this
entry is made
The selected
number of ephonedns are configured
IP Telephony
dialplan-pattern 1 2095559... extension-length 4 extensionpattern 1...
moh music-on-hold.au
ephone-dn 1 dual-line
number 401
call-forward busy 9999
call-forward noans 9999 timeout 10
© 2005 Cisco Systems, Inc. All rights reserved.
Cisco Public
118
This shows the results of the automated setup.
Note
3-124
ITS is the initial name of what is now called Cisco CME, and still appears in some of the
configuration that is created with the automated setup.
Cisco Networking Academy Program: IP Telephony v1.0
Copyright © 2005, Cisco Systems, Inc.
Partially Automated Phone Setup
This topic describes how to perform a partially automated phone setup in a Cisco CME system
using the router CLI.
Partially Automated Setup: Overview
• Partially Automated Setup
• Is the same as a manual setup except for deploying
phones
• Deployment of IP phones is automated
• Uses the “auto assign” command
• All ephone-dns must be the same type (single-line
or dual-line)
IP Telephony
© 2005 Cisco Systems, Inc. All rights reserved.
Cisco Public
119
The partially automated setup is exactly like a manual setup, without having to configure
ephones. The ephones can be detected automatically and assigned an ephone-dn from a range
of configured ephone-dns. This allows for the deployment of many phones without the work of
configuring every phone manually. This automatic assignment is done through the use of the
auto assign command.
Copyright © 2005, Cisco Systems, Inc.
Configuring Cisco CME > Initial Phone Setup
3-125
Partially Automated Setup (Cont.)
Auto Assign Command
CMERouter(config-telephony-service)#
auto
auto assign
assign start-dn
start-dn to
to stop-dn
stop-dn [type
[type model]
model] [cfw
[cfw number
number
timeout
timeout seconds]
seconds]
• Automatically assigns the ephone-dns configured to
new ephones
Auto assign usage guidelines
• Can take up to 5 minutes for phones to register
• Wait for all phones to register before saving the
configuration
• cfw setting defines the call forward busy number
and timeout value for phones that register
IP Telephony
© 2005 Cisco Systems, Inc. All rights reserved.
Cisco Public
120
To automatically assign ephone-dn tags to Cisco IP phones as they register for service with the
Cisco CME router, use the auto assign command in telephony-service configuration mode.
This command lets you assign ranges of ephone-dn tags according to the physical phone type.
Multiple auto assign commands can be used to provide discontinuous ranges and to support
multiple types of IP phones. Overlapping ephone-dn ranges may be assigned so that they map
to more than one type of phone. If no type is specified, the values in the range are assigned to
phones of any type, but if a specific range is assigned for a phone type, the available ephonedns in that range are used first. The cfw keyword sets the call forward busy number and timeout
value on all phones that auto register.
The auto assign command cannot be used for the Cisco IP Phone 7914 Expansion Module.
Phones with one or more expansion modules must be configured manually.
Automatically assigned ephone-dn tags must belong to normal ephone-dns and cannot belong
to paging ephone-dns, intercom ephone-dns, music-on-hold (MOH) ephone-dns, or messagewaiting-indication (MWI) ephone-dns. The ephone-dn tags that are automatically assigned
must have at least a primary number defined.
All the ephone-dns in a single automatic assignment set must be of the same kind (either singleline or dual-line). Automatic assignment cannot create shared lines.
If an insufficient number of ephone-dns are available in the automatic assignment set, some
phones will not receive ephone-dns.
Reversal or undoing of automatic assignment must be performed by manual command-line
interface (CLI) entry. This command must be followed by a reboot of the phones that are
assigned. If you use the type keyword with this command, use the reset command to reboot the
phones. If you do not use the type keyword with this command, use the restart command to
perform a quick reboot.
3-126
Cisco Networking Academy Program: IP Telephony v1.0
Copyright © 2005, Cisco Systems, Inc.
Note
Care should be taken when using the auto assign command because this command grants
telephony service to any IP phone that attempts to register. If you use the auto assign
configuration option, make sure that your network is secure from unauthorized access by
unknown IP phones.
Example: Phone Setup in Cisco CME System
Phones Setup in Cisco CallManager
Express System
New phone plugs in
• When an new IP phone registers with the
Cisco CME system, this creates a new
ephone with the MAC address of the IP
phone
• A pre-existing ephone-dn is assigned to the
new ephone; this is selected from the range
defined for the type of phone
telephony-service
auto assign
1 to 10 type 7920
auto assign 11 to 20 type 7940
auto assign 21 to 40 type 7960
auto assign 41 to 50
...
ephone-dn 1 dual-line
number 1000
...
• The lowest unassigned ephone-dn in matching statement range will
be used
• If all ephone-dns in a range have been assigned, some phones may
not receive an ephone-dn or may overflow to the general auto assign
without a type
• If the new IP phone does not match any auto assign with a type, then
the auto assign without a type will be used
IP Telephony
© 2005 Cisco Systems, Inc. All rights reserved.
Cisco Public
121
In this example there are four auto assign commands with different ephone-dn assigned to
each. Any 7920 IP phones will be assigned the lowest unassigned ephone-dn between 1 and 10.
7940s will be assigned the lowest unassigned ephone-dn between 11 and 20. Any 7960s will be
assigned the lowest unassigned ephone-dn between 21 and 40. Finally, the phone can get an
ephone-dn assigned to it from the generic range 41 to 50 in this example if any 7920s, 7940s, or
7960s cannot be assigned an ephone-dn in their assigned range because they are all assigned.
This generic range that is not tied to any type will also be used for any other non specified
models of IP phones.
Note
When all desired IP phones are have been auto assigned make sure to save the
configuration.
Copyright © 2005, Cisco Systems, Inc.
Configuring Cisco CME > Initial Phone Setup
3-127
Manual Phone Setup
This topic describes how to perform a manual phone setup in a Cisco CME system using the
router CLI.
Manual Setup: Overview
• All commands can be entered from the CLI
• Good for experienced administrators
• Leverages IOS knowledge
• Full functionality through IOS commands
• Deployment of IP phones can be batched or
scripted through a text file
IP Telephony
© 2005 Cisco Systems, Inc. All rights reserved.
Cisco Public
122
The manual setup of the Cisco CME system involves using the CLI environment. This allows
the administrator to leverage existing knowledge of IOS and implement any of the Cisco CME
functions. The configuration can be viewed, backed up and restore through a simple text file.
This can also be used for multiple site deployments allowing just the differences to be changed
on a per site basis, there by saving time and effort.
3-128
Cisco Networking Academy Program: IP Telephony v1.0
Copyright © 2005, Cisco Systems, Inc.
Manual Setup (Cont.): Commands Overview
Commands needed to configure a basic
telephony service
• tftp-server flash:filename
• telephony-service
• max-ephones max-ephones
• max-dn max-directory-numbers
• load phone-type firmware-file
• ip source-address ip-address [port port]
• create cnf-files
• keepalive seconds
• dialplan-pattern tag pattern extension-length length
extension-pattern pattern
IP Telephony
© 2005 Cisco Systems, Inc. All rights reserved.
Cisco Public
123
The following commands will need to be configured to deploy a Cisco CME system.
tftp-server flash:filename
telephony-service
max-ephones max-ephones
max-dn max-directory-numbers
load phone-type firmware-file
ip source-address ip-address [port port]
create cnf-files
keepalive seconds
dialplan-pattern tag pattern extension-length length extension-pattern pattern
In the addition to these commands, ephones and ephone-dns will need to be manually
configured. These topics were discussed in a previous lesson.
Copyright © 2005, Cisco Systems, Inc.
Configuring Cisco CME > Initial Phone Setup
3-129
Manual Setup (Cont.): tftp-server Command
CMERouter(config)#
tftp-server
tftp-server flash:filename
flash:filename
• Allows a file in flash to be downloadable with TFTP
7940/60
Firmware
7920
Firmware
Available through TFTP
7910
Firmware
tftp-server flash:P00303020214.bin
tftp-server flash:cmterm_7920.3.3-01-06.bin
tftp-server flash:P00403020214.bin
IP Telephony
© 2005 Cisco Systems, Inc. All rights reserved.
Cisco Public
124
The command tftp-server flash:filename allows the file specified that resides in flash to be
downloaded via TFTP. In Cisco CME the firmware files need to be configured to be available
through TFTP. The example above shares firmware for the 7910, 7940-7960, and the 7920 IP
phones.
3-130
Cisco Networking Academy Program: IP Telephony v1.0
Copyright © 2005, Cisco Systems, Inc.
Manual Setup (Cont.): Telephony Service
Commands
CMERouter(config)#
telephony-service
telephony-service
• Enters telephony service mode
CMERouter(config-telephony-service)#
max-ephone
max-ephone maximum-ephones
maximum-ephones
• Sets the maximum number of ephones that may be
defined in the system (default is 0)
CMERouter(config-telephony-service)#
max-dn
max-dn maximum-directory-numbers
maximum-directory-numbers
• Sets the maximum number of ephone-dn that may be
defined in the system (default is 0)
IP Telephony
© 2005 Cisco Systems, Inc. All rights reserved.
Cisco Public
125
The command telephony-service enters the telephony service mode where much of the
configuration of the Cisco CME system is entered. Two of the first commands that will want to
be entered are the max-dn and max-ephone. Both of these commands are set to 0 which has
the affect of not allowing any ephones or ephone-dns to be configured.
The number of ephones and ephone-dns is version and platform specific. The number displayed
in the IOS help is not always accurate and may reflect an artificially high number. Consult the
information provided with the CallManager router or cisco.com website.
Example
CMERouter1(config-telephony)#max-dn ?
<1-288> Maximum directory numbers supported
CMERouter1(config-telephony)#max-ephone ?
<1-100> Maximum phones to support
Copyright © 2005, Cisco Systems, Inc.
Configuring Cisco CME > Initial Phone Setup
3-131
Manual Setup (Cont.): Firmware
Association
CMERouter(config-telephony-service)#
load
load model
model firmware-file
firmware-file
• Associates a firmware file with the model of IP phone
telephony-service
7940/60
Firmware
7940/7960
load 7960-7940 P00303020214
load 7920 cmterm_7920.3.3-01-06.bin
load 7910 P00403020214
7920
Firmware
Filenames are case-sensitive
IP Telephony
7910
Firmware
© 2005 Cisco Systems, Inc. All rights reserved.
7920
7910
Cisco Public
126
To associate a type of Cisco IP phone with a phone firmware file, use the load model
firmware-file command in telephony-service configuration mode. The following show the
supported models for which firmware can be loaded:
Note
No suffix should be used when using the load command for the 7910, 7940 and 7960 model
IP phones.
CMERouter1(config-telephony)#load ?
3-132
7902
Select the firmware load file for 7902
7905
Select the firmware load file for 7905
7910
Select the IP phone firmware load file for Telecaster 7910 phones
7912
Select the firmware load file for 7912
7914
Select the IP phone firmware load file for sidecar 7914
7920
Select the firmware load file for 7920
7935
Select the IP phone firmware load file for 7935 Conference Station
7936
Select the firmware load file for 7936
7960-7940
Select the IP phone firmware load file for Telecaster 7960 & 7940 phones
ATA
Select the firmware load file for ATA
Cisco Networking Academy Program: IP Telephony v1.0
Copyright © 2005, Cisco Systems, Inc.
Manual Setup (Cont.): Source IP and Port
CMERouter(config-telephony-service)#
ip
ip source-address
source-address ip-address
ip-address [port
[port port]
port]
• Identifies the address and port through which IP
phones communicate with Cisco CME
Default
XML
10.90.0.1
telephony-service
ip source-address 10.90.0.1 port 2000
IP Telephony
Cisco Public
© 2005 Cisco Systems, Inc. All rights reserved.
127
The command ip source ip-address [port port] is used to configure the local IP address and
TCP port where the Cisco CME system is expecting Skinny Client Control Protocol (SCCP)
messages from the IP phones concerning registrations and call control. The port by default is
set to 2000, while this may be changed it is unusual to do so.
Example
This is an example of the XMLDefault.cnf.xml file. Note the IP address, port and firmware
files.
<Default>
<callManagerGroup>
<members>
<member priority="0">
<callManager>
<ports>
<ethernetPhonePort>2000</ethernetPhonePort>
</ports>
<processNodeName>10.90.0.1</processNodeName>
</callManager>
Copyright © 2005, Cisco Systems, Inc.
Configuring Cisco CME > Initial Phone Setup
3-133
</member>
</members>
</callManagerGroup>
<loadInformation6 model="IP Phone 7910">P00403020214</loadInformation6>
<loadInformation124 model="Addon 7914"></loadInformation124>
<loadInformation9 model="IP Phone 7935"></loadInformation9>
<loadInformation8 model="IP Phone 7940">P00303020214</loadInformation8>
<loadInformation7 model="IP Phone 7960">P00303020214</loadInformation7>
<loadInformation20000 model="IP Phone 7905"></loadInformation20000>
<loadInformation30008 model="IP Phone 7902"></loadInformation30008>
<loadInformation30002 model="IP Phone 7920">cmterm_7920.3.3-0106.bin</loadInformation30002>
<loadInformation30019 model="IP Phone 7936"></loadInformation30019>
<loadInformation30007 model="IP Phone 7912"></loadInformation30007>
</Default>
3-134
Cisco Networking Academy Program: IP Telephony v1.0
Copyright © 2005, Cisco Systems, Inc.
Manual Setup (Cont.): Create XML Files
CMERouter(config-telephony-service)#
create
create cnf-files
cnf-files
• Builds the specific XML files necessary for the IP
phones
SEP
SEP000F2473AB14.cnf.xml
XML
000F.2473.AB14
10.90.0.1
telephony-service
create cnf-files
IP Telephony
© 2005 Cisco Systems, Inc. All rights reserved.
Cisco Public
128
To build the XML configuration files that are required for IP phones used with Cisco CME 3.1,
or later versions, use the create cnf-files command in telephony-service configuration mode.
When this command is entered the file XMLDefault.cnf.xml is generated with that appropriate
settings including the firmware defined by the load command, the IP address for new IP phones
to register to and the TCP port those messages will arrive on.
Example
This is an example of SEP000F2473AB14.cnf.xml. Note the IP address, port, locale
information and firmware required.
<device>
<devicePool>
<callManagerGroup>
<members>
<member priority="0">
<callManager>
<ports>
<ethernetPhonePort>2000</ethernetPhonePort>
</ports>
Copyright © 2005, Cisco Systems, Inc.
Configuring Cisco CME > Initial Phone Setup
3-135
<processNodeName>10.90.0.1</processNodeName>
</callManager>
</member>
</members>
</callManagerGroup>
</devicePool>
<versionStamp>{Jan 01 2002 00:00:00}</versionStamp>
<loadInformation>P00303020214</loadInformation>
- <userLocale>
<name>English_United_States</name>
<langCode>en</langCode>
</userLocale>
<networkLocale>United_States</networkLocale>
<idleTimeout>0</idleTimeout>
<authenticationURL />
<directoryURL>http://10.90.0.1/localdirectory</directoryURL>
<idleURL />
<informationURL />
<messagesURL />
<proxyServerURL />
<servicesURL />
</device>
3-136
Cisco Networking Academy Program: IP Telephony v1.0
Copyright © 2005, Cisco Systems, Inc.
Manual Setup (Cont.)
Keepalive
CMERouter(config-telephony-service)#
keepalive
keepalive seconds
seconds
• Sets the length of the time interval between keepalive
message from the IP phones to Cisco CME
telephony-service
keepalive 10
Keepalive
Keepalive
• Default is 30 seconds, range is 10 – 65535 seconds
• If 3 keepalives are missed in a row, the device will
have to register again
© 2004 Cisco Systems, Inc. All rights reserved.
IPTX v1.1—2-11
To set the length of the time interval between successive keepalive messages from the Cisco
CME router to IP phones, use the keepalive command in telephony-service configuration
mode. The default setting for the keepalives is 30 seconds and if the router fails to receive three
successive keepalive messages, it considers the phone to be out of service until the phone
reregisters.
Copyright © 2005, Cisco Systems, Inc.
Configuring Cisco CME > Initial Phone Setup
3-137
Manual Setup (Cont.): DID Configuration
Commands
CMERouter(config-telephony-service)#
dialplan-pattern
dialplan-pattern tag
tag pattern
pattern extension-length
extension-length length
length
extension-pattern
extension-pattern pattern
pattern [no-reg]
[no-reg]
• Sets a dial plan pattern which can expand extension
numbers to E.164 numbers that can be used for DIDs
DN 1000
PSTN
ISDN PRI
DIDs assigned
2015559000
thru
…
DN 10XX
DN 1099
2015559099
telephony-service
dialplay-pattern 1 20155590.. extension-length 4 extension pattern 10..
IP Telephony
© 2005 Cisco Systems, Inc. All rights reserved.
Cisco Public
131
To create a global prefix that can be used to expand abbreviated extension numbers in a Cisco
CME system into fully qualified E.164 numbers, use the dialplan-pattern command in
telephony-service configuration mode.
Directory numbers for the Cisco IP phones are entered in extension-number format. The
dialplan-pattern command creates a global prefix that can be used to expand the abbreviated
extension numbers into fully qualified E.164 numbers. The dial-plan pattern is also required in
order to register Cisco IP phone lines with a gatekeeper. The dialplan-pattern command can
resolve an incoming call with a full E.164 number to a Cisco IP phone extension number.
The extension-length keyword enables the system to convert a full E.164 telephone number
back into an extension number for the purposes of caller ID display and received-call and
missed-call lists. For example, a company uses extension number range 100 to 199 across
several sites, with only the extensions from 1000 to 1099 present on the local router. An
incoming call from 1044 arrives from the company’s internal VoIP H.323 network, and this
call includes the calling number as 4085550144 in its full E.164 format.
By default the numbers matching the dialplan-pattern command will be registered to a H.323
Gatekeeper if a gatekeeper is configured. The use of the no-reg keyword will change this
default behavior and prevent the numbers matching the pattern from registering with the
Gatekeeper.
When the called number matches the dial-plan pattern, the call is considered a local call and has
a distinctive ring that identifies the call as internal. Any call that does not match the dial-plan
pattern is considered an external call and has a ring different from the internal ring. The valid
dial-plan pattern with the lowest dial-plan-tag number is used as a prefix to all local Cisco IP
phones.
The number of extension-pattern characters must match the extension length that is specified in
this command.
3-138
Cisco Networking Academy Program: IP Telephony v1.0
Copyright © 2005, Cisco Systems, Inc.
Note
This command can be a replacement for configuring secondary numbers on ephone-dns.
Example
Manual Setup (Cont.): Example
Manual Setup of the Cisco CME
tftp-server flash:P00303020214.bin
tftp-server flash:P00403020214.bin
telephony-service
load 7910 P00403020214
load 7960-7940 P00303020214
create cnf-files
max-ephones 10
max-dn 10
ip source-address 10.10.0.1 port 2000
dialplan-pattern 1 2095559... extension-length 4 extension-pattern 1...
ephone-dn 1 dual-line
Manually
configured
see module
3 lesson 3
number 401
call-forward busy 1999
call-forward noans 1999 timeout 10
ephone 1
mac-address 000F.2745.2AD8
button 1:1
IP Telephony
© 2005 Cisco Systems, Inc. All rights reserved.
Cisco Public
131
This shows a sample basic Cisco CME system that has been configured.
Copyright © 2005, Cisco Systems, Inc.
Configuring Cisco CME > Initial Phone Setup
3-139
Setup Tips
This topic identifies IP phone setup troubleshooting tips.
Setup Troubleshooting: Verify IP
Addressing
Verify the IP addressing on the IP phone
• Use the Settings button and select “Network
Configuration”
• Verify IP and subnet mask are correct
• Verify the TFTP server is the Cisco CME router
• Verify the default gateway is correct
IP Telephony
© 2005 Cisco Systems, Inc. All rights reserved.
Cisco Public
133
To verify that the DHCP server is handing out the correct information to the IP phones use the
“Settings” button and from the menu that appears select the “Network Configuration” settings.
Scroll through the settings and verify the IP address, subnet mask, default gateway and the
location of the defined TFTP server. The TFTP server needs to be the Cisco CME router.
3-140
Cisco Networking Academy Program: IP Telephony v1.0
Copyright © 2005, Cisco Systems, Inc.
Setup Tips (Cont.): Verify the Correct Files
in Flash
Show flash
CMERouter#show flash
-#- --length-- -----date/time------ path
1
2
3
399514 Mar 1 2002 12:56:28
22649180 Mar 1 2002 12:38:00
321939 Mar 1 2002 12:55:58
P00305000301.sbn
c3725-ipvoice-mz.123-7.T.bin
CP7902010200SCCP031023A.sbin
4
5
317171 Mar 1 2002 12:56:06
317968 Mar 1 2002 12:56:10
CP7905010200SCCP031023A.sbin
CP7912010200SCCP031023A.sbin
6
7
8
369950 Mar 1 2002 12:56:22
333822 Mar 1 2002 12:56:30
47904 Mar 1 2002 12:56:54
P00303020214.bin
P00403020214.bin
S00103020002.bin
9
10
11
12
13
14
301298 Mar 1 2002 12:56:56 ata18x-v2-16-ms-030327b.zup
496521 Mar 1 2002 12:57:22 music-on-hold.au
1908762 Mar 1 2002 12:56:54 P00503010100.bin
21 Mar 1 2002 12:56:18
839984 Mar 1 2002 12:57:18
307067 Mar 1 2002 12:56:02
OS7920.txt
cmterm_7920.3.3-01-06.bin
CP79050101SCCP030530B31.zup
...
IP Telephony
© 2005 Cisco Systems, Inc. All rights reserved.
Cisco Public
133
The command show flash displays the contents of flash RAM. This needs to contain the
firmware file necessary for the models of IP phones that are deployed. There may be many
other files here depending on other configurations.
Copyright © 2005, Cisco Systems, Inc.
Configuring Cisco CME > Initial Phone Setup
3-141
Optional Parameters
This topic identifies optional IP phone parameters.
Optional Parameters: Locale Parameters
Allow changes to:
• Language of phone display
Danish
Italian
• Locale for call progress
tones and cadences
Spanish
Dutch
Norwegian
Swedish
French
Portuguese
English
German
IP Telephony
© 2005 Cisco Systems, Inc. All rights reserved.
Russian
Federation
Cisco Public
135
The Cisco CME system can be customized to some degree with a localized language on the IP
phone, call progress indicators and cadence. This allows the user to hear and interact with the
system with the language and audible queues that they are familiar with.
The format that the phone displays the date and time in can be modified to the format that is
usual for the location of the installation.
3-142
Cisco Networking Academy Program: IP Telephony v1.0
Copyright © 2005, Cisco Systems, Inc.
Router Configuration: Two Commands
This topic identifies a router configuration.
Optional Parameters: Locale Parameters
Allow changes to:
• Language of phone display
Danish
Italian
• Locale for call progress
tones and cadences
Spanish
Dutch
Norwegian
Swedish
French
Portuguese
English
German
IP Telephony
© 2005 Cisco Systems, Inc. All rights reserved.
Russian
Federation
Cisco Public
135
The CallManager Express system can be customized to some degree with a localized language
on the IP phone, call progress indicators and cadence. This allows the user to hear and interact
with the system with the language and audible queues that they are familiar with.
The format that the phone displays the date and time can be modified to the format that is usual
for the location of the installation.
Copyright © 2005, Cisco Systems, Inc.
Configuring Cisco CME > Initial Phone Setup
3-143
Optional Parameters – Locale Parameters
This topic identifies a router configuration.
Optional Parameters: Locale Parameters
CMERouter(config-telephony-service)#
user-locale
user-locale language-code
language-code
• Specifies the language for display on an IP phone
CMERouter(config-telephony-service)#
network-locale
network-locale language-code
language-code
• Specifies the set of call progress tones and cadence
on the IP phone
© 2005 Cisco Systems, Inc. All rights reserved.
IP Telephony
Cisco Public
135
On the Cisco IP Phone 7940 and Cisco IP Phone 7960, the language displayed on the phone
and the locale for call progress tones and cadences can be set to one of several ISO-3166 codes
that indicate specific languages and geographic regions.
Note
The 7920 IP phone supports English, French, German, and Spanish and this setting is made
on the handset. The user-locale and network-locale have no effect on the 7920 IP phone.
CMERouter1(config-telephony)#user-locale ?
DE Germany
DK Denmark
ES Spain
FR France
IT Italy
NL Netherlands
NO Norway
PT Portugal
3-144
Cisco Networking Academy Program: IP Telephony v1.0
Copyright © 2005, Cisco Systems, Inc.
RU Russian Federation
SE Sweden
US United States
CMERouter1(config-telephony)#network-locale ?
AT Austria
CA Canada
CH Switzerland
DE Germany
DK Denmark
ES Spain
FR France
GB United Kingdom
IT Italy
NL Netherlands
NO Norway
PT Portugal
RU Russian Federation
SE Sweden
US United States
Copyright © 2005, Cisco Systems, Inc.
Configuring Cisco CME > Initial Phone Setup
3-145
Optional Parameters: Date and Time
CMERouter(config-telephony-service)#
date-format
date-format {mm-dd-yy
{mm-dd-yy || dd-mm-yy
dd-mm-yy || yy-dd-mm
yy-dd-mm || yy-mm-dd}
yy-mm-dd}
• Sets the date format for IP phone displays
CMERouter(config-telephony-service)#
time-format
time-format {12
{12 || 24}
24}
• Specifies the set of call progress tones and cadence
on the IP phone
IP Telephony
© 2005 Cisco Systems, Inc. All rights reserved.
Cisco Public
136
On the Cisco IP Phone 7940 and Cisco IP Phone 7960, the date and time format can be set on a
system wide basis for all IP phones.
CMERouter1(config-telephony)#date-format ?
dd-mm-yy Set date to dd-mm-yy format
mm-dd-yy Set date to mm-dd-yy format
yy-dd-mm Set date to yy-dd-mm format
yy-mm-dd Set date to yy-mm-dd format
CMERouter1(config-telephony)#time-format ?
12 Set time to 12Hrs(AM/PM) format
24 Set time to 24Hrs format
3-146
Cisco Networking Academy Program: IP Telephony v1.0
Copyright © 2005, Cisco Systems, Inc.
Rebooting Cisco CallManager Express Phones
This topic discusses rebooting IP phones.
Rebooting Cisco CallManager Express
Phones
Reset Command
Restart Command
• Hard reboot
• Soft reboot
• Phone firmware changes
• Phone buttons changes
• User locales changes
• Phone lines changes
• Network locales changes
• Speed-dial number changes
• URL parameters changes
• No DHCP or TFTP invoked
• DHCP and TFTP invoked
• System message changes
• Takes longer than restart
IP Telephony
© 2005 Cisco Systems, Inc. All rights reserved.
Cisco Public
138
After you update information for one or more phones associated with a Cisco CME router, the
phone or phones must be rebooted. There are two commands to reboot the phones: reset and
restart. The reset command performs a “hard” reboot similar to a power-off-power-on
sequence. It reboots the phone and contacts the DHCP server and TFTP server to update from
their information as well. The restart command performs a “soft” reboot by simply rebooting
the phone without contacting the DHCP and TFTP servers. The reset command takes
significantly longer to process than the restart command when you are updating multiple
phones, but it must be used after updating phone firmware, user locale, network locale, or URL
parameters. For simple button, line, or speed-dial changes, you can use the restart command.
Use the reset (ephone) command to perform a complete reboot of an IP phone when you are in
ephone configuration mode. This command has the same effect as a reset (telephony-service)
command that is used to reset a single phone.
Copyright © 2005, Cisco Systems, Inc.
Configuring Cisco CME > Initial Phone Setup
3-147
Router Configuration: Two Commands
(Cont.)
CMERouter(config-telephony-service)#
reset
reset {all
{all [time-interval]
[time-interval] || cancel
cancel || mac-address
mac-address ||
sequence-all}
sequence-all}
• Sets the date format for IP phone displays
CMERouter(config-ephone)#
reset
reset
• Resets a specific ephone
IP Telephony
© 2005 Cisco Systems, Inc. All rights reserved.
Cisco Public
139
To perform a complete reboot of one or all phones associated with a Cisco CME router, use the
reset command in telephony-service configuration mode.
When using the reset command from telephony service mode, the default time interval of 15
seconds is recommended for an 8- to 10-phone office so that all the phones do not attempt to
access TFTP server resources simultaneously. This value should be increased for larger
networks.
When you use the reset sequence-all command, the router waits for one phone to complete its
reset and reregister before starting to reset the next phone. The delay provided by this command
prevents multiple phones from attempting to access the TFTP server simultaneously and
therefore failing to reset properly. Each reset operation can take several minutes when you use
this command. There is a reset timeout of 4 minutes, after which the router stops waiting for the
currently registering phone to complete registration and starts to reset the next phone.
If the router configuration is changed so that the XML configuration files for the phones are
modified (changes are made to user locale, network locale, or phone firmware), then whenever
you use the reset all or restart all command, the router automatically executes the reset
sequence-all command instead. The reset sequence-all command resets phones one at a time
in order to prevent multiple phones trying to contact the TFTP server simultaneously. This oneat-a-time sequencing can take a long time if there are many phones. To avoid this automatic
behavior, use the reset all time-interval command or the restart all time-interval command
with an explicit argument that is not equal to the default 15-second time interval; for example,
set a time interval of 14 seconds. If a reset sequence-all command has been started in error, use
the reset cancel command to interrupt and cancel the sequence of resets.
To perform a complete reboot of a single phone associated with a Cisco CallManager Express
router, use the reset command in ephone configuration mode.
3-148
Cisco Networking Academy Program: IP Telephony v1.0
Copyright © 2005, Cisco Systems, Inc.
Router Configuration: Two Commands
(Cont.)
CMERouter(config-telephony-service)#
restart
restart {all
{all [time-interval]
[time-interval] || mac-address}
mac-address}
• Sets the date format for IP phone displays
CMERouter(config-ephone)#
restart
restart
• Restarts the ephone
IP Telephony
© 2005 Cisco Systems, Inc. All rights reserved.
Cisco Public
140
This command causes the system to perform a fast phone reset in which only the button
template, lines, and speed-dial numbers are updated on the phone. For updates related to phone
firmware, user locale, network locale, or URL parameters, use the reset command.
Use the restart command to reboot IP phones after quick changes to buttons, lines, and speeddial numbers. This command is much faster than the reset command because the phone does
not access the DHCP or TFTP server.
To restart a single phone, use the restart command with the mac-address argument or use the
restart command in ephone configuration mode.
Copyright © 2005, Cisco Systems, Inc.
Configuring Cisco CME > Initial Phone Setup
3-149
Setup Troubleshooting
This topic identifies IP phone setup troubleshooting tips.
Setup Troubleshooting
Troubleshooting setup overview
• Verify that a correct IP address and scope options
are received on the IP phone
• Verify the correct files are in flash
• Debug the tftp server
• Verify phone firmware install
• Verify locale is correct
• Verify phone setup
• Review configuration
IP Telephony
© 2005 Cisco Systems, Inc. All rights reserved.
Cisco Public
141
When using the automated setup if problems are encountered there are a many places to check,
some of the more useful places and tools to use include:
3-150
Verify IP addressing - checking the configuration on the IP phone through the “Settings”
button
Verify the files in flash – Check and verify that the correct firmware files are present in
flash
Debug the TFTP server – Make sure the firmware and xml files are being served correctly
Verify the phone firmware install – Use the debug ephone register command to verify
which firmware is being installed.
Verify locale is correct - Use the telephony-service tftp-bindings command to view the
files being served up by the tftp server
Verify phone setup – Use the show ephone command to view the status of ephone and
whether they are registered correctly
Review the configuration - Use the show running-config command to verify the ephonedn configuration
Cisco Networking Academy Program: IP Telephony v1.0
Copyright © 2005, Cisco Systems, Inc.
Verifying Cisco CallManager Express Phone
Configuration
This topic identifies the steps to verify the Cisco CME configuration.
Verifying Cisco CallManager Express
Phone Configuration
Verify ephone-dn Configurations
show running-config
telephony-service
load 7910 P00403020214
load 7960-7940 P00303020214
max-ephones 10
max-dn 10
ip source-address 10.90.0.1 port 2000
auto assign 1 to 10
create cnf-files dialplan-pattern 1 2015559... extension-length 4 extension-pattern 1...
voicemail 9999
max-conferences 8
!
ephone-dn
1
dual-line
number 9000
!
ephone 1
mac-address 000F.2470.F8F8
button 1:1
IP Telephony
© 2005 Cisco Systems, Inc. All rights reserved.
Cisco Public
142
To verify the configuration the command show running-config may be used. The primary area
of interest for Cisco CME functionality will be the telephony-service section, the tftp
configuration, the ephones, and the ephone-dns.
Copyright © 2005, Cisco Systems, Inc.
Configuring Cisco CME > Initial Phone Setup
3-151
Setup Tips (Cont.): Debug tftp events
command
Debug tftp events command
CMERouter#debug tftp events
Mar 2 19:32:59.333: TFTP: Looking for OS79XX.TXT
Mar
Mar
2 19:32:59.337: TFTP: Looking for SEP000F2470F8F8.cnf.xml
2 19:32:59.681: TFTP: Opened system:/its/XMLDefault7960.cnf.xml, fd 0, size 784 for
process 131
Mar
2 19:32:59.685: TFTP: Finished system:/its/XMLDefault7960.cnf.xml, time 00:00:00 for
process 131
Mar 2 19:33:02.713: TFTP: Looking for SEP000F2470F8F8.cnf.xml
Mar
2 19:33:02.713: TFTP: Opened system:/its/XMLDefault7960.cnf.xml, fd 0, size 784 for
process 131
Mar 2 19:33:02.745: TFTP: Finished system:/its/XMLDefault7960.cnf.xml, time 00:00:00 for
process 131
• Can verify if the SEP file for the phone is found
• Can verify the downloading of the correct firmware
IP Telephony
© 2005 Cisco Systems, Inc. All rights reserved.
Cisco Public
143
The debugging command debug tftp events allows the administrator to view output regarding
files that are served up by the tftp server. Cisco CME specific files include firmware if version
are out of date or different than the supported versions, XML files for configured IP phones,
XML files for new IP phones, and locale files.
If the firmware ends with a .bin extension then the file is unsigned. The .sbin firmware files are
signed and if used the IP phone will permanently require signed load and can no longer use
unsigned firmware loads.
3-152
Cisco Networking Academy Program: IP Telephony v1.0
Copyright © 2005, Cisco Systems, Inc.
Verifying Cisco CallManager Express
Phone Configuration (Cont.)
Verify Phone Firmware Installation
debug ephone register
Mar 2 15:16:57.582: New Skinny socket accepted [1] (2 active)
Mar 2 15:16:57.582: sin_family 2, sin_port 49692, in_addr 10.90.0.11
Mar 2 15:16:57.582: skinny_add_socket 1 10.90.0.11 49692
Mar 2 15:16:57.766: %IPPHONE-6-REG_ALARM: 20: Name=SEP000F2470F8F8 Load=3.2(2.14) Last=Phone-Keypad
Mar 2 15:16:57.766: Skinny StationAlarmMessage on socket [1] 10.90.0.11 SEP000F2470F8F8
Mar 2 15:16:57.766: severityInformational p1=2368 [0x940] p2=184551946 [0xB000A0A]
Mar 2 15:16:57.766: 20: Name=SEP000F2470F8F8 Load=3.2(2.14) Last=Phone-Keypad
Mar 2 15:16:57.766: ephone-(1)[1] StationRegisterMessage (1/2/2) from 10.90.0.11
Mar 2 15:16:57.766: ephone-(1)[1] Register StationIdentifier DeviceName SEP000F2470F8F8
Mar 2 15:16:57.766: ephone-(1)[1] StationIdentifier Instance 1 deviceType 7
Mar 2 15:16:57.766: ephone-1[-1]:stationIpAddr 10.90.0.11
Mar 2 15:16:57.766: ephone-1[1]:phone SEP000F2470F8F8 re-associate OK on socket [1]
Mar 2 15:16:57.766: %IPPHONE-6-REGISTER: ephone-1:SEP000F2470F8F8 IP:10.90.0.11 has registered.
Mar 2 15:16:57.766: Phone 0 socket 1
Mar 2 15:16:57.766: Skinny Local IP address = 10.95.0.1 on port 2000
...
Mar 2 15:16:57.766: Skinny Phone IP address = 10.90.0.11 49692
Mar 2 15:16:57.766: ephone-1[1]:Date Format M/D/Y
Mar 2 15:16:57.766: ephone-1[1][SEP000F2470F8F8]:RegisterAck sent to ephone 1: keepalive period 30
IP Telephony
© 2005 Cisco Systems, Inc. All rights reserved.
Cisco Public
144
Verify the correct phone firmware installation by setting registration debugging with the debug
ephone register command. Then, reset the phones and look at the StationAlarmMessage
displayed during phone re-registration. The Load= parameter should appear in the display,
followed by an abbreviated version name corresponding to the correct phone firmware file
name.
Copyright © 2005, Cisco Systems, Inc.
Configuring Cisco CME > Initial Phone Setup
3-153
Verifying Cisco CallManager Express
Phone Configuration (Cont.)
Verify Locale-Specific Files
CMERouter1#show telephony-service tftp-bindings
tftp-server system:/its/SEPDEFAULT.cnf
tftp-server system:/its/SEPDEFAULT.cnf alias SEPDefault.cnf
tftp-server system:/its/XMLDefault.cnf.xml alias XMLDefault.cnf.xml
tftp-server system:/its/ATADefault.cnf.xml
tftp-server system:/its/united_states/7960-tones.xml alias United_States/7960-tones.xml
tftp-server system:/its/united_states/7960-font.xml alias English_United_States/7960-font.xml
tftp-server system:/its/united_states/7960-dictionary.xml alias English_United_States/7960dictionary.xml
tftp-server system:/its/united_states/7960-kate.xml alias English_United_States/7960-kate.xml
tftp-server system:/its/united_states/SCCP-dictionary.xml alias English_United_States/SCCPdictionary.xml
tftp-server system:/its/XMLDefault7960.cnf.xml alias SEP000F2470F8F8.cnf.xml
tftp-server system:/its/XMLDefault7960.cnf.xml alias SEP000F23FC9CF0.cnf.xml
IP Telephony
Cisco Public
© 2005 Cisco Systems, Inc. All rights reserved.
145
Use the show telephony-service tftp-bindings command to ensure that the locale-specific files
are correct.
Verifying Cisco CallManager Express
Phone Configuration (Cont.)
Verify Cisco IP Phone Setup
CMERouter1#show ephone
ephone-1 Mac:000F.2470.F8F8 TCP socket:[1] activeLine:0 REGISTERED
mediaActive:0 offhook:0 ringing:0 reset:0 reset_sent:0 paging 0 debug:1
IP:10.10.0.11 49692 Telecaster 7960
button 1: dn 1
number 1000 CH1
keepalive 29 max_line 6
IDLE
CH2
IDLE
ephone-2 Mac:000F.23FC.9CF0 TCP socket:[2] activeLine:0 REGISTERED
mediaActive:0 offhook:0 ringing:0 reset:0 reset_sent:0 paging 0 debug:1
IP:10.10.0.13 52633 Telecaster 7960
button 1: dn 2
IP Telephony
number 1001 CH1
keepalive 135 max_line 6
IDLE
© 2005 Cisco Systems, Inc. All rights reserved.
CH2
IDLE
Cisco Public
146
Enter the show ephone command to verify Cisco IP phone setup after phones have registered
with the Cisco CME router.
3-154
Cisco Networking Academy Program: IP Telephony v1.0
Copyright © 2005, Cisco Systems, Inc.


