In the Art Room: Tree Weaving with 6th Grade
advertisement
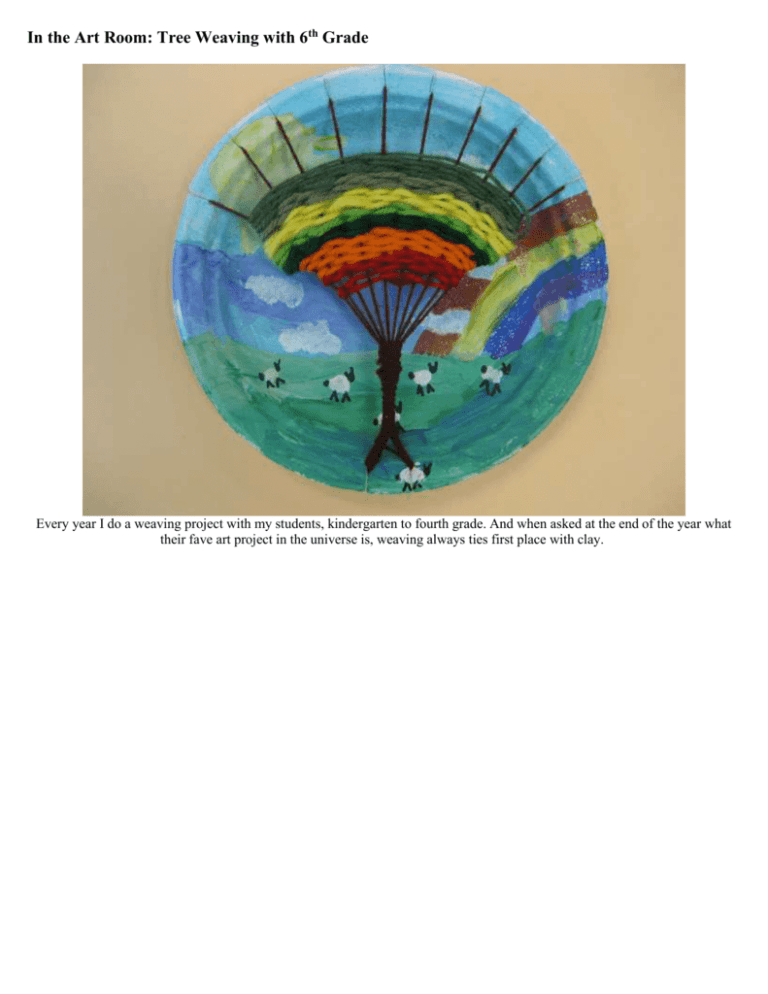
In the Art Room: Tree Weaving with 6th Grade Every year I do a weaving project with my students, kindergarten to fourth grade. And when asked at the end of the year what their fave art project in the universe is, weaving always ties first place with clay. And who can blame them? Digging ones hands deep into clay or entangled in a bundle of yarn is just about the best feeling ever, says the art teacher. However, I've grown a little tired of the usual weaving project my third grade students create. So when I saw these amazing tree weavings on pinterest, I was inspired to have my students create one of their own. Stunning, right? And if you know Russian (at least that's what I think it is) then you'll totally understand the directions. I'd click the "translate" button but I guess you gotta know the Russian word for that to make it happen. All kidding aside, the website does an excellent job of demonstrating the process. For headache-free purposes, I decided to forgo the bent twig option and have the students craft their loom from a Chinet plate. This weaving lesson was also apart of our study of the United Kingdom. We studied many landscape photographs and paintings of the countryside of such places as Northern Ireland and Scotland. Our first day was spent painting a sky on our plate. If you recall, these kids have plenty of experience with sky painting as they are the ones who created these German Gnome Landscapes. The following art class, we chatted about how to create a fore-, middle- and background in our landscapes. Students were encouraged to mix three different values of green to create a sense of depth. From there, they were given the option to enhance their landscape with what they'd imagine a countryside in the United Kingdom to look like. As you can see, we were feeling mighty sheepish. Once our landscapes were complete, we were ready to begin the process of creating and warping our loom. By placing a Tree Weaving Template over their plate, students could draw the correct number of notches on the top (10) and the bottom (2). These notches were cut to the inner edge of the plate. With notches cut, the students met me on the floor with their plates and about a yard and 1/2 of pre-cut yarn. Our first step was to wedge the yarn into the bottom left hand notch as seen above. With the long end of the yarn, we put the yarn into the far left top notch, out the notch beside it, into the bottom left, out the bottom right and back up to the top. This process was repeated until all top notches were filled in. We ended by going in the bottom left notch, coming out the right. At this point, we were ready to create our tree trunk. Which is super easy. With the end of the yarn, begin wrapping it around the yarn at the bottom, tugging gently as you go. If you run out of yarn, simply double knot a new piece to the old. Once your trunk is tall enough, tie it off to a tree branch. Some bare trees ready for weaving. To begin, we double knot tied our chosen color to one of the tree branches on the end. From there, we began the process of weaving over and under. One thing the students struggled with was weaving loose enough. You see, they wanted to pull tightly which caused the weaving to slide down the branches and pull the warping threads inward. However, once they got the hang of it, it was smooth sailing. When we first began this lesson, we chatted about wool and where it came from. I passed around some natural wool roving, some cream colored some brown. We chatted about how different colors of wool come from different color sheep. I guess that inspired the sheep in this landscape. New colors were added with a double knot tie. Weavings were ended with a double knot tie off as well. So that we could hang these for our upcoming art show, students tied a piece of yarn to the backside of the plates. And that's it. Honestly, the warping/weaving portion took no time at all. And I foresee so many variations of this project in the future: a woven peacock, a turkey...okay, that's all I've come up with. But I'm sure to think of some more (your input would be greatly appreciated and promptly stolen as an idea of my own!). I do hope my explanations helped and that you're encouraged to try this lesson with your students. If you're still not gettin' it, just translate it into Russian and it'll all become crystal clear. And if you'd like some more weaving projects, you can check here. Chat with you soon!
