Pipetting Techniques: Serological, Mohr & Micropipettes
advertisement
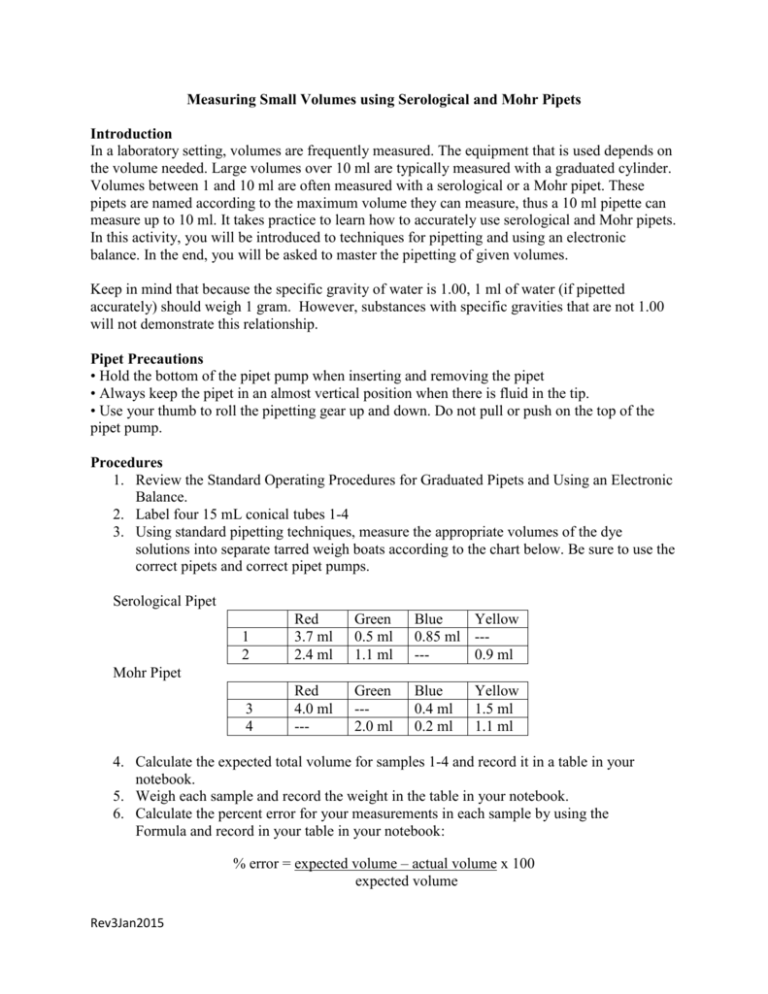
Measuring Small Volumes using Serological and Mohr Pipets Introduction In a laboratory setting, volumes are frequently measured. The equipment that is used depends on the volume needed. Large volumes over 10 ml are typically measured with a graduated cylinder. Volumes between 1 and 10 ml are often measured with a serological or a Mohr pipet. These pipets are named according to the maximum volume they can measure, thus a 10 ml pipette can measure up to 10 ml. It takes practice to learn how to accurately use serological and Mohr pipets. In this activity, you will be introduced to techniques for pipetting and using an electronic balance. In the end, you will be asked to master the pipetting of given volumes. Keep in mind that because the specific gravity of water is 1.00, 1 ml of water (if pipetted accurately) should weigh 1 gram. However, substances with specific gravities that are not 1.00 will not demonstrate this relationship. Pipet Precautions • Hold the bottom of the pipet pump when inserting and removing the pipet • Always keep the pipet in an almost vertical position when there is fluid in the tip. • Use your thumb to roll the pipetting gear up and down. Do not pull or push on the top of the pipet pump. Procedures 1. Review the Standard Operating Procedures for Graduated Pipets and Using an Electronic Balance. 2. Label four 15 mL conical tubes 1-4 3. Using standard pipetting techniques, measure the appropriate volumes of the dye solutions into separate tarred weigh boats according to the chart below. Be sure to use the correct pipets and correct pipet pumps. Serological Pipet 1 2 Red 3.7 ml 2.4 ml Green 0.5 ml 1.1 ml Blue Yellow 0.85 ml ----0.9 ml 3 4 Red 4.0 ml --- Green --2.0 ml Blue 0.4 ml 0.2 ml Mohr Pipet Yellow 1.5 ml 1.1 ml 4. Calculate the expected total volume for samples 1-4 and record it in a table in your notebook. 5. Weigh each sample and record the weight in the table in your notebook. 6. Calculate the percent error for your measurements in each sample by using the Formula and record in your table in your notebook: % error = expected volume – actual volume x 100 expected volume Rev3Jan2015 Measuring Very Small Volumes with a Micropipette Introduction Biology and chemistry labs often work at the micro-scale. The prefix micro means 10-6. Therefore, a microliter (μl) is one-millionth of a liter or 1/1000 of a milliliter. To measure this small of a volume, a micropipette is needed. Micropipettes are named by their maximum capacity so a P40 measures from 5-40μl, a P200 measures from 20-200 μl, and a P1000 measures from 200-1000 μl. Micropipetting Precautions • Do not attempt to set a volume beyond the pipette's minimum or maximum values. This will damage the micrometer gears! • When using a micropipette, first apply a tip. Forgetting to do this would ruin the precision piston that measures fluid volume. • Always keep the micropipette in a vertical position when liquid is in the tip • Use your thumb to slowly and smoothly operate the button plunger when aspirating and dispensing liquids Procedures 1. Review the Standard Operating Procedures for Micropipetting and Using an Electronic Balance. 2. Using standard pipetting techniques, measure the appropriate volumes of the dye solutions into separate tarred weigh boats according to the chart below. Be sure to use the correct pipettes and correct pipette tips. A B C Red 240 ul --440 ul Blue --350 ul 120 ul Yellow 40 ul 630 ul --- Water 160 ul 20 ul 60 ul 3. Calculate the expected total volume in samples A-C and record it in a table in your notebook. 4. Weigh each sample and record the weight in the table in your notebook. 5. Calculate the percent error for your measurements in each sample by using the following formula and record it in the table in your notebook: % error = expected volume – actual volume x 100 expected volume Conclusions In your conclusion, explain your results and suggest reasons for your errors. List ways to improve your pipetting proficiency. Rev3Jan2015
