LabVIEW Graphs, Charts, Arrays Homework
advertisement
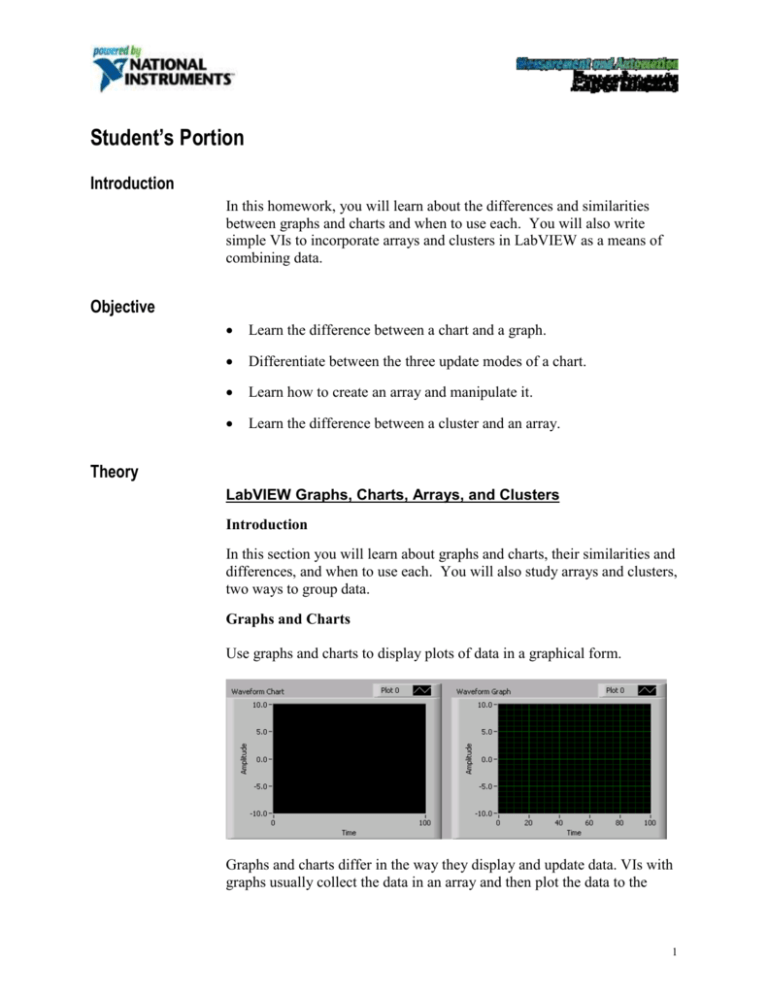
Student’s Portion Introduction In this homework, you will learn about the differences and similarities between graphs and charts and when to use each. You will also write simple VIs to incorporate arrays and clusters in LabVIEW as a means of combining data. Objective Learn the difference between a chart and a graph. Differentiate between the three update modes of a chart. Learn how to create an array and manipulate it. Learn the difference between a cluster and an array. Theory LabVIEW Graphs, Charts, Arrays, and Clusters Introduction In this section you will learn about graphs and charts, their similarities and differences, and when to use each. You will also study arrays and clusters, two ways to group data. Graphs and Charts Use graphs and charts to display plots of data in a graphical form. Graphs and charts differ in the way they display and update data. VIs with graphs usually collect the data in an array and then plot the data to the 1 graph, which is similar to a spreadsheet that first stores the data then generates a plot of it. In contrast, a chart appends new data points to those already in the display. On a chart, you can see the current reading or measurement in context with data previously acquired. The graphs and charts located on the Controls»Graph palette include the following types: • Waveform Chart and Graph—Displays data acquired at a constant rate. • XY Graph—Displays data acquired at a non-constant rate, such as data acquired when a trigger occurs. • Intensity Chart and Graph—Displays 3D data on a 2D plot by using color to display the values of the third dimension. • Digital Waveform Graph—Displays data as pulses or groups of digital lines. Computers transfer digital data to other computers in pulses. • (Windows) 3D Graphs—Displays 3D data on a 3D plot in an ActiveX object on the front panel. You customize the appearance of graphs and charts by showing or hiding options. Right-click the graph or chart and select Visible Items from the shortcut menu to display or hide the following options: • Plot Legend—Defines the color and style of the plot(s). Resize the legend to display multiple plots. • Scale Legend—Defines labels for scales and configures scale properties. • Graph Palette—Changes scaling and formatting while a VI is running. • X Scale and Y Scale—Formats the x- and y-scales. • Cursor Legend (graph only)—Displays a marker at a defined point coordinate. You can display multiple cursors on a graph. • Scrollbar (chart only)—Scrolls through the data in the chart. Use the scroll bar to view data that the buffer does not currently display. 2 Arrays Arrays group data elements of the same type. An array consists of elements and dimensions. Elements are the data that make up the array. A dimension is the length, height, or depth of an array. An array can have one or more dimensions and as many as 231 – 1 elements per dimension, memory permitting. You can build arrays of numeric, Boolean, path, string, waveform, and cluster data types. Consider using arrays when you work with a collection of similar data and when you perform repetitive computations. Arrays are ideal for storing data you collect from waveforms or data generated in loops, where each iteration of a loop produces one element of the array. You cannot create arrays of arrays. However, you can use a multidimensional array or create an array of clusters where each cluster contains one or more arrays. Indexes To locate a particular element in an array requires one index per dimension. In LabVIEW, indexes let you navigate through an array and retrieve elements, rows, columns, and pages from an array on the block diagram. Examples of Arrays An example of a simple array is a text array that lists the nine planets of our solar system. LabVIEW represents this as a 1D array of strings with nine elements. Array elements are ordered. An array uses an index so you can readily access any particular element. The index is zero-based, which means it is in the range 0 to n – 1, where n is the number of elements in the array. For example, n = 9 for the nine planets, so the index ranges from 0 to 8. Earth is the third planet, so it has an index of 2. Another example of an array is a waveform represented as a numeric array in which each successive element is the voltage value at successive time intervals. 3 A more complex example of an array is a graph represented as an array of points where each point is a cluster containing a pair of numerics that represent the X and Y coordinates. The previous examples use 1D arrays. A 2D array stores elements in a grid. It requires a column index and a row index to locate an element, both of which are zero-based. For example, a chessboard has eight columns and eight rows for a total of 64 positions. Each position can be empty or have one chess piece. You can represent a chessboard as a 2D array of strings. Each string is the name of the piece that occupies the corresponding location on the board, or an empty string if the location is empty. Restrictions for Arrays You can create an array of almost any data type, with the following exceptions: • You cannot create an array of arrays. However, you can use a multidimensional array or use the Build Cluster Array function to create an array of clusters where each cluster contains one or more arrays. • You cannot create an array of non-XY graphs because a graph is an array data type and an array cannot contain another array. However, you can have an array of non-XY graphs if the graph is in a cluster. • You cannot create an array of charts. Creating Array Controls, Indicators, and Constants Create an array control or indicator on the front panel by placing an array shell on the front panel and dragging a data object or element, which can be a numeric, Boolean, string, path, refnum, or cluster control or indicator, into the array shell. The array shell automatically resizes to accommodate the new object, whether a small Boolean control or a large 3D graph. To display a particular element on the front panel, either type the index number in the index display or use the arrows on the index display to navigate to that number. To create an array constant on the block diagram, select Functions»Array»Array Constant to place the array shell on the 4 front panel, then place a string constant, numeric constant, or cluster constant in the array shell. You can use an array constant as a basis for comparison with another array. Array Index Display A 2D array contains rows and columns. The upper display of the two boxes on the left is the row index and the lower display is the column index. The combined display to the right of the row and column displays shows the value at the specified position. Rows and columns are zero-based, meaning the first column is column 0, the second column is column 1, and so on. Changing the index display for the following array to row 1, column 2 displays a value of 6. If you try to display a column or row that is out of the range of the array dimensions, the array control is dimmed to indicate that there is no value defined, and LabVIEW displays the default value of the data type. The default value of the data type depends on the data type of the array. Use the Positioning tool to show more than one row or column at a time. Array Functions 5 Use the Array functions located on the Functions»Array palette to create and manipulate arrays, such as the following tasks: • Extract individual data elements from an array. • Insert, delete, or replace data elements in an array. • Split arrays. Automatically Resizing Array Functions The Index Array, Replace Array Subset, Insert Into Array, Delete From Array, and Array Subset functions automatically resize to match the dimensions of the input array you wire. For example, if you wire a 1D array to one of these functions, the function shows a single index input. If you wire a 2D array to the same function, it shows two index inputs—one for the row and one for the column. You can access more than one element, or subarray (row, column, or page) with these functions by using the Positioning tool to manually resize the function. When you expand one of these functions, the functions expand in increments determined by the dimensions of the array wired to the function. If you wire a 1D array to one of these functions, the function expands by a single index input. If you wire a 2D array to the same function, the function expands by two index inputs—one for the row and one for the column. The index inputs you wire determine the shape of the subarray you want to access or modify. For example, if the input to an Index Array function is a 2D array and you wire only the row input, you extract a complete 1D row of the array. If you wire only the column input, you extract a complete 1D column of the array. If you wire the row input and the column input, you extract a single element of the array. Each input group is independent and can access any portion of any dimension of the array. To access multiple consecutive values in an array, expand the Index Array function, but do not wire values to the index inputs in each increment. For example, to retrieve the first, second, and third rows from a 2D array, expand the Index Array function by three increments and wire 1D array indicators to each sub-array output. 6 Clusters Clusters group data elements of mixed types, such as a bundle of wires, as in a telephone cable, where each wire in the cable represents a different element of the cluster. A cluster is similar to a record or a struct in textbased programming languages. Bundling several data elements into clusters eliminates wire clutter on the block diagram and reduces the number of connector pane terminals that subVIs need. The connector pane has, at most, 28 terminals. If your front panel contains more than 28 controls and indicators that you want to use programmatically, group some of them into a cluster and assign the cluster to a terminal on the connector pane. Although cluster and array elements are both ordered, you must unbundle all cluster elements at once rather than index one element at a time. You also can use the Unbundle By Name function to access specific cluster elements. Clusters also differ from arrays in that they are a fixed size. Like an array, a cluster is either a control or an indicator. A cluster cannot contain a mixture of controls and indicators. Most clusters on the block diagram have a pink wire pattern and data type icon. Clusters of numerics, sometimes referred to as points, have a brown wire pattern and data type icon. You can wire brown numeric clusters to Numeric functions, such as Add or Square Root, to perform the same operation simultaneously on all elements of the cluster. Cluster elements have a logical order unrelated to their position in the shell. The first object you place in the cluster is element 0, the second is element 1, and so on. If you delete an element, the order adjusts automatically. The cluster order determines the order in which the elements appear as terminals on the Bundle and Unbundle functions on the block diagram. You can view and modify the cluster order by rightclicking the cluster border and selecting Reorder Controls In Cluster from the shortcut menu. 7 To wire clusters, both clusters must have the same number of elements. Corresponding elements, determined by the cluster order, must have compatible data types. For example, if a double-precision floating-point numeric in one cluster corresponds in cluster order to a string in the other cluster, the wire on the block diagram appears broken and the VI does not run. If numerics of different representations, LabVIEW coerces them to the same representation. Use the Cluster functions located on the Functions»Cluster palette to create and manipulate clusters, such as the following tasks: • Extract individual data elements from a cluster. • Add individual data elements to a cluster. • Break a cluster out into its individual data elements. 8 Homework Procedure Part 1. Temperature Monitor VI Complete the following steps to build a VI that uses a While Loop and a waveform chart to acquire and display data. 1. Open a new VI. 2. Build the following front panel. a. Select the vertical toggle switch on the Controls»Boolean palette and place it on the front panel. You will use the switch to stop the acquisition. b. Type Power inside the label and click outside the label or click the Enter button on the toolbar. c. Select a waveform chart on the Controls»Graph palette and place it on the front panel. The waveform chart will display the temperature in real time. d. Type Temperature History inside the label and click outside the label or click the Enter button. e. The waveform chart legend labels the plot Plot 0. Use the Labeling tool to triple-click Plot 0 in the chart legend, type 9 Temp, and click outside the label or click the Enter button to relabel the legend. f. The temperature sensor measures room temperature. Use the Labeling tool to double-click 10.0 in the y-axis, type 90, and click outside the label or click the Enter button to rescale the chart. g. Change –10.0 in the y-axis to 70. h. Label the y-axis Temp (Deg F) and the x-axis Time (sec). 3. Select Window»Show Diagram to display the block diagram. 4. Enclose the two terminals in a While Loop, as shown in the following block diagram. a. Select the While Loop on the Functions»Structures palette. b. Click and drag a selection rectangle around the two terminals. c. Use the Positioning tool to resize the loop, if necessary. 5. Select Functions»Tutorial»Digital Thermometer.vi. This VI returns simulated temperature measurements. 10 6. Wire the block diagram objects as shown in the previous block diagram. 7. Save the VI as Temperature Monitor.vi. 8. Display the front panel by clicking it or by selecting Window» Show Panel. 9. Use the Operating tool to click the vertical toggle switch and turn it to the ON position. 10. Run the VI. The section of the block diagram within the While Loop border, or subdiagram, executes until the specified condition is TRUE. For example, while the switch is on (TRUE), the Thermometer VI takes and returns a new measurement and displays it on the waveform chart. 11. Click the vertical toggle switch to stop the acquisition. The condition is FALSE, and the loop stops executing. 12. Format and customize the X and Y scales of the waveform chart. a. Right-click the chart and select Y Scale»Formatting from the shortcut menu. A dialog box appears. b. Click the Scale Style icon and select different styles for the yaxis. You also can select different mapping modes, grid options, scaling factors, and formats and precisions. 11 c. Select the options shown in the previous dialog box and click the OK button. 13. Right-click the waveform chart and select Data Operations»Clear Chart from the shortcut menu to clear the display buffer and reset the waveform chart. If the VI is running, you can select Clear Chart from the shortcut menu. 14. Modify the vertical toggle switch so temperature is plotted on the graph each time you run the VI. a. Stop the VI if it is running. b. Use the Operating tool to click the vertical toggle switch and turn it to the ON position. c. Right-click the switch and select Data Operations»Make Current Value Default from the shortcut menu. This sets the ON position as the default value. d. Right-click the switch and select Mechanical Action»Latch When Pressed from the shortcut menu. 15. Run the VI. 16. Use the Operating tool to click the vertical switch to stop the acquisition. The switch changes to the OFF position and changes back to ON after the conditional terminal reads the value. When this VI runs, the While Loop executes as quickly as possible. Complete the following steps to take data at certain intervals, such as once every half-second, as shown in the following block diagram. 12 a. Place the Wait Until Next ms Multiple function located on the Functions»Time & Dialog palette. This function makes sure that each iteration occurs every half-second (500 ms). b. Right-click the millisecond multiple input of the Wait Until Next ms Multiple function, select Create»Constant from the shortcut menu, type 500, and press the <Enter> key. The numeric constant specifies a wait of 500 ms so the loop executes once every half-second. c. On the front panel, right-click the chart and select X Scale»Formatting from the shortcut menu. Change the X value to 0.5 because you added a 500 ms wait between loop iterations. 17. Save the VI. 18. Run the VI. 19. Try different values for the numeric constant and run the VI again. 20. Close the VI. 13 Part 2. Temperature Analysis VI In Part 2, you will use charts, graphs, arrays, and clusters to build a VI that measures temperature every 0.25 s for 10 s. During the acquisition, the VI displays the measurements in real time on a waveform chart. After the acquisition is complete, the VI plots the data on a graph and calculates the minimum, maximum, and average temperatures. The VI displays the best fit of the temperature graph. 1. Open a new VI and build the following front panel using the following tips. • Set the point style of the waveform chart plot to a small x. • Hide the plot legend of the waveform chart. • Right-click the waveform chart, select X Scale»Formatting from the shortcut menu, and change .X to 0.25 and Digits of Precision to 2. • Use the Positioning tool to resize the plot legend of the waveform graph. • Use the Labeling tool to rename Plot 0 to Temp and Plot 1 to Fitted. • Set the point style of the waveform graph Temp plot to a small square. 14 • Do not create the Mean, Max, and Min indicators yet. 2. Build the following block diagram. a. Select Functions»Tutorial»Digital Thermometer.vi. This VI returns simulated temperature measurements. b. Place the Wait Until Next ms Multiple function located on the Functions»Time & Dialog palette and create a constant of 250. This function causes the For Loop to execute every 0.25 s (250 ms). c. Place the Array Max & Min function located on the Functions»Array palette. This function returns the maximum and minimum temperature. d. Place the Mean VI located on the Functions»Mathematics»Probability and Statistics palette. This VI returns the average of the temperature measurements. e. Right-click the output terminals of the Array Max & Min function and Mean VI and select Create»Indicator from the shortcut menu to create the Max, Min, and Mean indicators. 15 f. Place the General Polynomial Fit VI located on the Functions»Mathematics»Curve Fitting palette. This VI returns an array that is a polynomial fit to the temperature array. g. Place the Bundle function located on the Functions»Cluster palette. Press the <Ctrl> key while you drag the function to copy it. This function assembles the plot elements into a single cluster. The elements include the initial x value (0), the .x value (0.25), and the y array of temperature data. The .x value of 0.25 is required so that the VI plots the temperature array points every 0.25 s on the waveform graph. h. Place the Build Array function located on the Functions»Array palette. This function creates an array of clusters from the temperature cluster and the best fit cluster. 3. Save the VI as Temperature Analysis.vi. 4. Display the front panel and run the VI. The graph displays both the temperature data and best fit curve of the temperature waveform. 5. Try different values for the polynomial order constant on the block diagram and run the VI again. 6. Change the appearance of plots by modifying the plot styles and fill styles. a. Right-click the Temp plot display in the plot legend and select Common Plots»Scatter Plot from the shortcut menu, the top middle option. b. Right-click the Fitted plot display in the plot legend, select Bar Plots from the shortcut menu, and select the second option in the middle row. 7. Save and close the VI. 16 Part 3. Find Mid Value VI In Part 3, you will apply your knowledge of arrays to write a VI to implement various array functions. Build a VI that first accumulates an array of temperature values using the Digital Thermometer VI. Incorporate these items: Set the array size with a control on the front panel. Initialize an array using the Initialize Array function of the same size where all the values are equal to 10. Add the two arrays, calculate the size of the final array, and extract the middle value from the final array. Display the Temperature Array, Initialized Array, Final Array, and Mid Value. Save the VI as Find Mid Value.vi. 17
