Kelvinox 400 Dilution Refrigerator
advertisement
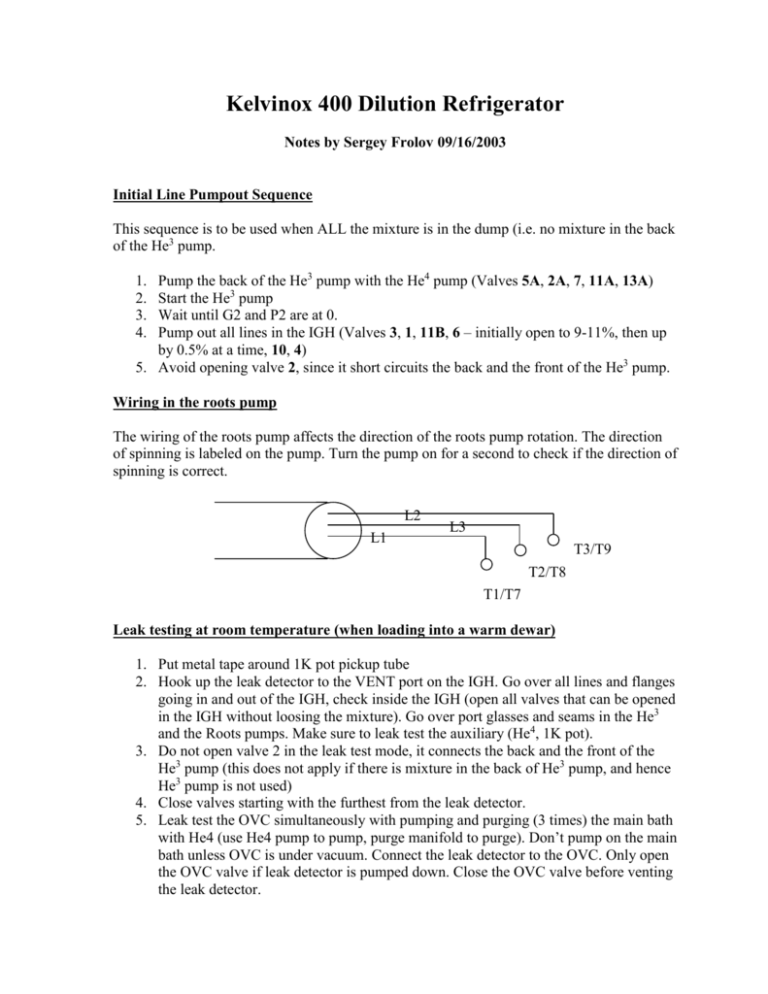
Kelvinox 400 Dilution Refrigerator Notes by Sergey Frolov 09/16/2003 Initial Line Pumpout Sequence This sequence is to be used when ALL the mixture is in the dump (i.e. no mixture in the back of the He3 pump. Pump the back of the He3 pump with the He4 pump (Valves 5A, 2A, 7, 11A, 13A) Start the He3 pump Wait until G2 and P2 are at 0. Pump out all lines in the IGH (Valves 3, 1, 11B, 6 – initially open to 9-11%, then up by 0.5% at a time, 10, 4) 5. Avoid opening valve 2, since it short circuits the back and the front of the He3 pump. 1. 2. 3. 4. Wiring in the roots pump The wiring of the roots pump affects the direction of the roots pump rotation. The direction of spinning is labeled on the pump. Turn the pump on for a second to check if the direction of spinning is correct. L2 L1 L3 T3/T9 T2/T8 T1/T7 Leak testing at room temperature (when loading into a warm dewar) 1. Put metal tape around 1K pot pickup tube 2. Hook up the leak detector to the VENT port on the IGH. Go over all lines and flanges going in and out of the IGH, check inside the IGH (open all valves that can be opened in the IGH without loosing the mixture). Go over port glasses and seams in the He3 and the Roots pumps. Make sure to leak test the auxiliary (He4, 1K pot). 3. Do not open valve 2 in the leak test mode, it connects the back and the front of the He3 pump (this does not apply if there is mixture in the back of He3 pump, and hence He3 pump is not used) 4. Close valves starting with the furthest from the leak detector. 5. Leak test the OVC simultaneously with pumping and purging (3 times) the main bath with He4 (use He4 pump to pump, purge manifold to purge). Don’t pump on the main bath unless OVC is under vacuum. Connect the leak detector to the OVC. Only open the OVC valve if leak detector is pumped down. Close the OVC valve before venting the leak detector. 6. When pumping and purging leave the 1K pot valve on the dewar closed, since 1K pot was pumped out while leak testing the auxiliary. 7. With He4 in the main bath, leak test the IVC. Hook up the leak detector to the IVC. IVC can also be leak tested before loading into the dewar. 1K pot throughput test (cold and warm) 0. 1. 2. 3. 4. 5. 6. 7. The leak detector is on the IVC. The main bath is full of He4. Pump out the 1K pot line: close 1A, open 4A, wait till the line pumps out. Open the 1K pot valve on the insert. Close 4A, open the N/V to 50% (When cold (77K): N/V may stick - stainless needle going into the brass fitting, tweak the brass fitting in that case) Keep an eye on the leak detector, since at the same time you are leak testing the 1K pot to the IVC. Leave the leak detector sound on. The He4 gas starts going into the 1K pot from the main bath. When the N/V is open to 50%, start timing the increase on G3: Cold: 80mbar/15 sec Warm: 60 mbar/min Close the N/V before 1K pot reached the atmosphere. The pressure on G3 should stop rising - this checks if the N/V is fully closed. Evacuate the 1K pot (open 4A), close the 1K pot valve on the insert, close 4A. Throughput test of the dilution unit (cold and warm) 1. Refer to section 4.1.3 in the Manual 2. The leak detector is on the IVC. 3. Connect He4 dewar to the VENT port on the IGH. Put the stick into the dewar, wait for purging 4. Purging the line: Open 2A, 5A, kink the rubber line, open manual valve on the vent, watch P2 Wait till P2 goes to 0. Close 2A, unkink the hose, kink it again Repeat 3 times total Close 2A, 5A 5. Let He4 into the circuit: Open manual valves on the insert (condenser and still) Open valves 7,2,3 Wait for G1 to go to the atmosphere Close 2,3, manual valve on the vent, open 1 Wait for G1 to go down and then start to increase Time the increase. Warm – 27 mbar/min. Cold – 160 mbar/min. 6. Keep an eye on the leak detector 7. Always close the valves on the insert before venting the leak detector 8. Pump out the He4 (if there is no mixture out of the dumps): Open 5A, 2A, 7, 11A, 13A Start He3 pump Open 6 slowly, make sure you are pumping on all spaces, including the dump valves (14…), since some He4 might have gone across the one-way release valves 9. 8 applies only if there is NO MIXTURE outside the dumps. Otherwise use 2,3,7 to pump out He4 with He4 Rotary pump through the VENT port (valves 2A, 5A). Precooling with LN2 1. Put some exchange gas into the IVC with a bladder. 5 cm3 – one bladder neck. Purge the bladder and the IVC valve before opening. 2. Close all the valves on the insert before transferring LN2. 3. Disconnect the He4 recovery line or a check valve that is on the main bath recovery port. 4. Insert the LN2 blow out tube into the siphon port. (Blockage is detected in the cone on the initial run. In case this problem is not solved, take the blowout tube slightly out of the cone.) 5. Transfer LN2, should take about 90-100 liters. Wait until LN2 stops boiling, then put the check valve back on the recovery port to avoid cryopumping junk into the main bath. 6. Let precool overnight (or at least for 5 hours). E.g., on the initial run the sorb thermometer went to 109 K overnight. 7. Blow LN2 back into the dewar. Blank the recovery port, put 3 psi of He4 gas onto the purging manifold. When all LN2 has come out, the blowout tube stops getting moisture accumulation. Purge the dewar with He4 gas for 15 minutes after all the LN2 is out. Leak testing at 77 K When loading the insert into the cold dewar (containing LHe4), it is impossible to do leak testing other than from the outside of the dewar. 1. Remove the exchange gas from the IVC. Pump the IVC with the leak detector while purging LN2 back into the dewar. Wait until He level on the leak detector decreases. 2. Leak check the OVC. Move the leak detector to the OVC. Wait till LN2 is out, start the leak check. 3. Put the safety one-way check valve back on to the exhaust port. (we took it off when we were transferring LN2). 4. Pump the He4 gas out of the main bath with He4 pump (valves 1A, 4A). If the gauge on the manifold gets stuck at 20-25 inches, it means we have LN2 left in the dewar. Purge the dewar with He4 gas after pumping. Repeat pump&purge cycle 3 times. Monitor G3 to make sure it doesn’t get stuck. 5. Move the leak detector to the IVC. Do the 1K pot and the dilution unit throughput tests. LHe4 Transfer 1. Make sure all the valves on the insert are closed, the leak detector disconnected from the system. 2. Put exchange gas into the IVC. 3. There is a special fitting for the siphon port side of the LHe4 transfer line. 4. Make sure you have a positive pressure in the system dewar to avoid cryopumping junk into the main bath. 5. When changing dewars, use the rubber plug to close the siphon side of the transfer line. 6. Start the transfer slowly to avoid excessive boil out. 7. When re-filling the dewar, there is no need to precool the fridge side of the transfer line. 8. If using the check-valve on the main bath exhaust port, make sure to take it off while transferring, especially if He4 starts coming out of it with loud hissing. Reconnect it after LHe4 is transferred. 9. When the transfer is complete, use heat gun to warm up the top plate and the exhaust port. Running the fridge to base temperature 1. 4.2K cooldown. The sequence works fine. Make sure valves on the insert are open and pumps are running. The sequence prompts for that. 2. Let the mixture out of the dump. Open valve 9, slowly open the manual valves on the dump. The pressure on G2 should read 800 mbar. If it reads less, it means we lost some mixture, if it reads more – the mixture is contaminated. 3. Start the Run sequence, sit back and relax. 4. In case of 1K pot overfilling close the N/V. During circulation the N/V is open to approximately 14%. 5. To change cold traps use “change cold traps” sequence. The system remembers which cold trap is in use. 6. Condensing sequence took 65 minutes. 7. Keep either valve 10 or 14 open during circulation to make sure all the mixture is out of the dumps. 8. At Base temperature G1 – 128, G2 – 159. After an overnight run, however, G1 – 265. G2 – 280 9. Refer to manual for cleaning cold traps – explained well 10. The default still power is 7 mW 11. Temperature control – unclick “Turn off all power” before using. Make sure to select it again after done using the temperature control. Single shot technique Normally circulation is started by slowly opening the valve 6. However, on the initial run the sequence wasn’t able to open the valve 6 past 12% (the G2 kept going over 300). The reason was that the top of the still didn’t get cold enough, putting a heat load on the mixture. To check if this is the case in the future, a still plate thermometer can be used. The connector is on the bottom side of the diagnostics box. Another reason could have been the excess exchange gas in the IVC. Normally, single shot (before starting the CIRCULATE sequence) – close 13A, open 9 (section 8.7 manual) State of the system before the single shot: Valve 6 not open past 12.3 % Mixture out of the dump P1 overloaded Automatic sequence running (trying to open V6) Stop the sequence – abort Close 14, close 13A, open 9 Start gradually opening V6 until fully open. P1 will be down by the time V6 is open When G2 reaches ~200-250 mbar, close 9, open 13A. Wait until G1 and G2 equalize While watching G2, open 10. When G2 gets above 300, close 10. Close and open 10 until it stays below 300 mbar. 6. Wait for G2 to go to 120 mbar, start the roots pump, put the power on the still 1. 2. 3. 4. 5. Loading into a cold dewar Blow He4 through the 1K pot (small amount from a bladder) – check with a cap of ISO. Flow He gas through the sliding seal – manual doesn’t mention that. Fill the dewar to about 60% before loading. Do not perform leak checks. To help the cool down, throttle the exhaust line valve a bit, to divert some boil off back to cool the insert. Assorted information 1. When finished running the fridge, clean N2 and He cold traps. Clean N2 cold traps once a week if running the fridge. 2. If there is a blockage in the cold traps, there should be a pressure difference on G1 and G2. Depending on the sign of this difference, blockage can be in the N2 or He cold traps. 3. Cold trap 1 for condensing. Cold trap 2 for running. This is because valve 12 is difficult to handle. 4. When topping the dewar with no insert with LHe, put weight on the baffle stick. 5. Alignment is performed if Indium seals on the dilution unit were remade.

