procedures for the ti-86 graphics calculator (finite mathematics topics)
advertisement
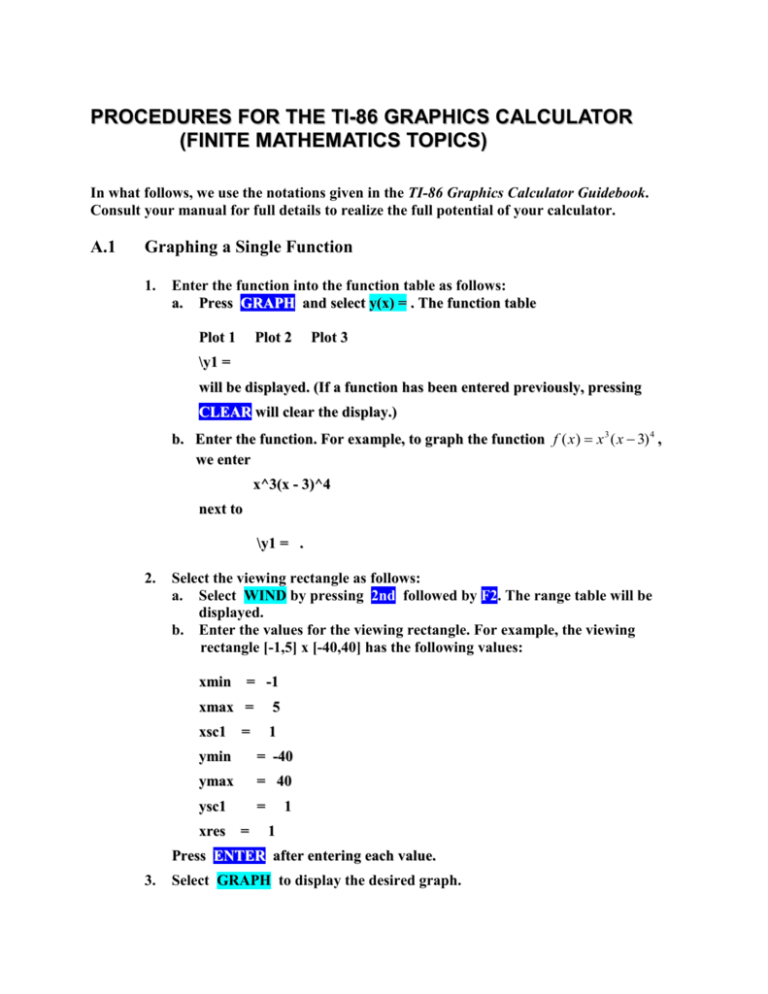
PROCEDURES FOR THE TI-86 GRAPHICS CALCULATOR (FINITE MATHEMATICS TOPICS) In what follows, we use the notations given in the TI-86 Graphics Calculator Guidebook. Consult your manual for full details to realize the full potential of your calculator. A.1 Graphing a Single Function 1. Enter the function into the function table as follows: a. Press GRAPH and select y(x) = . The function table Plot 1 Plot 2 Plot 3 \y1 = will be displayed. (If a function has been entered previously, pressing CLEAR will clear the display.) b. Enter the function. For example, to graph the function f ( x) x 3 ( x 3) 4 , we enter x^3(x - 3)^4 next to \y1 = . 2. Select the viewing rectangle as follows: a. Select WIND by pressing 2nd followed by F2. The range table will be displayed. b. Enter the values for the viewing rectangle. For example, the viewing rectangle [-1,5] x [-40,40] has the following values: xmin = -1 xmax = 5 xsc1 = 1 ymin = -40 ymax = 40 ysc1 = xres = 1 1 Press ENTER after entering each value. 3. Select GRAPH to display the desired graph. A.2 Evaluating a Function Method A (Displaying the graph of the function) 1. Enter the function f using an appropriate viewing window as outlined in A.1. [See procedure for graphing a single function, Section A.1.] 2. Press MORE twice to display the function EVAL. Next select EVAL . The display Eval x = will appear on the bottom of the screen. 3. Enter the value of x and press ENTER . The desired value of f (x) will be displayed on the bottom of the screen. Method B (Without displaying the graph of the function.) 1. Press 2nd CALC to select the CALC menu. 2. Select evalF. The screen displays evalF( Enter the function, the variable, and the value of x at which the function is to be evaluated. For example, to evalaute f (2) , where f ( x) x 2 1 , we enter evalF (x^2 + 1, x, 2) [Don't forget to enter "x" after the function!] and then press ENTER . The value of f at x = 2, which is 5, will be displayed on the screen. A.3 Finding the Points of Intersection of Two Graphs 1. Plot the graphs of the two functions. To do this, follow Step 1 of the procedure for graphing a single function (A.1) to enter the first function. Then press ENTER to display \y2 = in the function table. Enter the second function. Then proceed to Step 2 of the procedure for graphing a function (A.1). 2. Select the ISECT operation as follows: a. Press MORE once to display the function MATH in the menu. Then select MATH. Press MORE to obtain the ISECT function display. b. Select ISECT to use this operation. 3. A.4 To find the coordinates of a point of intersection, move the cursor close to the point of intersection on one of the graphs and then press ENTER . The cursor will automatically jump to a point on the other graph. Press ENTER twice and the display Intersection will appear at the bottom of the screen together with the coordinates of the point(s) of intersection of the two graphs. Using the ZOOM Function 1. Display the graph of the function. [See procedure for graphing a single function A.1.] 2. Select ZOOM. To zoom-in select ZIN. 3. Use the left, right, up, or down arrow keys to move the cursor near the point of interest. Press ENTER . 4. To zoom-in again, move the cursor close to the desired point and press ENTER once more. A.5 Using the TRACE Function 1. Display the graph of the function. [See procedure for graphing a single function (A.1).] 2. Select TRACE. The cursor will appear on the graph. 3. By pressing , or , , the cursor can be made to move along the graph. The coordinates of the point indicated by the cursor appear on the bottom of the screen. REMARK If more than one graph is displayed on the screen, then the cursor can be made to jump from one graph to the other by pressing , or . A.6 Finding an Equation of a Least-Squares Line 1. Enter the data as follows: a. Press 2nd STAT to call the statistics menu. Then select EDIT to enter the data. The screen displays -------- Name = -------- -------- ( ) NAMES " OPS ► Select NAMES, then select xStat. Press ENTER. The heading xStat appears in the first column. Next, move the cursor to the second column. Select NAMES, then select yStat. Press ENTER and the heading yStat appears in the second column. Repeat the process to enter fStat in the third column. The screen then displays. xStat yStat fStat 2 -------- -------- -------- yStat = ( ) NAMES " OPS ► b. Enter the data for x1 , x2 ,..., xn in the first column using the left, right, up or down arrow keys and pressing ENTER after each entry. In a similar manner, enter the data for y1 , y2 ,..., yn in the second column. Enter 1's for the entries in the third column. [ Previous data can be cleared using the DEL key.] Return to the calculator mode by pressing 2nd QUIT. 2. Find the least-squares equation as follows: Select the statistics menu by pressing 2nd STAT. Then select CALC. Next, select LinR, the linear regression operation. The operation LinR appears on the screen. Press ENTER and the screen will display the values of a, b, corr, and n. A desired equation of the least-squares line is y a bx. A.7 Entering a Matrix 1. Press 2nd MATRX to call the matrix menu. Then select EDIT . 2. Enter the name of the matrix. For example, pressing ALPHA A will give the matrix the label “A.” If the name already appears on the screen, then just select it by pressing the appropriate key. Press ENTER . 3. Enter the size of the matrix. For example, if A has order 3 x 4, press 3 , ENTER , 4 , ENTER . 4. Enter the elements of the matrix row by row, starting with the first row. 5. Return to calculator mode by pressing 2nd QUIT . To enter more than one matrix, repeat the above procedure as necessary. REMARK To view a matrix, press 2nd MATRX . Then select the name of the matrix to be viewed. Press ENTER . If necessary, use the right or left cursor keys to move any hidden part of the matrix into view. A.8 Using Row Operations on Matrices, rref, and SIMULT 1. 2. Using Row Operations Enter the matrix A. Press 2nd MATRX and then select OPS . Press MORE to display the menu for the row operations on the screen. The calculator is now ready to perform the following operations. a. Operation 1 ( Ri R j ): Select rSwap to use rSwap, the row swap operation. The command is rSwap(A , i, j). Press ENTER . b. Operation 2 ( cRi ): Select multR to use multR, the row multiplication operation. The command is multR(c, A, i). Press ENTER . c. Operation 3 ( Ri aR j ): Select mRAdd to use mRAdd, the multiply and add row operation. The command is mRAdd(a, A, j, i). Press ENTER . Using rref Enter the matrix A. Press 2nd MATRX and then select OPS to display the menu. Select rref to use rref , the reduced row echelon form operation. Enter A and then press ENTER . The row-reduced (equivalent) matrix is displayed. 3. Using SIMULT Press 2nd SIMULT . Enter the number of variables (and equations) in the system. Press ENTER . Then enter the coefficients of the system (written in standard form), row by row, starting with the first. Select SOLVE to solve the system. A.9 Operations on Matrices: Addition, Subtraction, Multiplication by a Scalar, and Matrix Multiplication To perform any of the above operations on matrices, first enter the matrices A, B, C, and so on, and go back to the calculator mode. Then press 2nd MATRX . The calculator is now ready to perform the following operations: 1. Addition of two matrices: To find the sum A + B of two matrices A and B press, in succession, A, + , B, and ENTER . 2. Subtraction of two matrices: To find the difference A - B of two matrices A and B press, in succession, A , - , B, ENTER . 3. Multiplication of a matrix by a scalar: To find the matrix cA enter the scalar c . Then press A and ENTER . 4. Multiplication of two matrices: To find the product AB of two matrices A and B, press in succession, A, x , B, ENTER . REMARK More then two of the above operations may be combined into a single statement. For example, we can compute (cA + dB)C by entering (cA + dB) C and pressing ENTER . A.10 A.11 Finding the Transpose of a Matrix and Finding the Inverse of an n x n Matrix. 1. Finding the transpose of a matrix: Enter the matrix as the matrix A and go back to the calculator mode by pressing 2nd QUIT. Press 2nd MATRX and select MATH. Press ALPHA A followed by T and press ENTER . 2. Finding the inverse of a matrix: Enter the matrix as the matrix A and go back to the calculator mode by pressing 2nd QUIT. Press ALPHA A followed by 2nd -1 x , and then press ENTER . Evaluating n!, P(n,r), and C(n,r) To use any of the operations n!, P(n,r), or C(n,r), press 2nd MATH to display the Math menu. Then select PROB to use the PROB functions. 1. To evaluate n! : Enter the number n, then select ! to use the factorial function. Press ENTER and the answer will appear on the right-hand side of the screen. 2. To evaluate P(n, r) : Call for the PROB functions as before. Then enter the number n. Select nPr to use the P(n,r) function. Next, enter the number r. Finally, press ENTER to obtain the answer which will be displayed on the right-hand side of the screen. 3. To evaluate C(n, r): Proceed as in part 2, but select nCr instead of nPr . A.12 Generating a Random Number Press 2nd MATH to call the Math menu. Then select PROB to use the PROB menu. Observe that the rand function is displayed on the bottom of the screen. To generate a random number between a and c, enter a + b where b = c - a. Select rand to obtain the display a + b rand. Then press ENTER to obtain the random number. For example, to generate a random number between 2 and 6, enter 2 + 4, followed by rand. Then press ENTER. A.13 Graphing a Histogram 1. 2. 3. Enter the data as follows: a. Press 2nd STAT to call the statistics menu. Then select EDIT from the menu. Enter the data x1 , x2 , ..., xn , into the first column under xStat. Previous data can be deleted by using DEL. Plot the histogram as follows: a. Select the appropriate viewing rectangle by pressing GRAPH and selecting WIND. b. Go back the statistics menu by pressing 2nd STAT . Select PLOT and then select PLOT1. The screen displays On Off Type = Xlist Name = xStat Freq=1 Plot1 Plot2 Plot3 PLon Ploff Then turn on Plot 1 by moving the cursor to ON and pressing ENTER . Next use the cursor to move to Type= . Select HIST from the menu and press ENTER . Exit by pressing 2nd Quit. c. Return to the statistics menu by pressing 2nd STAT. Select DRAW. The histogram now appears on the screen. A.14 Finding the Mean and Standard Deviation 1. 2. A.15 Enter the data x1 , x2 ,..., xn as per Step 1 in A.6. The fStat-values can be left as 1's. To find the mean and standard deviation of X go to the statistic menu by pressing 2nd STAT. Then select CALC. From the menu displayed, select OneVa . Press ENTER . The values of the mean and the standard deviation X are displayed along with other quantities. Programming the TI-86 1. To enter a new program: a. Press PRGM and select EDIT from the menu. The display PROGRAM Name = will appear on the screen. b. Enter the name of the program—up to 8 characters— and then press ENTER . [In what follows, we will write and then execute the program COMPINT appearing in the Using Technology Section 5.1, Applied Finite Mathematics] We enter the name COMPINT using ALPHA and the key corresponding to the alphabet required. After the name has been typed in, press ENTER. The following display now appears in the window. PROGRAM: COMPINT . . Page c. Page I/ O CTL INSc ► Enter the program (see the textbook referred to earlier). To enter the first line : DISP "P" select I/O . Next, press 2nd STRING . From the menu now on display, select Disp followed by " . Then type in the letter P followed by " . Press ENTER. The calculator is ready for the next line of the program. [Note: Use 2nd Alpha to enter lower-case letters.] d. After the complete program has been entered into the calculator, press 2nd QUIT to exit the programming mode. 2. To execute a program: a. Press PRGM and select NAMES from the menu. Then select a program from the menu. The name of that program will appear on the top of the screen. Press ENTER . b. Enter the numerical values of the quantities asked for, pressing ENTER after each entry. For the example in the textbook, we enter 500 for the value of P, 0.1 for the value of r, 10 for the value of t, and 12 for the value of m. The answer is $1,353.52. 3. To erase a program: a. Press 2nd MEM and select DELET from the menu. The word DELETE will appear on the screen. b. Press MORE and then select PRGM . The screen will display all the programs entered into the calculator. c. Move the cursor to the program to be deleted and press ENTER . d. To exit the delete menu, press 2nd QUIT .

