Science Story > Soil – Dig It! > Teaching and Learning Approaches > Observing soil microbes
STUDENT ACTIVITY: Observing soil microbes
Activity idea
In this activity, students observe billions of soil microbes and ‘see’ microbes at work as they
soft boil an egg in a compost bin.
By the end of this activity, students should be able to:
discuss that soil is home to living things, including things we cannot see
associate the heat generated by microbial activity with the heating of an egg in a compost
bin.
Introduction/background notes
What you need
What to do
Introduction/background
Believe it or not, there are more soil microbes in one
teaspoon of healthy soil than there are people living
on Earth. Soil microbes are responsible for many soil
ecosystem services such as carbon and nitrogen
cycling and breaking down wastes in a compost bin.
Without the use of powerful microscopes, it is
impossible for us to observe an individual soil
microbe, but we can see them when they form
extensive colonies. We can also ‘see’ them at work in
our compost bins.
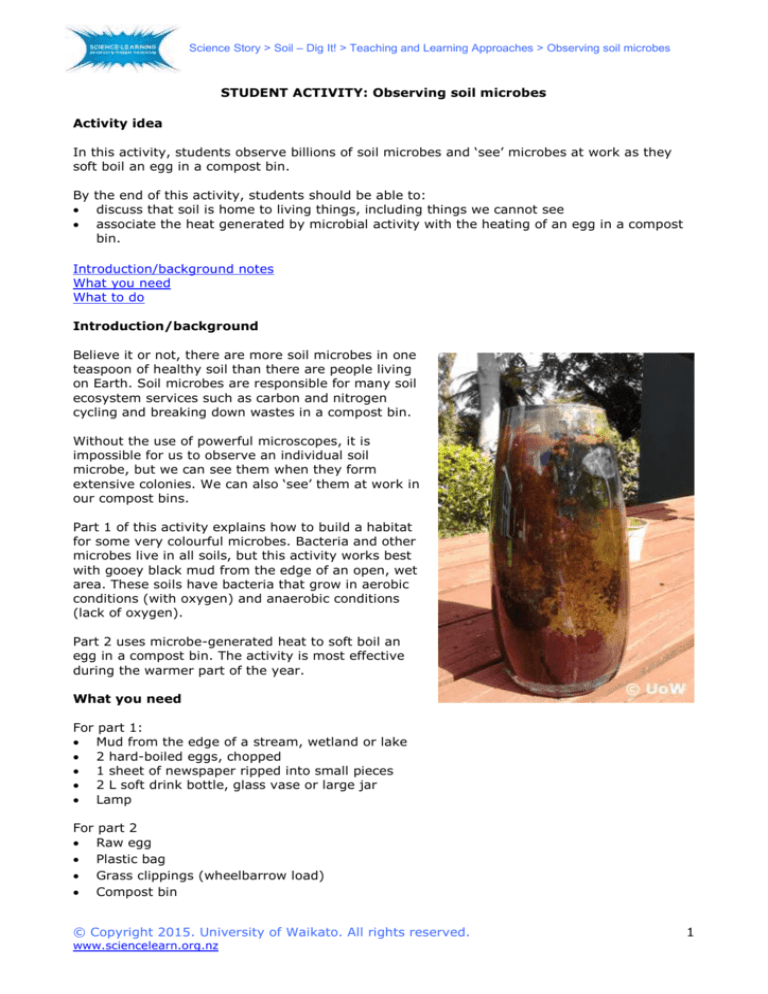
Part 1 of this activity explains how to build a habitat
for some very colourful microbes. Bacteria and other
microbes live in all soils, but this activity works best
with gooey black mud from the edge of an open, wet
area. These soils have bacteria that grow in aerobic
conditions (with oxygen) and anaerobic conditions
(lack of oxygen).
Part 2 uses microbe-generated heat to soft boil an
egg in a compost bin. The activity is most effective
during the warmer part of the year.
What you need
For part 1:
Mud from the edge of a stream, wetland or lake
2 hard-boiled eggs, chopped
1 sheet of newspaper ripped into small pieces
2 L soft drink bottle, glass vase or large jar
Lamp
For part 2
Raw egg
Plastic bag
Grass clippings (wheelbarrow load)
Compost bin
© Copyright 2015. University of Waikato. All rights reserved.
www.sciencelearn.org.nz
1
Science Story > Soil – Dig It! > Teaching and Learning Approaches > Observing soil microbes
What to do
Part 1
1. To make the microbe habitat, remove sticks, stones and other large pieces of material from
the mud. Add water to the mud so its consistency is similar to raw egg whites.
2. Mix in the newspaper. Newspaper is a food source and speeds up bacterial growth. In
nature, the microbes use organic matter in the soil.
3. Fill one-third of the container with mud.
4. Add the eggs and stir gently. Eggs provide food for the bacteria that use sulphur. The top
of the container does not have as much sulphur, so other types of bacteria grow there.
5. Top up the container with the mud. Tap the container on the table a few times to dislodge
any air bubbles. The bottom of the container should be anaerobic (without oxygen).
6. Add some water to the container so that it does not dry out.
7. For best results, shine a light on the container 24 hours a day. Some bacteria grow in light;
other bacteria grow in dark conditions.
8. As the microbes use the eggs as food, they produce some pretty smelly gases. Gently
squeezing the bottle (if you’re using one) may cause it to burp – or pass gas. This should
settle down after a few days. Place plastic wrap on the mouth of the container, but don’t
seal it.
9. Colourful colonies of microbes usually begin to grow within a couple of weeks. (The
container pictured in this activity had been sitting in a shed for about 18 months with
sunlight as its only light source.)
10. Observe changes in the container. Why is it we can now ‘see’ microbes when we cannot see
them in a handful of soil?
11. Have students document the changes in the microbe habitat over time and discuss the
results.
Part 2
12. Discuss the composting process. How do students think organic materials like food scraps
get turned into compost?
13. Explain that bacteria are the driving force of a compost bin. Bacteria break down organic
matter, and in the process, they create carbon dioxide and heat. Compost can reach
temperatures up to 60°C.
14. Place the raw egg into the plastic bag. Tie the egg
up in the bottom of the bag and use the top of the
bag as a ‘tail’ sticking out of the compost. This
allows you to more easily find and remove the
egg.
15. Add the grass clippings to the bin. Bury the egg in
the clippings, leaving the end of the ‘tail’ exposed.
If the clippings are quite dry, wet them down a bit
– but don’t make them soggy.
© Copyright 2015. University of Waikato. All rights reserved.
www.sciencelearn.org.nz
2
Science Story > Soil – Dig It! > Teaching and Learning Approaches > Observing soil microbes
16. Ask students to predict what they think will happen to the egg and why.
17. Leave the egg in the grass clippings for a couple of days.
18. Open the compost bin and remove the egg. Take note of the heat generated by the
microbes as they work to break down the grass clippings – similar to how humans produce
heat when we work hard. You may also see steam and fungi (discoloured patches) – the
fungi help the compost/clippings break down. A note of caution: Take care when digging
through the compost to retrieve the egg. Avoid breathing in dust or mist coming from the
compost.
19. Remove the egg from the bag and cut it open. Chances are some or all of it will be cooked.
(The egg is not safe to eat, but if it is put back in the compost bin, the microbes will get to
work and recycle it!)
20. Discuss the results with students. Ask where the heat came from to soft boil the egg and
how this activity helps students ‘see’ microbes at work.
© Copyright 2015. University of Waikato. All rights reserved.
www.sciencelearn.org.nz
3

