Guidance notes

Installing and using Pentaho Kettle to transfer data to an LOVD database
Getting Started
From the Pentaho Kettle home page follow the release note for Kettle version 4.3. Download the software from Sourceforge ( PDI 4.3.0-stable) and unzip.
Go to pdi-ce-4.3.0-stable/data-integration/
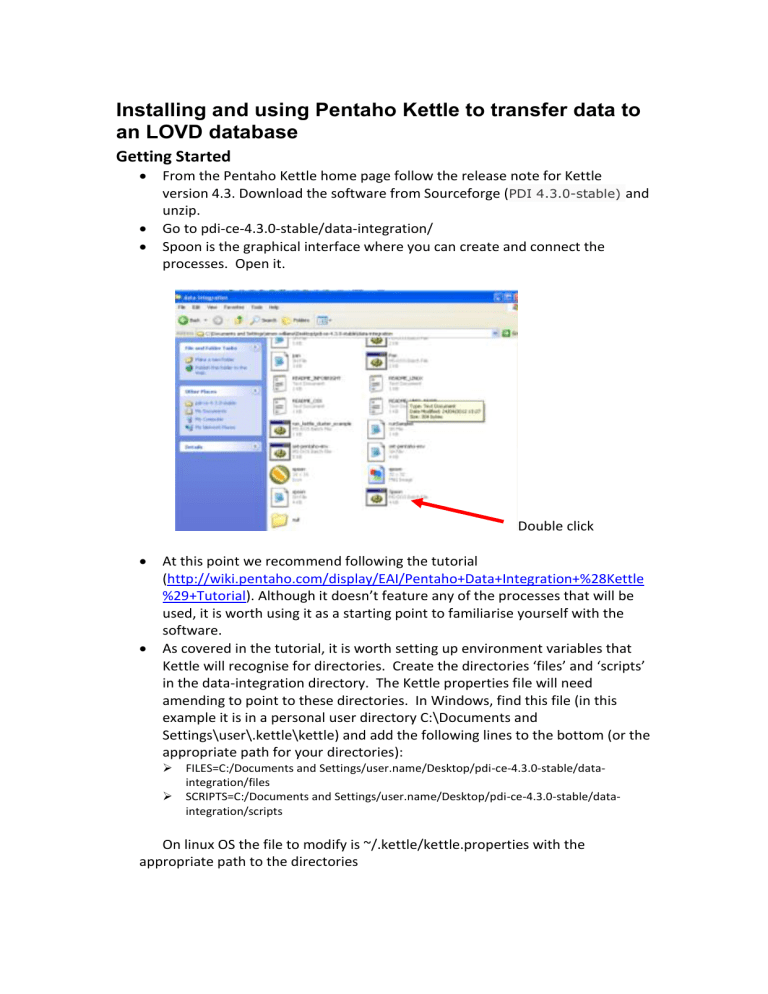
Spoon is the graphical interface where you can create and connect the processes. Open it.
Double click
At this point we recommend following the tutorial
( http://wiki.pentaho.com/display/EAI/Pentaho+Data+Integration+%28Kettle
%29+Tutorial ). Although it doesn’t feature any of the processes that will be used, it is worth using it as a starting point to familiarise yourself with the software.
As covered in the tutorial, it is worth setting up environment variables that
Kettle will recognise for directories. Create the directories ‘files’ and ‘scripts’ in the data-integration directory. The Kettle properties file will need amending to point to these directories. In Windows, find this file (in this example it is in a personal user directory C:\Documents and
Settings\user\.kettle\kettle) and add the following lines to the bottom (or the appropriate path for your directories):
FILES=C:/Documents and Settings/user.name/Desktop/pdi-ce-4.3.0-stable/dataintegration/files
SCRIPTS=C:/Documents and Settings/user.name/Desktop/pdi-ce-4.3.0-stable/dataintegration/scripts
On linux OS the file to modify is ~/.kettle/kettle.properties with the appropriate path to the directories
To use the connection to MySQL you will also need to download the mysql java connector and put it in the correct place. Download from http://dev.mysql.com/downloads/connector/j/ , unzip and put the jar file in
/data-integration/libext/JDBC/
Example – Connecting to a spreadsheet
Starting with a new transformation
Select ‘Input->Microsoft Excel Input’ by dragging it from the steps panel on the left of the screen into the main panel
Double click the icon
Fill in the ‘File or directory’ field with the path and .xls filename. Press ‘Add’ to select this file.
Select the ‘Fields’ tab and press ‘Get fields from header row...’ to populate with the fields from the spreadsheet.
Press ‘OK’ to close this window
Senario 1 – Connecting to a database and extracting data
First you need to establish a database connection
Click in the ‘View’ tab at the top of the left panel and double click ‘Database connections’ to configure the connection.
To connect to a MySQL database select it from the list and fill in the Setting fields on the right.
You will need to enter the database name, username and password.
With the connection now established, select Input->Table input from the left hand panel and drag it into the main screen.
Double click the icon and select the connection you have just made from the drop down list.
Fill in the SQL query to pull out the data from the database table
(e.g. SELECT * FROM lab_database_table)
Putting information from the database into a spreadsheet (for example)
Following the database connection above, we can send this data to a spreadsheet
Drag and drop Output->Microsoft Excel Output icon from the left panel into the main screen.
Connect the ‘Table input’ icon to the ‘Excel output’ output icon (left click on it, hold shift and connect the arrow to the output icon)
Double click the excel output icon. Select the spreadsheet filename and optionally customise the headers and fields that are written to the spreadsheet by clicking on the relevant tabs.
The transformation should then be saved, creating a .ktr file
Running the processes
The process can be run through the Spoon interface or, alternatively, on the command line using pan.sh
You will need to make it executable before running it: chmod 755 pan.sh
To run the example in scenario 1:
./pan.sh –file ./scripts/senario1.ktr –norep
If everything worked you should have the .xls file in the ‘files’ directory.
Senario 2 – Automatic variant submission to an LOVD database –
Kabuki example
The Manchester laboratory has a genetic service for Kabuki syndrome – identifying mutations in the MLL2 gene. We used this data, stored in an excel spreadsheet, as a way of testing the Kettle software for automatic LOVD submission.
Local LOVD installation
The NGRL have LOVD2 installed on a local server so we created a new gene (MLL2) by logging on to LOVD through the online interface.
The relevant tables for automated variant submissions are lovd_MLL2_variants, lovd_patients and lovd_patients2variants. The basic idea behind automated variant submission is that Kettle connects to this database and enters the appropriate data in the relevant tables and fields.
When you upload a file to LOVD in the conventional way you can leave many compulsory fields empty as the underlying LOVD scripts will populate them automatically. Many of these fields are crucial for the database interface to function correctly and so replicating the action of these scripts to automatically fill in the empty fields needs to be carried out programmatically. A perl script forms part of the process and computes the appropriate values for entry to the database.
Null versus empty string value issue
Many of the fields in the lovd database that we are populating do not allow ‘NULL’ values. This essentially means that you are required to put something in them. I uploaded some basic variant data (DNA mutation, protein mutation etc) through the lovd web interface and looked at how this was reflected in the database tables where there was no data for that field. Where no data are available the fields are blank (contain empty string values) and this is ideally what we would replicate.
Unfortunately the current version of Kettle (v4.3) treats empty string values as null and therefore when I attempt to fill these fields with empty strings a null is inserted and the process fails, reporting the error. The Kettle documentation states that this issue will be addressed in version 5 (– available early 2013) but in the meantime we have developed a work around.
Kettle processes
We have created a workflow for this scenario. The process is controlled by execute.kjb – a
Kettle job that runs different transformations in order to carry out the task.
Breakdown of the steps:
1.
START – this just starts the process and is a requirement of all jobs
2.
set_parameters – this transformation takes in some input from the user – the name of the spreadsheet and the gene name (e.g. ‘MLL2’)
3.
excel2txt (excel2txt.ktr) – this transformation reads in the spreadsheet and converts it into a text format
4.
Check if lab data exists – this is a simple error check that aborts the job if no lab data is found
The next 3 steps retrieve existing IDs from the database to ensure that the new IDs don’t conflict and that no duplicate entries are made
5.
get variant IDs (retrieve_ids.ktr) – this transformation reads the existing variantids from the lovd2.lovd_MLL2_variants table. This is then used to ensure that the variantids aren’t duplicated.
6.
get patient IDs (retrieve_ids2.ktr) – this transformation reads existing patientids from lovd2.lovd_patients2variants table.
7.
get patients2variants IDs (retrieve_ids2.ktr) – this transformation reads existing patientids and variantids from lovd2.lovd_patients2variants table.
8.
Check if current ID file exists – self explanatory
9.
run perl script… (create_DBIDs.pl) - this is a shell command that runs a perl script to generate the appropriate information for each field in each table (as above) and print out all of the information to a text file. It fills in many of the compulsory fields
(date created etc) and ensures that patient IDs and variants aren’t duplicated in the database.
10.
load_LOVD_tables (lovd_loader.ktr) – this transformation reads in the text file and outputs the data to the lovd_MLL2_variants and lovd_patients2variants database tables.
11.
load lovd_patients (lovd_loader2.ktr) – this transformation loads the lovd_patients data – this is separate from the others as patientIDs can have multiple variants
12.
tidy – this is a simple script to remove any intermediate files that have been generated to keep things tidy.
Points to consider:
The parameters in each transformation and location of files would have to be adapted for each laboratory setting.
Where variants are stored in a database, step 3 would need replacing.
To run this Kettle transformation from the command line you use the ‘kitchen.sh’ script, making sure that all of the transformations and scripts are in the ./scripts directory and that the spreadsheet is where you point to in the transformations (these can be modified to point to different locations).
Argument1 = ‘kabuki_spreadsheet’ – the name of the spreadsheet
Argument2 = ‘MLL2’ – the gene name
./kitchen.sh –file ./script/execute.kjb kabuki_spreadsheet MLL2 -norep
We provide this Kettle job and individual transformations for modification as well as the perl script for preventing redundant entries and filling in necessary fields.


