Pfizer, BeneFIX R2 – Recombinant Factor IX
advertisement
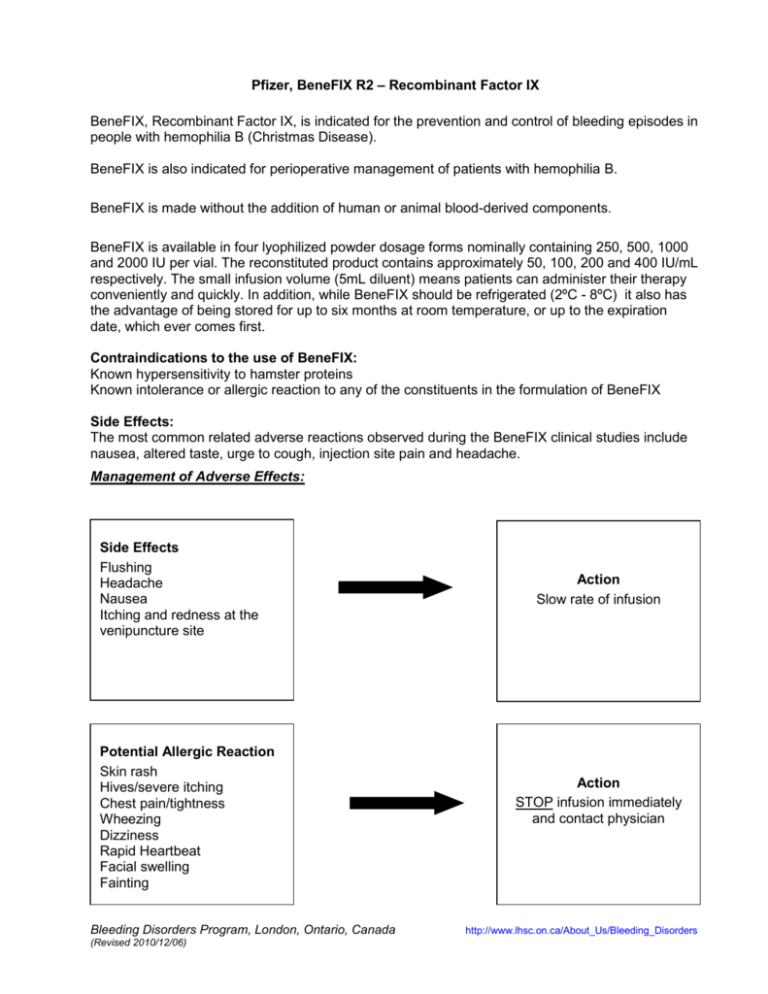
Pfizer, BeneFIX R2 – Recombinant Factor IX BeneFIX, Recombinant Factor IX, is indicated for the prevention and control of bleeding episodes in people with hemophilia B (Christmas Disease). BeneFIX is also indicated for perioperative management of patients with hemophilia B. BeneFIX is made without the addition of human or animal blood-derived components. BeneFIX is available in four lyophilized powder dosage forms nominally containing 250, 500, 1000 and 2000 IU per vial. The reconstituted product contains approximately 50, 100, 200 and 400 IU/mL respectively. The small infusion volume (5mL diluent) means patients can administer their therapy conveniently and quickly. In addition, while BeneFIX should be refrigerated (2ºC - 8ºC) it also has the advantage of being stored for up to six months at room temperature, or up to the expiration date, which ever comes first. Contraindications to the use of BeneFIX: Known hypersensitivity to hamster proteins Known intolerance or allergic reaction to any of the constituents in the formulation of BeneFIX Side Effects: The most common related adverse reactions observed during the BeneFIX clinical studies include nausea, altered taste, urge to cough, injection site pain and headache. Management of Adverse Effects: Side Effects Flushing Headache Nausea Itching and redness at the venipuncture site Potential Allergic Reaction Skin rash Hives/severe itching Chest pain/tightness Wheezing Dizziness Rapid Heartbeat Facial swelling Fainting Bleeding Disorders Program, London, Ontario, Canada (Revised 2010/12/06) Action Slow rate of infusion Action STOP infusion immediately and contact physician http://www.lhsc.on.ca/About_Us/Bleeding_Disorders PFIZER: BENEFIX R2 (Recombinant FIX) STEP 1 Bring BeneFIX to room temperature (NOT >37ºC) before using. Choose a clean, dry, well-lit work area and lay out the following supplies: Contained within the box: Bottle of recombinant factor IX powder 1 5 ml diluent syringe and plunger rod Vial adapter with inline filter Butterfly infusion set Alcohol swabs Sterile gauze Adhesive bandage Packaged Separately Larger luer lock syringe for multi vial dose STEP 2 Wash hands Use warm running water Use antibacterial soap from pump dispenser Dry hands with a paper towel Turn off taps with paper towel & discard STEP 3 Remove the cap from the FIX powder. STEP 4 Clean the top of the bottle with an alcohol swab. Allow to dry completely. DO NOT blow on the top to speed up drying, this will contaminate it. Place the vial on a flat surface, Bleeding Disorders Program, London, Ontario, Canada (Revised 2010/12/06) http://www.lhsc.on.ca/About_Us/Bleeding_Disorders STEP 5 Remove the cover from the plastic vial adapter package. DO NOT REMOVE DEVICE FROM PACKAGE STEP 6 Place adapter over BeneFIX vial, press down firmly until it snaps into place. Leave plastic cover on adapter until you are ready to connect the syringe. STEP 7 Remove plastic cover on vial adapter. STEP 8 Attach plunger rod to diluent syringe by inserting the rod into the syringe and turning. Bleeding Disorders Program, London, Ontario, Canada (Revised 2010/12/06) http://www.lhsc.on.ca/About_Us/Bleeding_Disorders STEP 9 Remove plastic cap from diluent syringe by bending up and down to break the seal. STEP 10 Connect the syringe to adapter on BeneFIX vial. Insert tip of syringe into adapter opening. Push firmly and turn in a clockwise direction. STEP 11 Slowly push down plunger of syringe to inject all diluent into BeneFIX vial. STEP 12 Do not remove syringe. Gently swirl and invert vial until all the BeneFIX powder is dissolved. Solution should be clear and colourless. STOP HERE: Go to Step 16 if prescribed dose requires more than one vial. Bleeding Disorders Program, London, Ontario, Canada (Revised 2010/12/06) http://www.lhsc.on.ca/About_Us/Bleeding_Disorders STEP 13 Invert vial, slowly draw reconstituted BeneFIX into syringe. Remove syringe from vial by pulling and turning counter clockwise. STEP 14 Attach butterfly needle for peripheral vein infusion. Holding the syringe and the needle pointing up, gently flick the syringe to move any air bubbles to the top and gently push on the plunger to remove the air. DO NOT push any factor solution out of the syringe. Peripheral Vein STEP 15 Attach a blunt cannula for Port-a-cath® infusion. Mark the syringe with a piece of tape. Port-a-Cath® MULTIVIAL DOSE STEP 16 Mix all product vials, using a new vial adapter device for each vial, as directed in Step 1 – 12 to prepare the prescribed dose to the nearest vial. Leave the diluent syringe attached until ready to draw back the solution. Select a syringe large enough to hold the prescribed dose. Bleeding Disorders Program, London, Ontario, Canada (Revised 2010/12/06) http://www.lhsc.on.ca/About_Us/Bleeding_Disorders STEP 17 Remove all of the diluent syringes from the vial adapter leaving the vial adapters in place. Remove the large luer lock siring form the packaging and attached to the vial adapter. STEP 18 Follow Step 13 to draw the product from each vial into the larger syringe. DO NOT INJECT AIR. Go to Step 14 for administration using a butterfly infusion set or Step 15 for administration through a Port-a-Cath®. Administer slowly (through peripheral vein or Port-a-Cath®) over several minutes. The rate should be determined by the patient’s comfort level. Dispose of butterfly needle or winged infusion set in sharps container, remainder of waste to be disposed of in household garbage. Bleeding Disorders Program, London, Ontario, Canada (Revised 2010/12/06) http://www.lhsc.on.ca/About_Us/Bleeding_Disorders
