STEM: Art Robot Challenge
advertisement

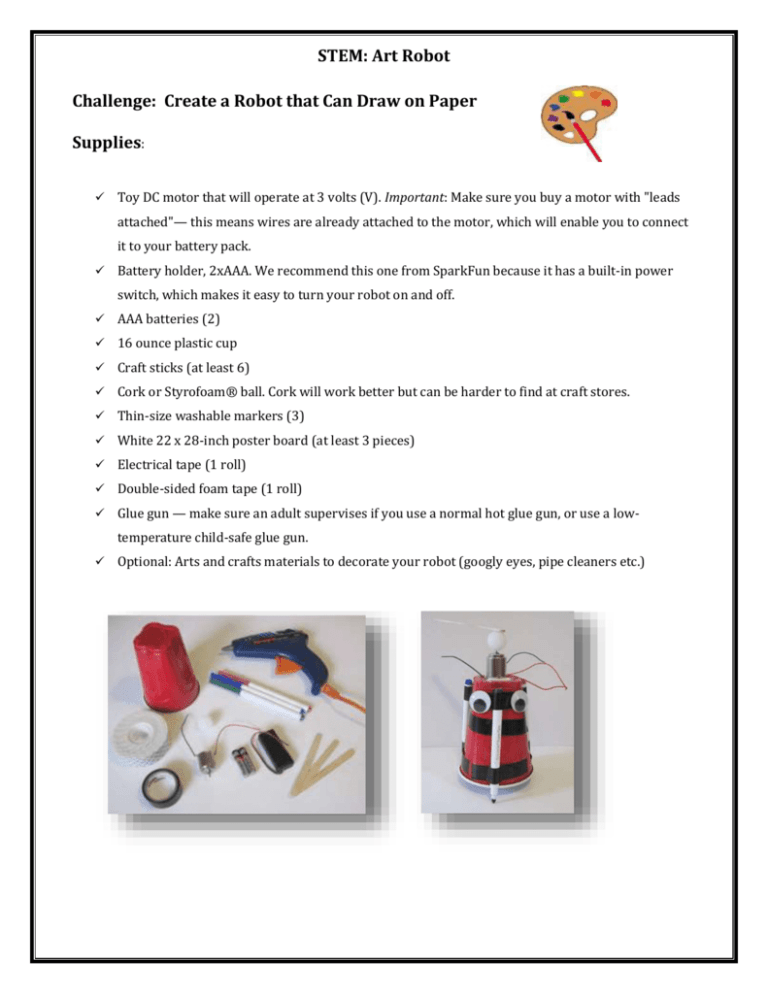
STEM: Art Robot Challenge: Create a Robot that Can Draw on Paper Supplies: Toy DC motor that will operate at 3 volts (V). Important: Make sure you buy a motor with "leads attached"— this means wires are already attached to the motor, which will enable you to connect it to your battery pack. Battery holder, 2xAAA. We recommend this one from SparkFun because it has a built-in power switch, which makes it easy to turn your robot on and off. AAA batteries (2) 16 ounce plastic cup Craft sticks (at least 6) Cork or Styrofoam® ball. Cork will work better but can be harder to find at craft stores. Thin-size washable markers (3) White 22 x 28-inch poster board (at least 3 pieces) Electrical tape (1 roll) Double-sided foam tape (1 roll) Glue gun — make sure an adult supervises if you use a normal hot glue gun, or use a lowtemperature child-safe glue gun. Optional: Arts and crafts materials to decorate your robot (googly eyes, pipe cleaners etc.) STEM: Art Robot Building Instructions: 1. Apply a small dab of glue to the tip of your motor's shaft. Quickly (before the glue dries) press your cork or Styrofoam ball onto the motor's shaft. 2. Use the hot glue gun to attach one end of a single craft stick to the top of your cork or Styrofoam ball. A Styrofoam ball with single craft stick glued on, both glued to the shaft of the motor. 3. The plastic cup serves as your robot's "body." Using double-sided tape, electrical tape, and/or glue as needed, firmly attach your motor to the top of your robot (note that you must flip the cup upside down, so the base of the cup is the top of the robot). The best way to attach the motor will depend on its exact shape and if it has a flat bottom. Use double-sided foam tape to attach the motor to the top of the robot (the base of the cup). Add electrical tape or glue if necessary to make sure it is stuck on firmly. 4. Put the two AAA batteries in the battery pack. Make sure the switch on the battery pack is in the "off" position. Use electrical tape to strap the battery pack to the side of the cup. Twist the exposed metal ends of the motor wires and battery pack wires together (red to red and black to black). This lets electrical current flow from the batteries to the motor when the switch is on. See Figures 5 and 6 below. Note: If you did not purchase a battery pack with a built-in on/off switch, then do not twist both pairs of wires together yet. You can twist just one pair - but if you twist both, the motor will start spinning, and your robot is not ready yet! Use electrical tape to attach the battery pack to the side of the cup. (The black wires have not been twisted together yet in this image.) STEM: Art Robot The picture above shows a close up view of the red wire from the battery pack twisted together with the red wire of the motor. Optional: If you are having trouble twisting the wires together, you can use a binder clip to pinch them in place, as shown in the image on the right. 5. Using electrical tape, attach the three markers (caps left on) to the sides of the cup, with their points facing downward. Make sure the markers are equally spaced around the cup, creating a stable tripod — it should not fall over when it is standing. Use electrical tape to attach three markers, pointing down, to the sides of the cup 6. Decorate your robot! If you have arts and crafts supplies, be creative and use them to personalize your robot design. 7. Place one sheet of poster board flat on the floor, and put your robot in the middle. Removed caps from the markers, and turn the switch on the battery pack to "on". 8. Change one variable at a time to see different designs. 9. Challenge: Modify your robot to draw circles. STEM: Art Robot Challenge: Design a robot out of everyday items that performs a specific function. Examples of homemade robots:


