File
advertisement
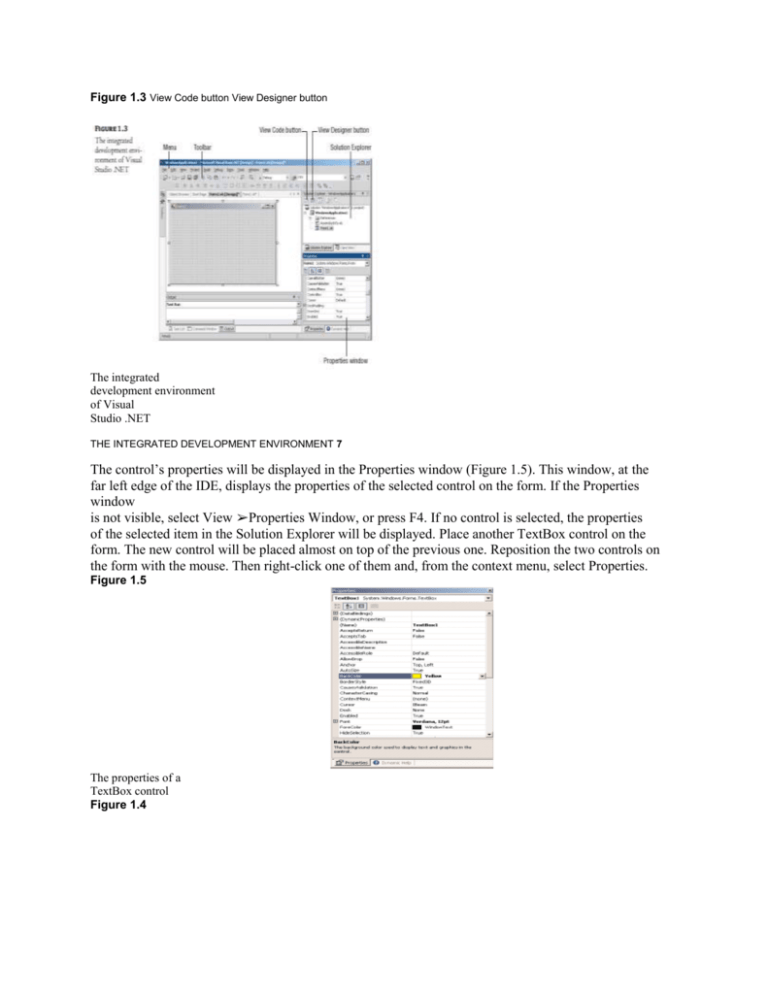
Figure 1.3 View Code button View Designer button The integrated development environment of Visual Studio .NET THE INTEGRATED DEVELOPMENT ENVIRONMENT 7 The control’s properties will be displayed in the Properties window (Figure 1.5). This window, at the far left edge of the IDE, displays the properties of the selected control on the form. If the Properties window is not visible, select View ➢Properties Window, or press F4. If no control is selected, the properties of the selected item in the Solution Explorer will be displayed. Place another TextBox control on the form. The new control will be placed almost on top of the previous one. Reposition the two controls on the form with the mouse. Then right-click one of them and, from the context menu, select Properties. Figure 1.5 The properties of a TextBox control Figure 1.4 The Windows Forms Toolbox of the Visual Studio IDE In the Properties window, also known as the Property Browser, you see the properties that determine the appearance of the control, and in some cases, its function. Locate the TextBox control’s Text property and set it to “My TextBox Control” by entering the string (without the quotes) into the box next to property name. Select the current setting, which is TextBox1, and type a new string. The control’s Text property is the string that appears in the control. Then locate its BackColor property and select it with the mouse. A button with an arrow will appear next to the current setting of the property. Click this button and you will see a dialog box with three tabs (Custom, Web, and System), as shown in Figure 1.6. On this dialog box, you can select the color, from any of the three tabs, that will fill the control’s background. Set the control’s background color to yellow and notice that the control’s appearance will change on the form. Then locate the control’s Font property. You can click the plus sign in front of the property name and set the individual properties of the font, or you can click the button with the ellipsis to invoke the Font dialog box. On this dialog box, you can set the font and its attributes and then click OK to close the dialog box. Set the TextBox control’s Font property to Verdana, 14 points, bold. As soon as you close the Font dialog box, the control on the form will be adjusted to the new setting. There’s a good chance that the string you assigned to the control’s Text property won’t fit in the control’s width when rendered in the new font. Select the control on the form with the mouse, and you will see eight handles along its perimeter. Rest the pointer over any of these handles, and it will assume a shape indicating the direction in which you can resize the control. Make the control long enough to fit the entire string. If you have to, resize the form as well. Click somewhere on the form and when the handles along its perimeter appear, resize it with the mouse. If you attempt to make the control tall enough to accommodate a few lines of text, you’ll realize that you can’t change the control’s height. By default, the TextBox control accepts a single line of text. So far you’ve manipulated properties that determine the appearance of the control. Now you’ll change a property that determines not only the appearance, but the function of the control as well. Locate the Multiline property. Its current setting is False. Expand the list of available settings and Figure 1.6 Setting a color property in the Properties dialog box THE INTEGRATED DEVELOPMENT ENVIRONMENT 9 change it to True. (You can also change it by double-clicking the name of the property. This action toggles the True/False settings.) Then switch to the form, select the TextBox control, and make it taller. The Multiline property determines whether the TextBox control can accept one (if Multiline = False) or more (if Multiline = True) lines of text. Set this property to True, go back to the Text property, and this time set it to a long string and press Enter. The control will break the long text into multiple lines. If you resize the control, the lines will change, but the entire string will fit across the control. That’s because the control’s WordWrap property is True. Set it to False to see how the string will be rendered on the control. Multiline TextBox controls usually have a vertical scrollbar, so that users can quickly locate the section of the text they’re interested in. Locate the control’s ScrollBars property and expand the list of possible settings by clicking the button with the arrow. This property’s settings are None, Vertical, Horizontal, and Both. Set it to vertical, assign a very long string to its Text property, and watch how the control handles the text. At design time, you can’t scroll the text on the control. If you attempt to move the scrollbar, the entire control will be moved. To examine the control’s behavior at runtime, press F5. The application will be compiled, and a few moments later, the form with the two TextBox controls will appear on the desktop (like the ones in Figure 1.7). This is what the users of your application would see (if this were an application worth distributing, of course). Enter some text at runtime, select text on the control, and copy it to the Clipboard by pressing Ctrl+C. You can also copy text in any other Windows application and paste it on the TextBox control. When you’re done, open the Debug menu and select Stop Debugging. This will terminate your application’s execution, and you’ll be returned to the IDE. One of the properties of the TextBox control that determines its function, rather than its appearance, is the CharacterCasing property, whose settings are Normal, Upper, and Lower. In normal mode, the characters appear as typed. In Lower mode, the characters are automatically converted to lowercase before they are displayed on the control. The default setting of this property is Normal. Set it to Upper or Lower, run the application again, and see how this property’s setting affects the function of the control. Enter some lowercase text on the control, and the control itself will convert it to uppercase (or vice versa). The design of a new application starts with the design of the application’s form. The design of the form determines the functionality of the application. In effect, the controls on the form determine how the application will interact with the user. The form itself is a prototype, and you can demonstrate it to a customer before even adding a single line of code. As you understand, by placing Figure 1.7 The appearance of a TextBox control displaying multiple text lines controls on the form and setting their properties you’re implementing a lot of functionality before coding the application. The TextBox control with the settings discussed in this section is a functional text editor. Project Types Before moving on, let me mention briefly all the types of projects you can build with Visual Studio in addition to Windows applications. All the project types supported by Visual Studio are displayed on the New Project dialog box, and they’re the following: Class library A class library is a basic code-building component, which has no visible interface and adds specific functionality to your project. Simply put, a class is a collection of functions that will be used in other projects beyond the current one. With classes, however, you don’t have to distribute source code. Class libraries are equivalent to ActiveX DLL and ActiveX EXE project types of VB6. Windows control library A Windows control (or simply control), such as a TextBox or Button, is a basic element of the user interface. If the controls that come with Visual Basic (the ones that appear in the Toolbox by default) don’t provide the functionality you need, you can build your own custom controls. People design their own custom controls for very specific operations to simplify the development of large applications in a team environment. If you have a good idea for a custom control, you can market it—the pages of the computer trade magazines are full of ads for advanced custom controls that complement the existing ones. Console application A Console application is an application with a very limited user interface. This type of application displays its output on a Command Prompt window and receives input from the same window. You’ll see an example of a simple Console application later in this chapter, and that will be the last Console application in this book. The purpose of this book is to show you how to build Windows and Web applications with rich interfaces, not DOS-like applications. However, the product’s documentation uses Console applications to demonstrate specific topics, and this is why I’ve included a short section on Console applications in this chapter. Windows service A Windows service is a new name for the old NT services, and they’re longrunning applications that don’t have a visible interface. These services can be started automatically when the computer is turned on, paused, and restarted. An application that monitors and reacts to changes in the file system is a prime candidate for implementing as a Windows service. When users upload files to a specific folder, the Windows service might initiate some processing (copy the file, read its contents and update a database, and so on). We will not discuss Windows services in this book. ASP.NET Web application Web applications are among the most exciting new features of Visual Studio. A Web application is an app that resides on a Web server and services requests made through a browser. An online bookstore, for example, is a Web application. The application that runs on the Web server must accept requests made by a client (a remote computer with a browser) and return its responses to the requests in the form of HTML pages. Web applications are not new, but ASP.NET hides many of details of building Web applications and makes THE INTEGRATED DEVELOPMENT ENVIRONMENT 11 the process surprisingly similar to the process of building Windows applications. Web applications and Web services are discussed in detail in the last part of the book. ASP.NET Web service A Web service is not the equivalent of a Windows service. A Web service is a program that resides on a Web server and services requests, just like a Web application, but it doesn’t return an HTML page. Instead, it returns the result of a calculation or a database lookup. Requests to Web services are usually made by another server, which is responsible for processing the data. A Web application that accepts a query for all VB books published by Sybex will return a page with the results. A Web service that accepts the same query will return an XML file with the results. The file will be used by the application that made the request to prepare a new page and send it to the client, or to populate a Windows form. Web control library Just as you can build custom Windows controls to use with your Windows forms, you can create custom Web controls to use with your Web pages. Web controls are not discussed in this book, but once you’ve understood how ASP applications work and how Web applications interact with clients, you’ll be able to follow the examples in the documentation. The other three templates in the New Project dialog box—Empty Project, Empty Web Project, and New Project In Existing Folder—are not project types, just a way to organize the new project yourself. When you create a new project of any of the previous types, Visual Studio creates a new folder named after the project and populates it with a few files that are necessary for the specific application type. A Windows application, for example, has a form, and the appropriate file is created automatically in the project’s folder when a new Windows application is created. With the last three types of projects, you’re responsible for creating and adding all the required items yourself. /////////////////////////// A Few Common Properties In the next few sections, I will go through some of the properties, methods, and events that are common to many controls, so that I will not have to repeat them with every control in the following chapters. These are very simple members you’ll be using in every application from now on. To manipulate a control you use its properties, either on the Property Browser at design time, or though your code at runtime. To program a control, supply a handler for the appropriate events. Figure 1.16 The Projects and Solutions options Figure 1.15 The Fonts and Colors options Controls expose methods, too, which act on the control. The Hide method, for example, makes the control invisible. Properties, methods, and events constitute the programmatic interface of the control and are collectively known as the control’s members. All controls have a multitude of properties, which are displayed in the Properties window, and you can easily set their values. Different controls expose different properties, but here are some that are common to most: Name The control’s name. This name appears at the top of the Properties window when a control is selected on the form and is also used in programming the control. To set the text on a TextBox control from within your code, you will use a statement like the following: TextBox1.Text = “My TextBox Control” You will see how to program the controls shortly. Font A Font object that determines how the text of the control will be rendered at both design and runtime. Enabled By default, all controls are enabled. To disable a control, set its Enabled property to False. When a control is disabled, it appears in gray color and users can’t interact with it. Disabling a control isn’t as rare as you may think, because many controls are not functional at all times. If the user hasn’t entered a value in all required fields on the form, clicking the Process button isn’t going to do anything. After all fields have been set to a valid value, you can enable the control, indicating to the user that the button can now be clicked. Size Sets, or returns, the control’s size. The Size property is a Size object, which exposes two properties, the Width and Height properties. You can set the Size property to a string like “320, 80” or expand the Size property in the Properties window and set the Width and Height properties individually. Tag Holds some data you want to associate with a specific control. For example, you can set the Tag property to the control’s default value, so that you can restore the control’s default value if the user supplies invalid data (a string in a TextBox control that expects a numeric value, or a date). Text The text (a string) that appears on the control. The Label control’s caption can be set (or read) through the Text property. A control that displays multiple items, like the ListBox or the ComboBox control, returns the currently selected item in the Text property. TabStop As you know, only one control at a time can have the focus on a form. To move the focus from one control to the other on the same form, you press the Tab key (and Shift+Tab to move the focus in reverse order). The TabStop property determines whether the control belongs to the so-called tab order. If True (which is the default value), you can move the focus to the control with the Tab key. If False, the control will be skipped in the tab order. TabIndex A numeric value that determines the position of the control in the Tab order. The control with the smallest TabIndex value is the one that has the focus when the form is first loaded. If you press Tab once, the focus will be moved to the control with the next larger TabIndex value. Visible Sometimes we want to make a control invisible. We do so by setting its Visible property to False (the default value of the property is True). A FEW COMMON PROPERTIES 27 A Few Common Events As you have already seen, and will also see in the coming chapters, much of the code of a Windows application manipulates the properties of the various controls on the form. The code of the application resides in selected event handlers. Each control recognizes several events, but we rarely program more than one event per control. In most cases, most of the controls on the form don’t have any code behind them. The events that are most frequently used in programming Windows applications are shown next. Click This is the most common event in Windows programming, and it’s fired when a control is clicked. DoubleClick Fired when the control is double-clicked. Enter Fired when the control received the focus. Leave Fired when the control loses the focus. We usually insert code to validate the control’s content in this event’s handler. MouseEnter Fired when the mouse pointer enters the area of the control. This event is fired once. If you want to monitor the movement of the mouse over a control, use the MouseMove event. MouseLeave This is the counterpart of the MouseEnter event, and it’s fired when the mouse pointer moves out of the area of the control. XXXChanged Some events are fired when a property changes value. These events include BackColorChanged, FontChanged, VisibleChanged, and many more. The control’s properties can also change through code, and it’s very common to do so. To set the text on a TextBox control from within your code, you can execute a statement like the following: TextBox1.Text = “a new caption” You may wish to change the background color of a TextBox control if the numeric value displayed on it is negative: If Val(TextBox.Text) < 0 Then TextBox1.BackColor = Color.Red End If A Few Common Methods In addition to properties, controls also expose methods. A method acts upon the control by performing a specific task. Windows controls don’t provide many methods, but the objects we’ll explore in the following chapters provide many more methods. You have already seen the ToUpper method, which converts a string to uppercase and returns it as a new string. In VB.NET, a string is more than a series of characters: it’s an object, and so is just about everything in .NET. Even a number is an object and exposes a few properties and methods of its own. A String variable exposes the methods Length (it returns the string length), ToUpper (it converts the characters in the string to uppercase and returns a new string), and ToLower (it converts the characters in the string to lowercase and returns a new string). To see these methods in action, create a new application, place a Button control on the form and enter the following statements in its Click event handler: Console.WriteLine(“Visual Basic”.Length) Console.WriteLine(“Visual Basic”.ToUpper) Console.WriteLine(“Visual Basic”.ToLower) Then press F5 to run the application, and you will see the following in the Output window (this is where the Console.WriteLine statement sends its output): 12 VISUAL BASIC visual basic Note If the Output window is hidden, select View ➢ Other Windows ➢ Output. Here are a few methods that are common to most controls. In later chapters, where we’ll explore the Windows controls in detail, you’ll learn about the methods that are unique to individual controls. The following methods apply to most of the Windows controls. Focus This method moves the focus to the control to which the method applies, regardless of the control that has the focus at the time. Your validation routine could move the focus to the control with an erroneous entry with the following statement: TextBox1.Focus It’s also possible to “trap” the focus to a specific TextBox control until the user enters a valid value, by calling the Focus method from within the Leave event. The following code segment doesn’t allow users to move the focus to another control while TextBox1 doesn’t contain a valid numeric value: Private Sub TextBox1_Leave(ByVal sender As Object, _ ByVal e As System.EventArgs) Handles TextBox1.Leave If Not IsNumeric(TextBox1.Text) Then TextBox1.Focus() End Sub The function IsNumeric() returns True if its argument (the value in parentheses following the function’s name) is a numeric value, like 35 or 244.01. Clear Many controls provide a method to clear their contents, and this is the Clear method. When you call the Clear method on a TextBox control, the control’s Text property is set to an empty string. Hide/Show The Hide and Show methods reveal or conceal the control. The two methods are equivalent to setting the Visible property to True and False respectively. PerformClick It’s rather common to invoke the Click event of a button from within our code. To do so, call the PerformClick method of the Button control. There are no equivalent methods for other events. Scale This method scales the control by a value specified as argument. The following statement scales the TextBox1 control down to 75 percent of its current size: TextBox1.Scale(0.75) A FEW COMMON METHODS 29 Building a Console Application One of the new features of Visual Basic .NET is that you can write applications that run in a Command Prompt window. The Command Prompt window isn’t really a DOS window, even though it looks like one. It’s a text window, and the only way to interact with an application is to enter lines of text and read the output generated by the application, which is displayed on this text window, one line at a time. This type of application is called a Console application, and we’re going to demonstrate Console applications with a single example. We will not return to this type of application later in the book, because it’s not what you’re supposed to do as a Windows developer. The Console application you’ll build in this section, ConsoleApplication1, prompts the user to enter the name of his or her favorite language, and then it prints the appropriate message on a new line, as shown in Figure 1.17. Start a new project and, in the New Project dialog box, select the template Console Application. You can also change its default name from ConsoleApplication1 to a more descriptive name. For the example of this section, don’t change the application’s name. A Console application doesn’t have a user interface, so the first thing you’ll see is the code editor’s window with the following statements: Module Module1 Sub Main() End Sub End Module Unlike a Windows application, which is a class, a Console application is a module. Main() is the name of a subroutine that’s executed automatically when you run a Console application. The code you want to execute must be placed between the statements Sub Main() and End Sub. Insert the statements shown in Listing 1.4 in the application’s Main() subroutine. Figure 1.17 A Console application uses the Command Prompt window to interact with the user. Listing 1.4: A Console Application Module Module1 Sub Main() Console.WriteLine(“Enter your favorite language”) Dim language As String language = Console.ReadLine() language = language.ToUpper If language = “VISUAL BASIC” Or language = “VB” Or language = “VB.NET” Then Console.WriteLine(“We have a winner!”) Else Console.WriteLine(language & “ is not a bad language.”) End If Console.WriteLine() Console.WriteLine() Console.WriteLine(“PRESS ANY KEY TO EXIT”) Console.ReadLine() End Sub End Module This code is quite similar to the code of the equivalent Windows applications we developed earlier, except that it uses the Console.WriteLine statement to send its output to the Command Prompt window instead of a message box. A Console application doesn’t react to events, because it has no visible interface. However, it’s easy to add elements of the Windows interface to a Console application. If you change the Console.WriteLine method calls into the MsgBox() function, the message will be displayed on a message box. The reason to build a Console application is to test a specific feature of the language without having to build a user interface. Many of the examples in the documentation are Console applications; they demonstrate the topic at hand and nothing more. If you want to test the DateDiff() function, for example, you can create a new Console application and enter the lines of Listing 1.5 in its Main() subroutine.
