machine and user authentication in windows with clearpass
advertisement
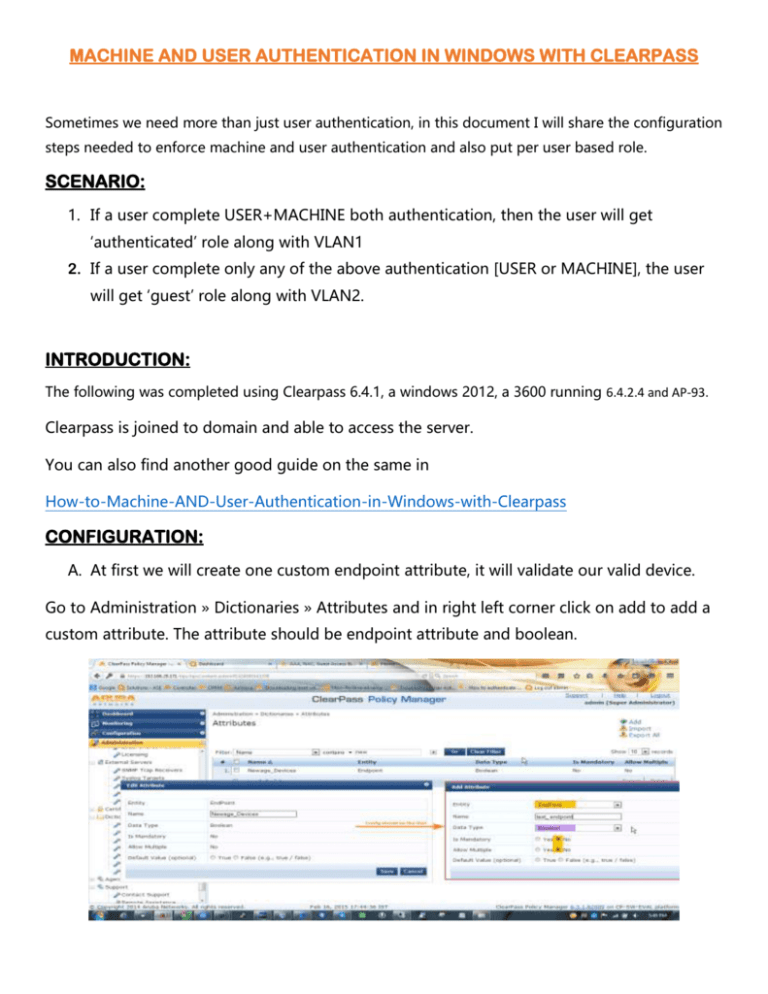
MACHINE AND USER AUTHENTICATION IN WINDOWS WITH CLEARPASS Sometimes we need more than just user authentication, in this document I will share the configuration steps needed to enforce machine and user authentication and also put per user based role. SCENARIO: 1. If a user complete USER+MACHINE both authentication, then the user will get ‘authenticated’ role along with VLAN1 2. If a user complete only any of the above authentication [USER or MACHINE], the user will get ‘guest’ role along with VLAN2. INTRODUCTION: The following was completed using Clearpass 6.4.1, a windows 2012, a 3600 running 6.4.2.4 and AP-93. Clearpass is joined to domain and able to access the server. You can also find another good guide on the same in How-to-Machine-AND-User-Authentication-in-Windows-with-Clearpass CONFIGURATION: A. At first we will create one custom endpoint attribute, it will validate our valid device. Go to Administration » Dictionaries » Attributes and in right left corner click on add to add a custom attribute. The attribute should be endpoint attribute and boolean. B. Now we will configure enforcement profile. For this scenario we need three enforcement profile. Open Configuration » Enforcement » Profiles. Follow this screenshot. First enforcement profile is a post auth profile to enforce the attribute, for this we will select Clearpass entity update enforcement template. Now 2nd one for authenticated users. In here we will give the user ‘authenticated’ role and after that assigned them to VLAN1. 3rd profile for the user, who completed only one authentication. Here we will give the user ‘guest’ role along with VLAN2 C. After configuring enforcement profile we have to configure enforcement policy which will bundle all the three enforcement profile. Open Configuration » Enforcement » Policies D. Now we have to configure one role mapping policy to tag information in the request so later we can use it in enforcement profile. Also create one role to map this. Go to Configuration » Identity » Role Mapping This role mapping will place the validate user in desired roles, User authe E. Now the most important things, we have to configure one service. Check the summary tab of the service. Remember to enable authorization source in service tab. Open authentication tab and select AD as a authentication source, EAP-PEAP and EAPMSCHAPV2 as authentication method [this two is enough to handle the AAA process but if you want or if you have legacy device you always can configure other authentication method]. In controller side nothing to do, just make sure that you have the VLAN and Role configured in controller, because what are you defining[VLAN & Role] here will take effect from the controller. We need to configure our wireless ssid profile to make the both authentication work. Below are the configuration steps. Go to Control Panel\Network and Internet\Manage Wireless Networks click add and add your desired network and go to the setting. That’s all. Now it’s time to check output In above user has completed both authentication so it’s got authenticated role along with VLAN1. In above users has completed only one authentication so it’s got guest role along with VLAN2.

