Candle - Blender 3D Design Course
advertisement
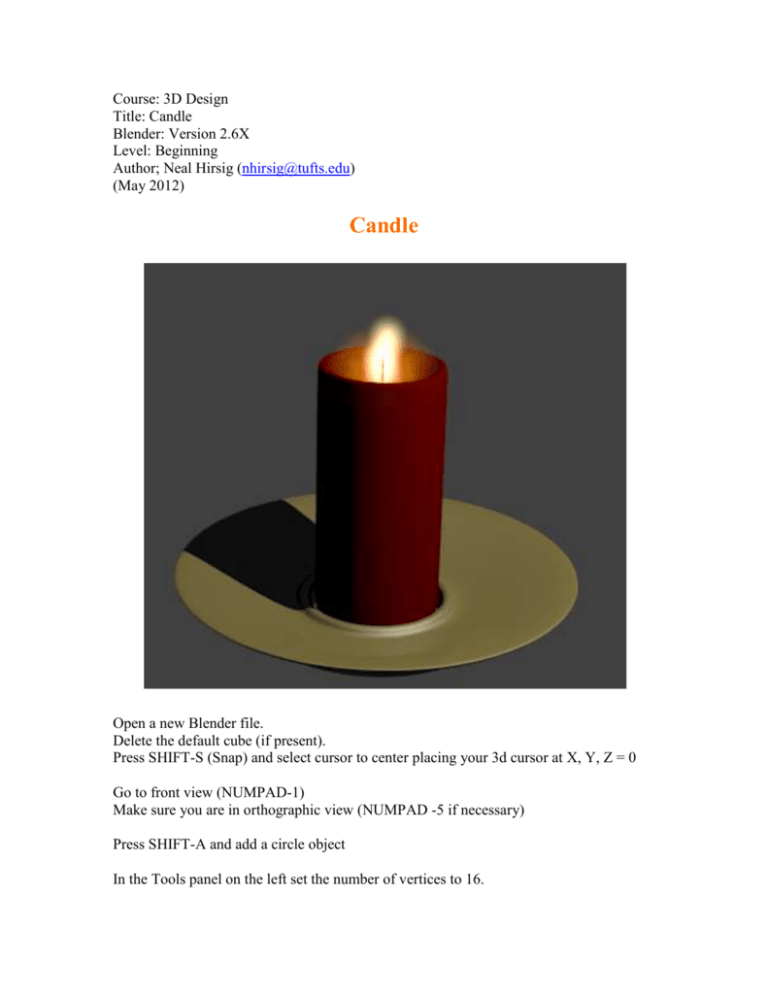
Course: 3D Design Title: Candle Blender: Version 2.6X Level: Beginning Author; Neal Hirsig (nhirsig@tufts.edu) (May 2012) Candle Open a new Blender file. Delete the default cube (if present). Press SHIFT-S (Snap) and select cursor to center placing your 3d cursor at X, Y, Z = 0 Go to front view (NUMPAD-1) Make sure you are in orthographic view (NUMPAD -5 if necessary) Press SHIFT-A and add a circle object In the Tools panel on the left set the number of vertices to 16. TAB into edit mode. With all of the vertices selected press the EKEY (Extrude) followed by the ZKEY and extrude the vertices a short distance up along the Z-Axis. Extrude the vertices up again along the Z-Axis and then press the SKEY and scale them out as shown below. Extrude the vertices up a bit again along the Z-Axis as shown below. Switch to wireframe display mode (ZKEY). Extrude the vertices up again along the ZAxis. Switch to top view and scale them down as shown below. Go to front view and move the vertices down along the Z-Axis as shown below. Go to solid shading mode (ZKEY). Rotate your view a bit so you can see the model more dimensionally. Extrude the vertices up a bit along the Z-Axis Extrude the vertices up again along the Z-Axis a bit and them scale then inward as shown below. Then move them down a bit along the Z-Axis as shown below. Extrude the vertices down along the Z-Axis as shown below. Deselect the vertices. TAB out of edit mode. Name this object “Candle Holder”. With the candleholder object selected, press on the modifier icon in the properties editor. Add a subdivision surface modifier. Set the subdivision view and render levels to 3. Save your Blender file. Press CTRL-ALT-Q and go to quad view. Adjust the position and rotation of the camera object in the top, front and side views so that the camera view is similar to as shown below. Render the scene (F12). It should look something like below. Press CTRL-ALT-Q to go back to a single 3d viewport. We will add a brass material to the candleholder object. With the object selected, press on the materials icon in the properties panel and add a new material. Name this material “Brass”. Select the diffuse color swatch and set the colors: R=.726, G=.582, B=.172 Select the specular color swatch and set the colors: R=.895, G=.895, B=.787 Select the Blinn specular shader. Set the specular intensity to 1 and the hardness to 16 and the IOR to 5.575 Checkmark “Mirror” and set the mirror reflectivity to .091 Render the scene (F-12). We will now model the candle. Select the candleholder object and press SHIFT-CTRLALT-C and set the object’s origin to the geometry. This will set the center point origin to the center of the extruded geometry. With the candleholder object selected, press SHIFT-S (Snap) and snap your 3d cursor to the selected object. This will place your 3d cursor at the object origin of the candleholder object. Go to top view and add a tube object. In the tools panel, make sure the tube has its ends capped (it should be by default). Scale the tube object down so it fits the candleholder hole. Go to front view. Switch to wireframe display mode. Move the tube object up along the Z-Axis as shown below. TAB into edit mode. Deselect all of the vertices (AKEY). Box select the top vertices and move them up along the Z-Axis as shown below. Deselect the vertices. Go to top view and select the top center vertex. Go to front view and move the vertex down along the Z-Axis as shown below. Deselect the vertex. TAB out of edit mode. Go to solid display mode. Name this object “Candle”. With the candle object selected, add a subdivision surface modifier. Set the view and render levels to 3. Go to front view and TAB into edit mode. Deselect any vertices that may be selected. In the modifier panel, press the “Apply modifier to edit cage during edit mode” button. This will collapse the modifier edit cage around the object. Go to wireframe display mode. Click on the “cut loop and slide” button located in the 3d editor viewport tools panel Move your cursor inside the candle until you see a blue horizontal line. Let-Click. This will loop cut the candle object in the center and place the loop in “slide mode”. Move the loop down toward the bottom of the candle. This will decrease the smoothing effect of the bottom-to-side of the candle object. Left-click to position the loop. Deselect the loop vertices. Add another horizontal loop cut and slide the loop up towards the top of the candle. This will decrease the smoothing effect of the top-to-side of the candle object. Left-click to position the loop. Deselect the loop vertices. TAB out of edit mode. Render the scene. Select the candle object and press SHIFT-CTRL-ALT-C and set the origin to the geometry. Save your Blender file. With the candle object selected. Press the materials icon in the properties editor. Add a new material. Name this material “Candle Red”. Set the diffuse colors: R=.402, G=0, B=0 Set the default specular shader’s hardness to 155. Render the scene (F-12). We will now model the wick. With the candle object selected, press SHIFT-S (Snap) and snap your cursor to the selected object. Go to top view. Go to wireframe display mode. Add a capped tube object. Scale the tube object down (quite a bit) as shown below. Go to front view. Move the tube object up along the Z-Axis as shown below. Go to top view. Scale the tube object down even smaller. Go to side view. Press the SKEY followed by the ZKEY and scale the tube object up along the Z-Axis as shown below. Deselect the vertices. TAB out of edit mode. Name this object “Wick”. Add a Black material to the wick object. Name the material “Wick Black”. Render the scene. Save your Blender file. We will now place a flame effect on the candle’s wick. We will be using 3 Blender tools: Halo material, Procedural texture and Particles. We will first make a halo glow that will illuminate the candle depression with a soft yellowish-orange light. Select the wick object. Press SHIFT-S and snap your cursor to the wick object. Add a sphere object. In front view, and in wireframe display mode, scale the sphere down and move it to the bottom of the candle depression as shown below. Name this object “Glow Sphere”. With the glow sphere selected, press on the materials icon in the properties editor and add a new material. Name this material “Glow” Select Halo as the type of material. Set the Alpha to .01 (we want to barely see this glow) Set the halo color to a yellowish-orange (R=1, G=.43, B=0) Set the size at .5 Set the hardness to 95 Set the Add to .431 (this will add the glow to other colors in the same space) Under options checkmark: Texture (we will add a texture), Shaded (so it can receive light from other objects) and Soft (which will further soften the edges of the glow). Now click on the texture icon in the Properties editor. Add a new texture. Accept the default texture type as “Clouds” and name it “Glow Clouds” We will use this texture to further breakup the glow. In the clouds panel, select hard noise. Set the size to .35 and the depth to 6. In the influence panel, set the color swatch to red. (R=1, G=0.B=0). The black parts of the cloud texture will appear red and mix with the underlying yellowish-orange color. Render the scene (F-12). The candle should now have a soft glow around the wick area. We will now add a flame. SHIFT-S Snap your 3d cursor to the wick object. Add a circle object. In front view, scale the circle object down as shown below. Name this object “Flame Emitter”. Like the Glow Sphere object, we will add a halo material and a procedural texture. Click on the material icon in the properties editor and add a new material to the flame emitter object. Name this material “Flame Color”. Select Halo as the material type. In the Halo panel, set the color swatch to a yellowish-cream color (R=1, G=.637, B=.336) Set the size to .17 (very small) Set the hardness to 43 and set the “add” to 1. In the options section, checkmark “texture”. Click on the texture icon in the properties editor and add a new texture. Name this texture “Flame Marble”. Select Marble as the procedural texture type. In the Marble panel, select “Sharper” and set the noise to “Hard”. Set the noise Size to .35 Set the Depth to 6 Set the Turbulence to 7.6 In the Mapping panel, set the Y Size to .3 and the Z Size to .2 (This will distort the marble texture a bit) In the influence panel, set the color swatch to a pinkish red (R=1, G=.77, B=.43). Render the scene. There is now a flame (sort of..) around the wick. We will now add a particle effect to shape the flame and give it some movement. With the Flame emitter object selected, click on the Particles icon in the Properties editor. Click on the Plus sign to add a new particle system. Name this system “Candle Flame”. We will use the particle system to create a flow of particles from the flame emitter object, each particle having the same Flame Color material and texture we set earlier. There are many sets of controls in the particle system editor. The particle system is automatically linked to the animation timeline. We will be adjusting how many particles are emitted, over time, their size, randomness and the forces that drive them. Before we set the particle controls, go to the timeline editor below the 3d editor viewport and set the length of the animation to 100 frames. In the Emission panel, set the “amount” to 300 (we do not need many particles over the length of the animation) Set the “start” to -250 (we want the particles in movement already by frame number 1 – so we start the movement at -250). Set the “end” at 100 (the end of the animation). Set the “lifetime” to 9 (each particle will die after 9 frames.) Notice that in the 3d viewport, we can see some of the particles. The timeline is at frame one. The particles are being emitted from the flame emitter object and falling straight back down due to gravity. Play the animation by clicking on the go button on the timeline editor. Note the flow of particles from the emitter and how they simply fall back down (and then die). Stop the animation and return to frame 1. In the Velocity Panel, set the Random to .105 (This will cause some random particles to be emitted at a different speed than others.) Scroll down to the Field Weights panel. Set the Gravity to -.01 (This will counteract the gravity and allow the particles to go higher in the air. Note the difference in the 3d viewport. Press the “go” button on the animation timeline and play the animation. Note how the particles now are emitted higher (and a bit random) and die before they fall back below the wick. Press the stop button and go back to frame 1. Go to the Render panel in the particles editor. Uncheck the render “emitter” checkbox. (We want only the particles to be rendered and not the original emitter) Render the scene (frame 1). We now have a more realistic flame. Save your Blender file. We will now render the animation. Click on the Render icon in the Properties editor. Set the Resolution to 640 x 480 pixels at 100% In the 3d editor, go to camera view (NUMPAD-0). Check to see if the camera and object are aligned to your liking. If not, press CTRL-ALT-Q (quad view) and re-position the camera In the output panel, set the output file type to “QuickTime”. Click on the file icon to the right of the output path. This will open up Blender’s file editor. Select the destination folder for the QuickTime video (I selected my desktop) and then name the file “Candle”. Click on the “Accept” button. In the Render panel, click on “animation”. The animation (QuickTime video 640 x 480 pixels) will now render. This may take some time to complete. When finished, the file will be named Candle0001_0100.mov Open your QuickTime player and play the video file. Save your Blender file. A completed copy of this Blender file named “CandleComplete.blend” can be found HERE.
